Make 1 Charming Wreath for the Front Door
After wasting a whole day cutting bits and pieces of wood, I gave up and tossed everything in the trash.
I’m so glad I did.
Now I have a permanent wreath for the front door.

The next morning, I understood the problem. I complicated the whole project.
Simple is always better. Don’t you Agree?
This post may contain affiliate links to products used to create the project. I may earn a small amount for referring you to the product if you make a purchase. You can read my complete disclosure here if you wish.
It is okay to start over
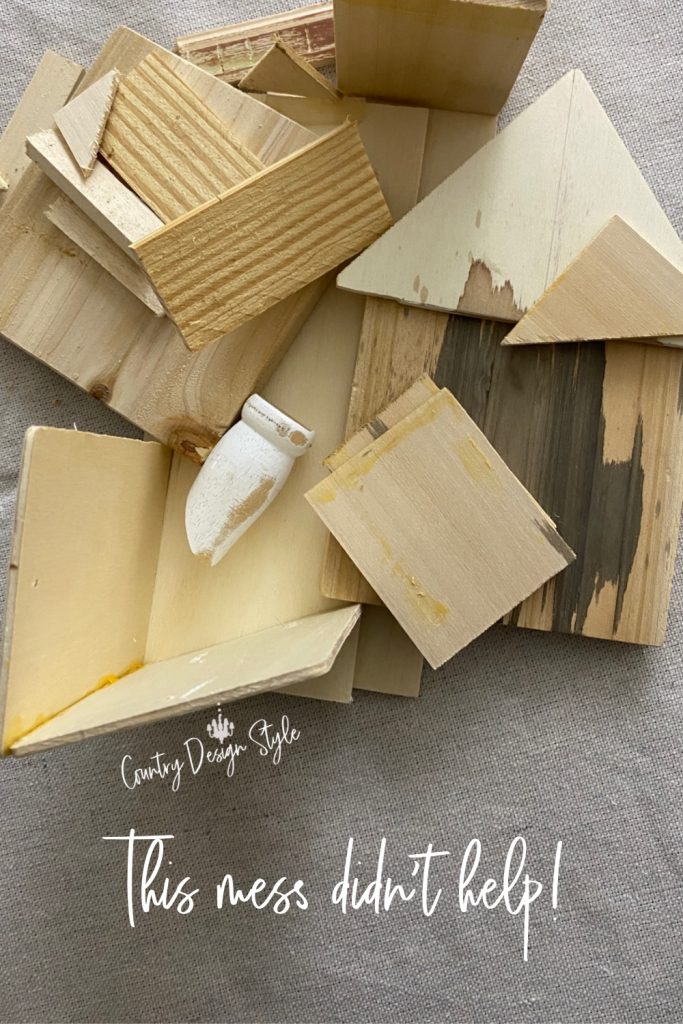
I pushed this pile of wood pieces off the workbench and into the trash. It felt good.
The houses were too complicated. Tiny square boxes with wonky roof lines. I even tried cutting out tiny doors and windows. Ugh!
Now it’s time to start over.

Then I grabbed some barn wood and started cutting out a few BASIC house shapes.
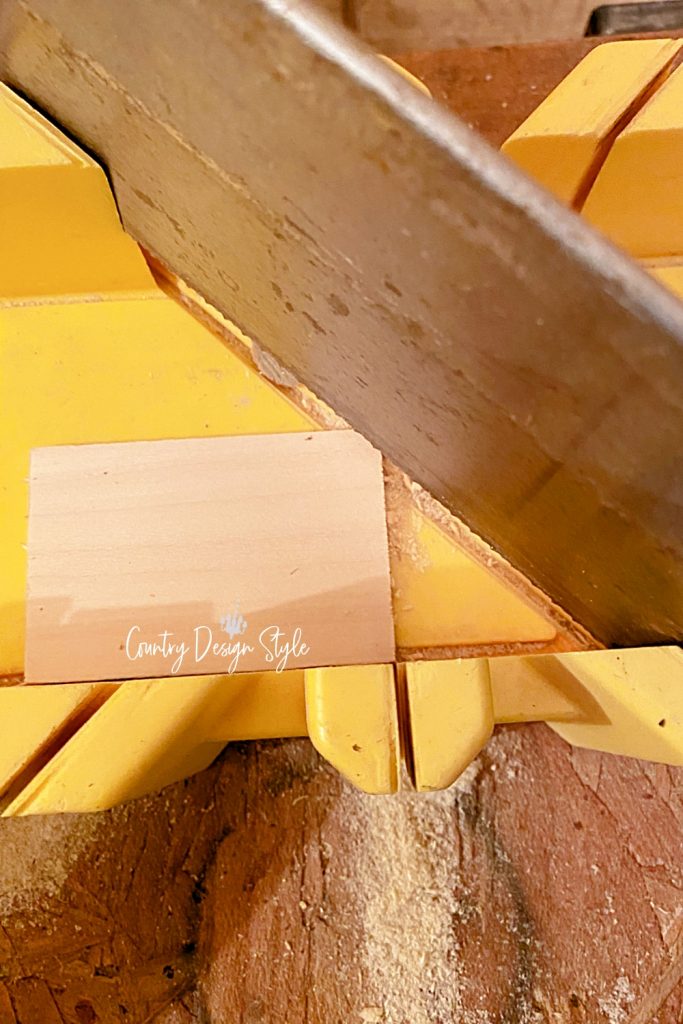
When cutting small pieces of wood use a miter box and hand saw. It’s much safer and great for arm exercises.
I even used 2-by-2 pieces of scrap wood to make smaller house shapes.
Light painting of the wreath
To give the green wreath a depth of color I added my favorite white chalk-based paint using a chip brush. It’s sorta like highlights in the wreath.

The only thing I added to the houses was a basic chimney. This one did get a
The inspiration wreath
Anthropologie created a Christmas village wreath complete with faux snow. It was pretty, and glittery with pastel houses and sold for over $300. And it sold out! I found a used one here.
My wreath
The wreath came from Hobby Lobby. I found this wreath that’s very similar on Amazon since Hobby Lobby sells its items so fast!

Making your own base wreath for the front door
1. Gather the materials needed: a wreath frame, floral wire, scissors, and a mix of greenery.
2. Cut the greenery and flowers into uniform lengths, making sure to leave a few inches of extra stem.
3. Begin wrapping your wreath frame with floral wire, securing it at the end by twisting it.
4. Begin adding the greenery to the frame by looping it over the wire. Then wrap it around the frame, making sure to keep it distributed even.
5. Begin adding in your houses and trees. Secure them with floral wire.
6. Hang the finished wreath on a door or wall with a command hook.
Adding houses & trees to the wreath
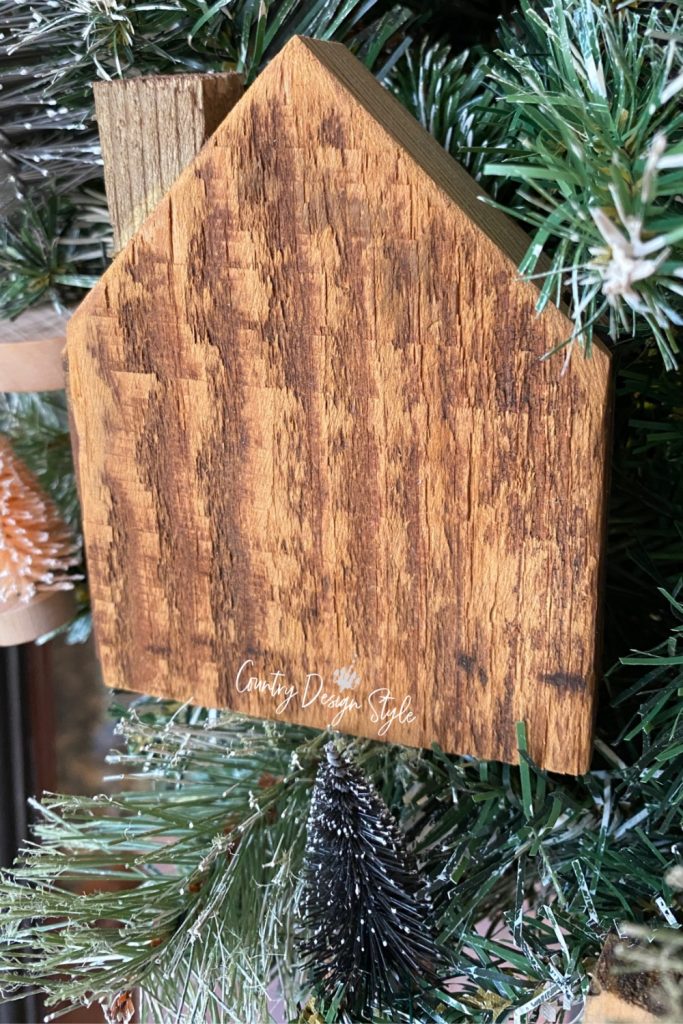
Each house has a screw or two in the back with floral wire wrapped around the head. Then I was able to use it to wire the houses in place.
Now it was time to hunt for bottle brush trees around the house under 10 inches tall.
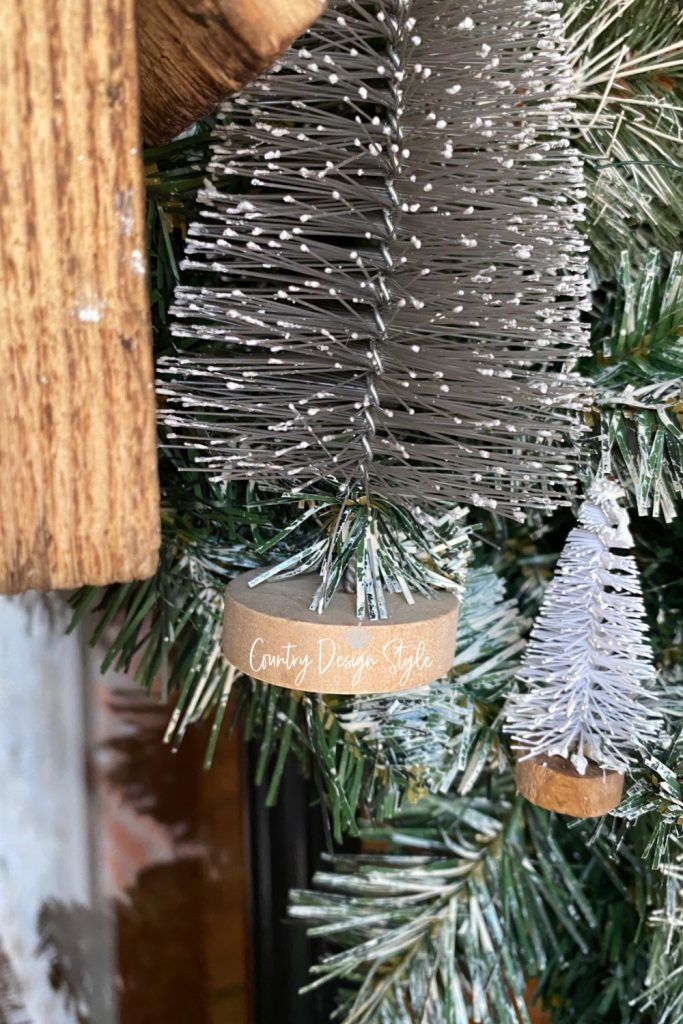
I started placing the largest trees first. It was easy to use a wire branch from the wreath to wrap around the base of the trees.
By the way, I love the trees gathered in the center of the wreath. The wreath hangs on our mudroom door and I can see the tree from the inside through the window.

The middle sizes of trees came next. I wired them into place the same way. But for the small teensy trees, I wrapped floral wire to the base.
Another DIY wreath for the front door I’ve created

This peanut wreath is the most unusual item I used to make a wreath. But the birds loved it! See how easy it is to make a peanut wreath here.

Does your craft area have a wreath? This one is perfect for the craft room or the front porch.
This wood house and bottle brush tree is, way by far, my favorite wreath I’ve ever made. As spring approaches, the wreath will hang somewhere inside the house. I don’t want it wasting away with sun or buggies on it!