
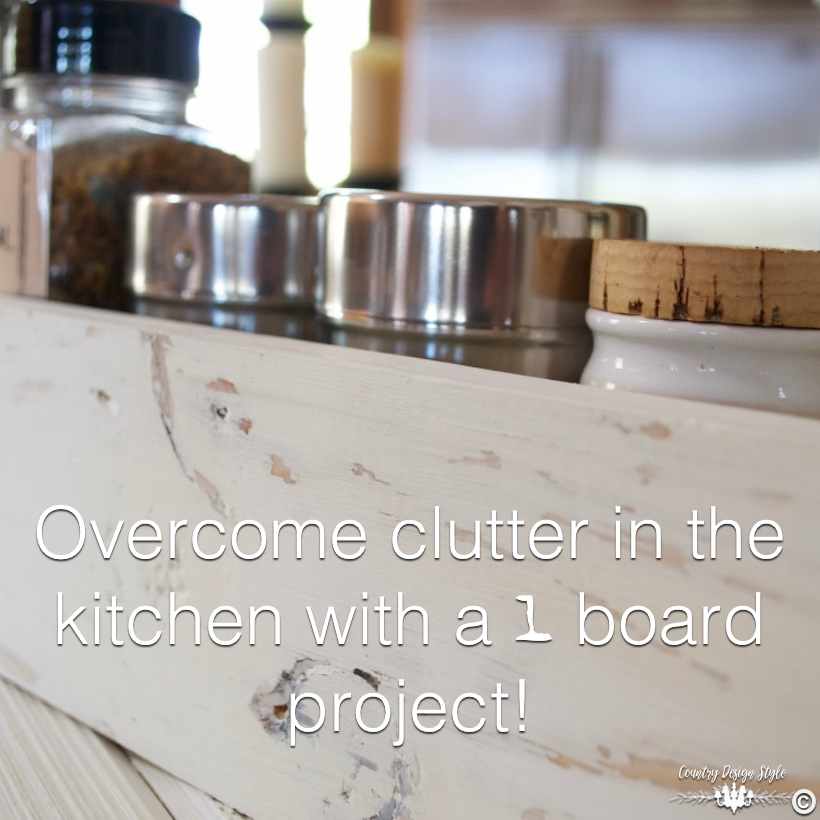
Overcome clutter in the kitchen with a one board project

Inside: This project is a one board project without leftover wood. The project is perfect for organizing and decluttering. Included is my tip for distressing any DIY project using homemade wax and chalk-based paint.
I’m not a great cook. I’m an average cook wondering into the kitchen about 30 minutes before the tummy rumbles with no idea what to make. This routine happens every night. This project will not help me decide what to make.
But I’m convinced it will make dinner appear on the table faster. How one board from home depot is helping me declutter. One board, one project, no leftovers other than a pile of sawdust.
One Board Project
This post contains affiliate links. I will make a commission for your purchase at no extra cost to you. This helps me maintain the website. Thank you for your support. Think of it as a friend letting you know where I found a product I use, love or want. Click here to read my full disclosure policy.
I plan on making this one a series, one broad projects. Grab one board at your local lumber and make a farmhouse style project. Perfect for anyone like me that can’t cope with tossing that 3-inch piece of wood. You know, wood hoarders!
This project used a 1 by 4 that’s 6-feet long. Bonus, the project will help in the kitchen. And I need all the help in the kitchen I can get.
Great cooks use many spices. I’m not a great cook. I decided to add a kitchen storage piece for my spices next to the stove. It may not help my cooking…but it will look fabulous!
Supplies & Tools Kitchen Declutter, One board project
One board – 1 by 4 by 6-feet
My favorite wood glue {using this glue I did not use nails}
Miter saw {power or hand} or have the lumberyard cut the board for you!
Tape measure
Centering Ruler {not necessary, but this thing is awesome sauce}
Pencil {to mark cut areas on the board}
Clamps
Sandpaper
Supplies & Tools for Painting, One board project
Of course, you can paint yours any way you choose.
Paint brush {1 1/2-inch and round artist brush}
Handmade wax
Wet paper towel or cloth
Chalk-based paint
Steps, One board project
Cut list
2 pieces 20-inches {sides}
1 pieces 18 1/2-inches {bottom}
2 pieces 6 1/4-inches or use a centering ruler and cut the leftover piece in half {ends}
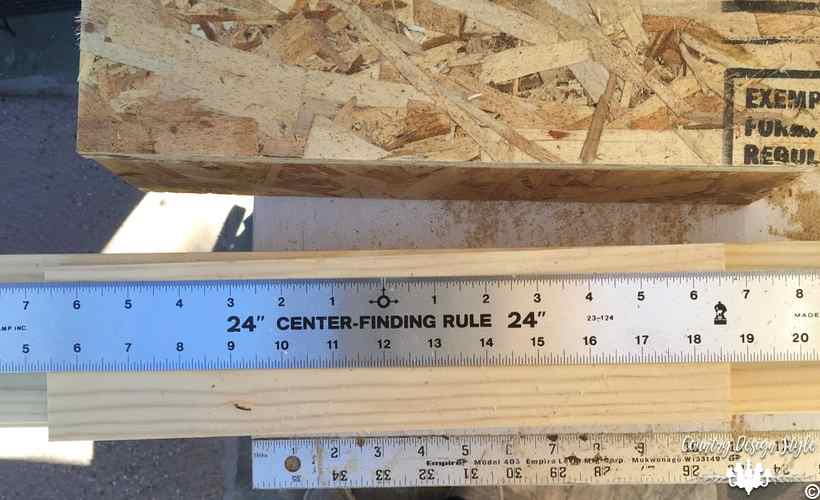
Above is the awesome sauce centering ruler. Great for woodworking and hanging frames!

After cutting the boards, lightly sand. Then wipe the wood with a damp cloth to remove any sawdust.

I added a 45° notch on one end of the side pieces for detail. Not necessary, but a fun detail.

Add a bead of glue to the 20-inch boards as shown. Add a bead of glue to the bottom edge of the end pieces too.

Firmly clamp the ends to the bottom. Then clamp the sides. Wipe any glue that escapes. Now for the hard part, let your one board project sit! Let it sit for an hour to dry well.

Aging your one board project
This step will be different for some of my DIYer’s. Aging the project is often done after painting. Today we are aging first, then painting, then uncovering our age. Well, not our age, but the aged finish on the wood! 🙂 I’ve aged many projects this way and love the outcome.
The artist paint brush in the photo is the one I’ve used for years, about 15 years. The handle has gloppy waxes in different colors and I love it.

The brush is used to add wax to the bare wood along edges…

in the knots…

and to outline the wood grain.

Painting your one board project
The wax sits and dries long enough for me to pick my paint color. Paint the wood just like the wax wasn’t there. Warning: the wax can get on your brush and then into your paint. If protecting your paint color is a concern, add paint to a small container, enough to finish your project. You can paint one or two coats. Let the first coat dry well before starting the second.

Distressing your one board project
After the paint dries, grab a damp towel and rub the edges, knots and wood grain areas where the wax was applied. This reveals the dark wax areas. I love the love of the wood grain distressing.

Kitchen Storage
I filled my project with my often-used spices. My farmhouse labels help identify what’s inside on some of the jars.

Now to see if my cooking skills improve!
No Leftovers!!! What can you make with a pile of sawdust?
Additional DIY Help!


If the sawdust is not ‘treated,’ you can add to your compost pile or just mix in the garden to aerate the soil. I’m liking that tray!
Thank you for the tip! We have a compost pile. It’s been a great way to keep the most used spices on hand but pretty.
Love… bookmark done 😊