Toilet paper pumpkins
Running out of toilet paper is the worse thing ever! This project will eliminate this problem, but you’ll have to destroy a pumpkin.
This time of year, anything round starts looking like a pumpkin. Does that happen to you too?
These easy pumpkins look cute sitting on the back of the toilet.
This post contains affiliate links. As an Amazon Associate I earn from qualifying purchases. Click here to read my full disclosure policy.
Don’t have a Prime membership? What are you waiting for?
Click to Start your Amazon Prime 30-Day Free Trial now!
You could make thinner pumpkins if you have used some of the paper. We have four bathrooms, and I ran around to each one and wouldn’t you know. Every bathroom had a full roll! That never happens. So it’s fat pumpkins for us.

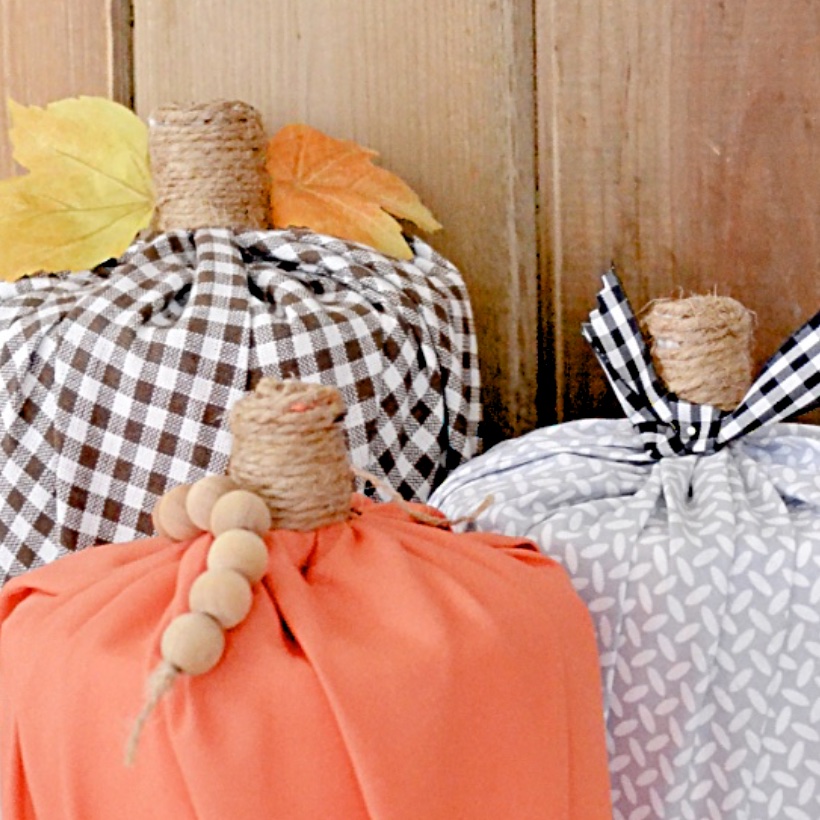
I used fat quarters to make two of the pumpkins. For the buffalo check pumpkin, I sacrificed a dish towel. Fat quarters are a quarter of a yard of fabric. It’s a quilting term. They are great for small fabric DIY home projects too. Like these toilet paper pumpkins!
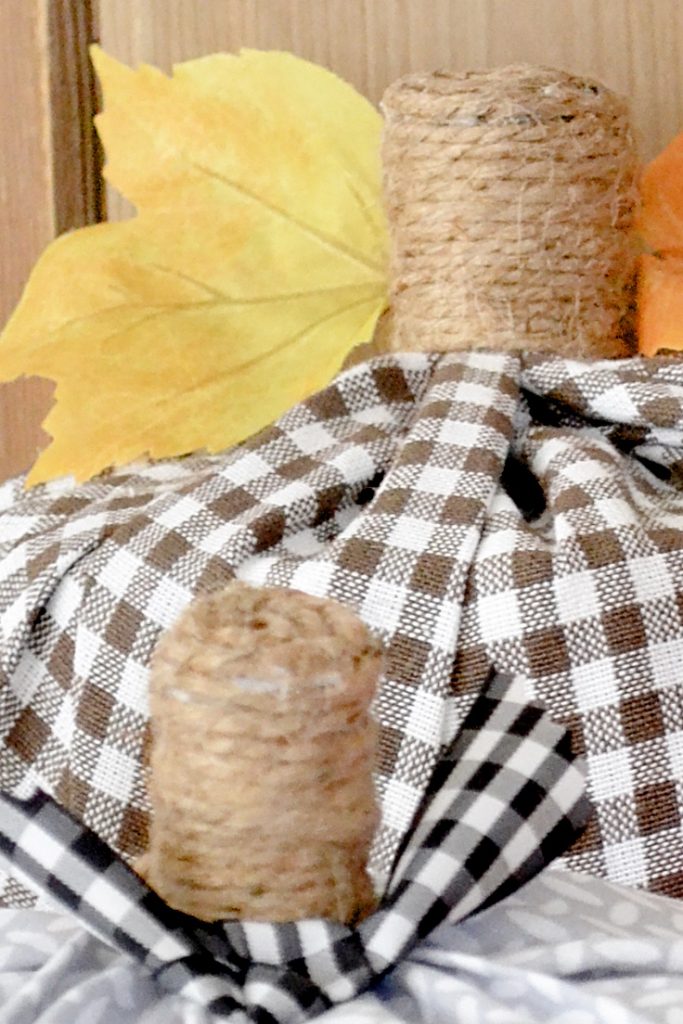
A piece of twine makes the stem. Each pumpkin uses 24 – 30 inches.
Quick setting craft glue holds these fat flat-topped stems together.
A fake leaf, small piece of ribbon or wood beads add a bit of style to the pumpkins. It’s like adding lipstick on a pumpkin. 🎃
My mission in life is not merely to survive, but to thrive; and to do so with some passion, some compassion, some humor, and some style.
~ Maya Angelou
The steps
Lay the fabric on your work surface and place a roll of toilet paper in the middle. Pull the fabric up over the roll, gathering the material tight on top. Using your third hand, wrap the end of the twine around the top of the pumpkin. Tie in a knot.
Then keep wrapping the twine in a single layer like on a spool. Continue wrapping for at least an inch. Hold the string in place and cut the fabric about 1/4 inch from the twine. Cut straight across, leaving a flat top.
Hold the twine and add a swirl of craft glue. Wrap the string into a coil on the top of the flat gathers of fabric.
Cut the end of the twine.
Add a leaf or piece of ribbon with a dollop of glue. Or drape wood beads.
Printable tags would be fun to add to the pumpkins too. You can add a stack of mini pumpkins next to the sink.
Make sure you have extra TP when company comes. They might feel awkward destroying your pumpkin.