Fall leaves and pumpkins
What goes with your pumpkin spice latte as the air turns cooler? Fall leaves and pumpkins! Here’s a collection of unique and easy DIY fall leaves and pumpkins.

Friends, this post may contain affiliate links to products used to create the project. As an Amazon Influencer, I earn from qualifying purchases. You can read my complete disclosure here if you wish.
DIY Fall Leaves and Pumpkins
Today I’m sharing a collection of fall leaves and pumpkin DIY projects. Some can be created in 5 minutes and others took a couple of hours. But they are all unique and fun. At least I think so.
Pumpkins
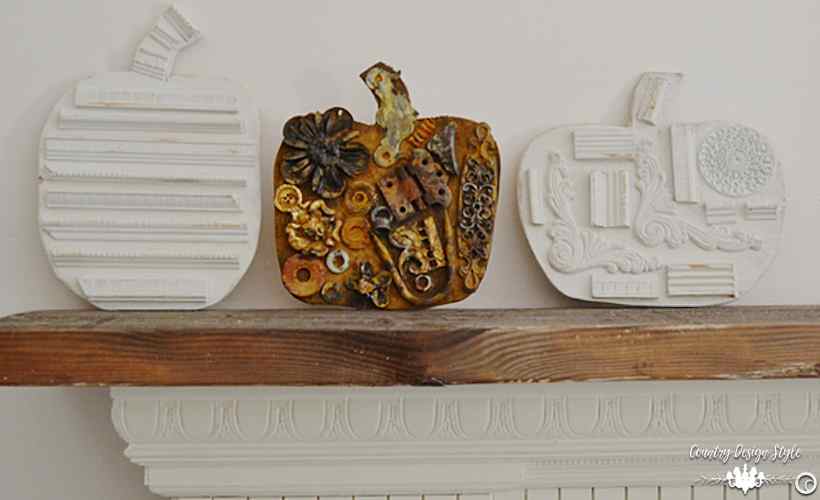
I’m always aware that fall really will arrive when I get my hands on a thrift store frame. One that’s filled with junk…but arranged junk!
Above I simply cut out pumpkin shapes with a jigsaw. Then glued scraps and junk on the surface. My scraps and junk pieces are wood and metal, but you could use whatever your junk happens to be. The Scrap Junk Pumpkins actually made it into a local magazine…in Boston.
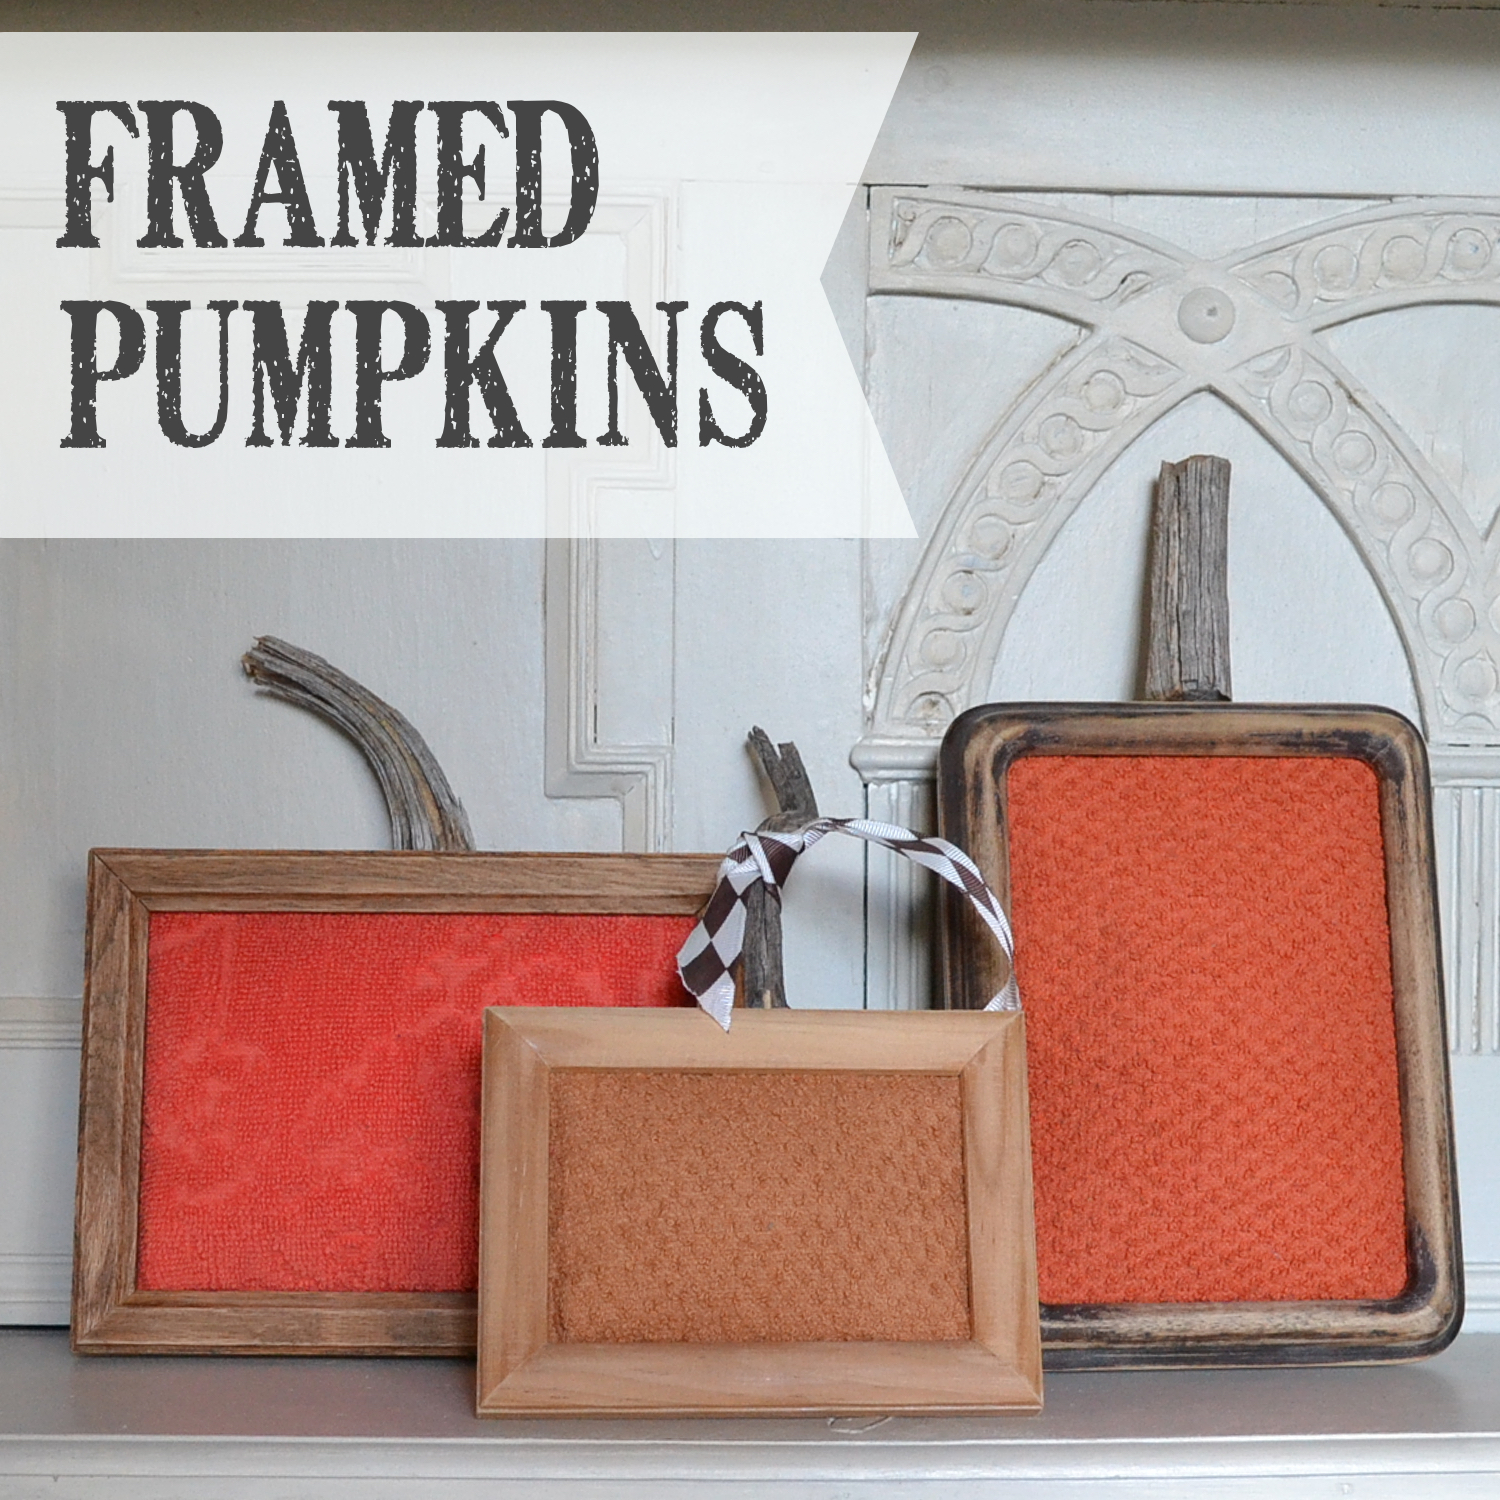
Out of the six projects here, two use thrift store frames. These pumpkins made from thrift store frames have pieces of towels in the frames with a bit of padding to make them fatter. A stick hot glued on top makes the stem.

I created this sweater pumpkin on a live Facebook video. I enjoy doing live DIY projects on Facebook, Instagram and my favorite, Pinterest. You can see the video by clicking this link. Sweater pumpkin made in 5 minutes. It does take you to Facebook.

It took a couple of book pages to figure out the best way to make this pumpkin. Each section has 4 book pages. the pages were folded and then glue onto a toilet paper roll! You can watch the video on Pinterest by clicking this link. Folded book page pumpkin.

This mix media pumpin was made on a time-lapse video for Pinterest. Don’t you just love those videos? They are perfect for tips and tricks that are easy to follow. Check out the mix media pumpkin here.
The transfer is from Chalk Couture club. You can read more about the craft club here.
Pumpkin Art Printable

This pumpkin art frame and vintage handwriting are printable from my shop.
The basic steps to make glassine paper
Supplies
- Paper Napkin
- White candle
- Small thin cheese grader
- Iron and ironing surface
- Wax paper
- Cloth to cover both sides of the napkin
- Scissors
Steps to make glassine paper
- Warm the iron to a medium setting.
- Remove the back of the napkin so you have one single layer with the artwork.
- Trim to a square.
- Grate about 2 tablespoons of the white candle.
- Lay the cloth down on the ironing surface.
- Lay the wax paper on top.
- Next lay the napkin down so the wax paper and cloth can fold over the top surface of the napkin.
- Sprinkle the candle pieces over the napkin.
- Then fold the wax paper and cloth over the candle. You’re basically making a napkin sandwich.
- Iron over the cloth melting the wax into the napkin. You can peek to see if the napkin is completely covered.
You can watch the time-lapse video on Pinterest.

How many projects have you started and about halfway through, thought, “This is ugly?” I’ve had many including this pumpkin. But, it was fast to cover, so I kept going. Now I’m glad I did.
The pumpkin is a Dollar Store stryoform pumpkin. The yarn is chunky yarn from Walmart. I warmed the hot glue gun on the low setting. Then squeezed out tiny dots of hot glue (I didn’t want to melt the stryoform) onto the pumpkin. Then pressed the yarn into the glue using a rubber statula. My tip! About halfway I thought this pumpkin is ugly. I randomly placed the yarn to cover the round pumpkin. I was thinking it might be better to just go up and down like the ribs of a pumpkin.
But I continued, and I’m glad I did. The stem is cinnamon sticks. I love the textures and colors.
Click here to see more hot glue gun tips!
Fall leaves

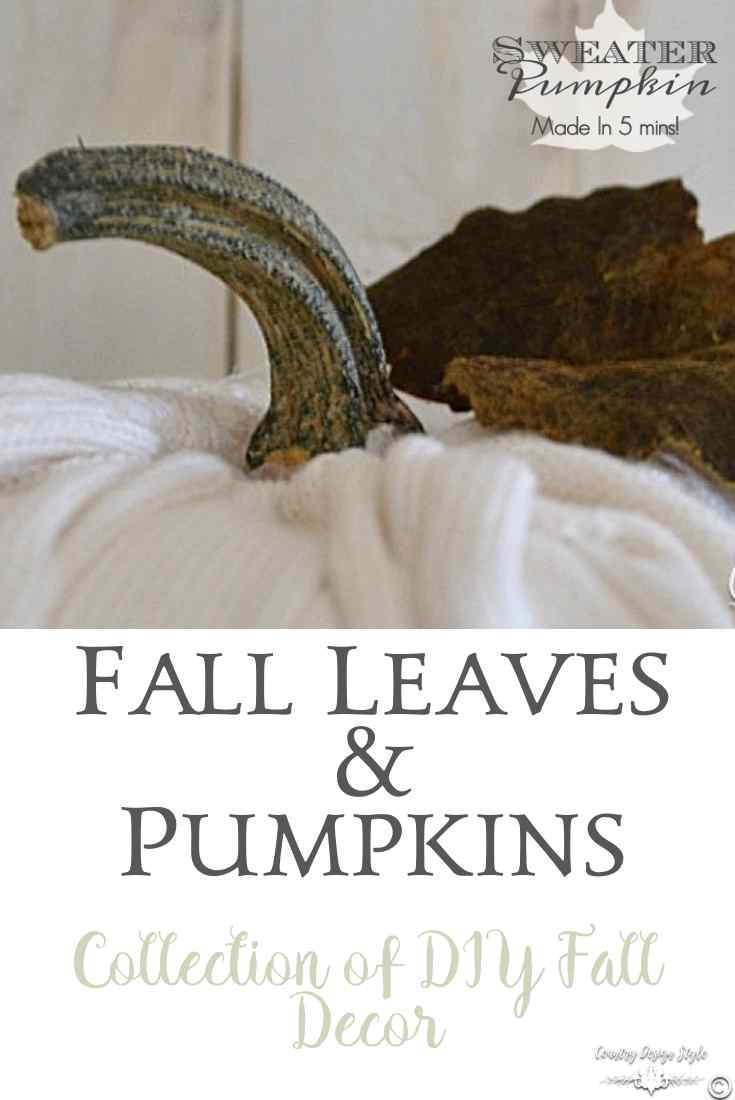
On top of the sweater pumpkin above is one of my favorite rusty leaves. I’ve made a bowl full.
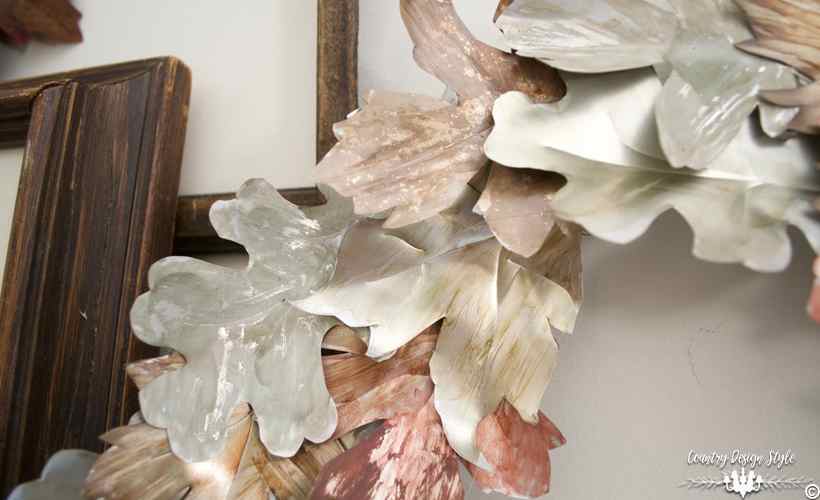
Rock and roll metal leaves were a huge hit last year. This year they will be showing up around the mantels and tablescapes.
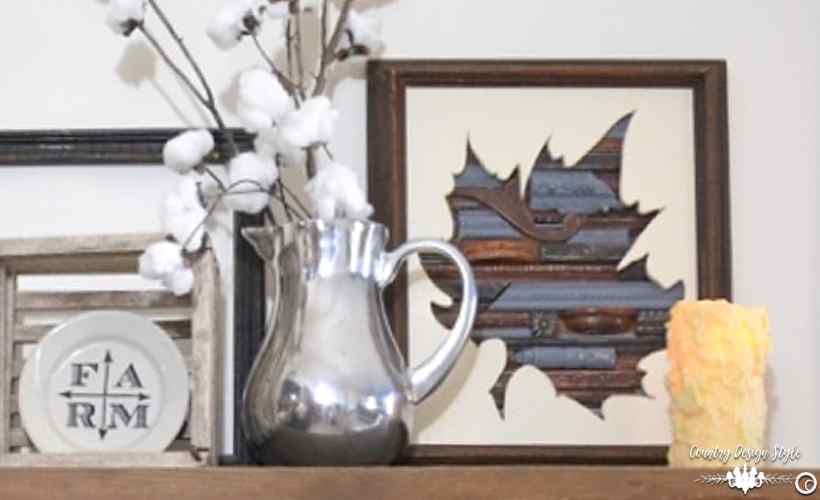
Instead of glass over the junk, I created a large leaf cut-out. Then the junk peeks through filling the leaf shape.
The sign of autumn, even if it’s 90… the autumn leaf I made from scraps.
This again could be recreated with whatever your scraps happen to be. It would be fun to create with scrapbook papers.
What item peeking from your fall bins lets you know autumn is around the corner?