
How these DIY wood vases kept me out of trouble
Back in my younger years, I spent a weekend making 23 wood vases. It was a l~o~n~g weekend. I had a vision for the vases, but my vision was not an easy make. Several prototypes hit the trash. But did keep the final prototype. The wood vases sold like hotcakes. But I never had a desire to make more. Todays DIY wood vases are easy to make.
Why didn’t I think of this a long time ago?
DIY Wood Vases
This post contains affiliate links. I will make a commission for your purchase at no extra cost to you. This helps me maintain the website. Thank you for your support. Think of it as a friend letting you know where I found a product I use, love or want. Click here to read my full disclosure policy.

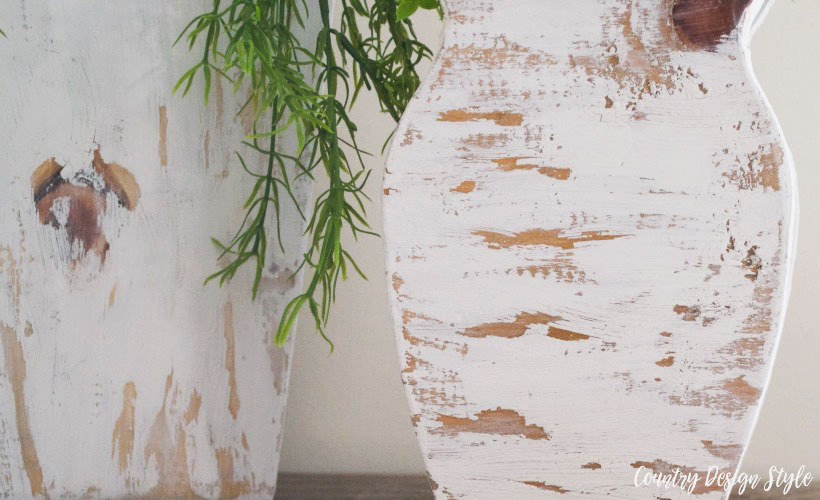
Above are two easy to make wood vases.

This is my one prototype would vase that is hard to make. This one is stained. The other vases I sold were painted in vintage colors.
The supplies to make both vases
- Two pieces of 8 inch by 11-inches pine wood
- Two pieces of 8-inch by 5 1/2 inches pine wood
- 2 pieces of 1 by 2 pine wood cut to 6 inches, 2 pieces of 1 by 2 pine wood cut to 9 inches, 2 pieces of 1 by 2 pine wood cut to 1 1/2 inches
- Quality wood glue
- Paint in your choice of color
- Paintbrush
- Vaseline
- Jig Saw
- Sandpaper 180 grit
- Test tubes or cigar tubes
- 2 Clamps
- Ironed Vinegar
- One black tea bag
- Template {Download yours here}
The Steps
First I cut out the template and drew the outline on one piece of wood. I’m comfortable cutting through two pieces of pine at the same time. If you’re not comfortable cut out individual pieces. I do clamp the two pieces together and clamp to my worktable.

Cut the shapes using the jigsaw. You can read my jigsaw tips here.
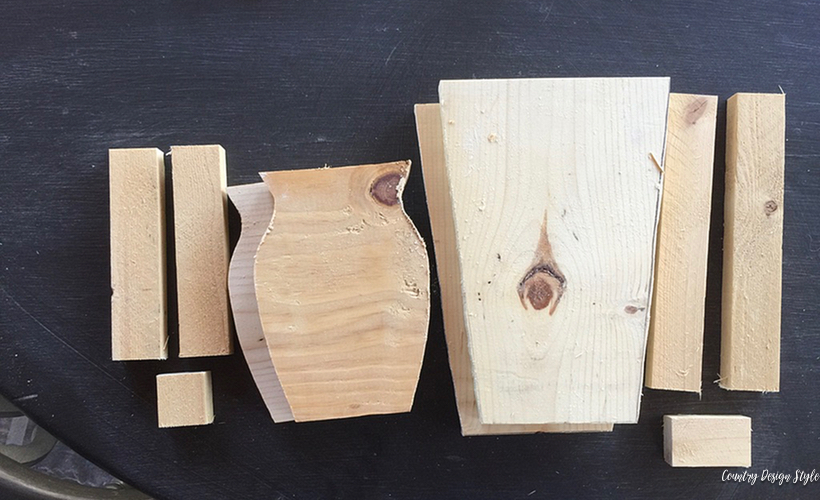
Above are the pieces for the two wood vases.

To assemble glue the side 1 1/2 pieces into a “U” shape. Then glue the two sides to the taller vase or shorter vase. Clamp the pieces to dry. This wood glue holds the best I’ve ever seen. I did not use nails!

The vases standing at attention on the kitchen counter waiting to be painted.

First, I used the black tea and ironed vinegar technique on the wood to give the vases a bit of age. Notice the one piece of wood is much darker. That piece happened to have more tannins in the wood.
Painting

My vision for these vases was shabby paint. I used my finger to apply vaseline along the grain in the wood. I also applied some to the knots and rough areas. This acts as a resist. Basically keeping the paint from adhering to the wood.

My camera and lighting gave me fits, but above I wanted to show how the paint resists the area with vaseline. Notice on the right side of the vase the paint didn’t apply?

When the paint dried, I use a piece of sandpaper to add more distress and reveal the aged wood underneath. Since the sides of the vases are 1 1/2 inch wood, I could fit test tubes inside to hold water and real flowers or…

I just added faux greens. You will be seeing these vases around our home in more photos.
I’m looking for easy ways to create beauty in our home.


Loved these!! What a cool spin on a vase!!
Thank you, Debbie. I’ve been wanted to make some for awhile. I plan to make more to give as hostess gifts.