
The Knock Off PB Chandelier
What can you do with 600 wooden balls, a tuna can, a vanity mirror and chandelier parts?
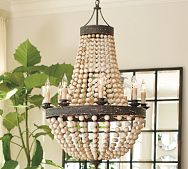 Make the knock off PB chandelier! Pottery Barn Wooden Ball Chandelier!
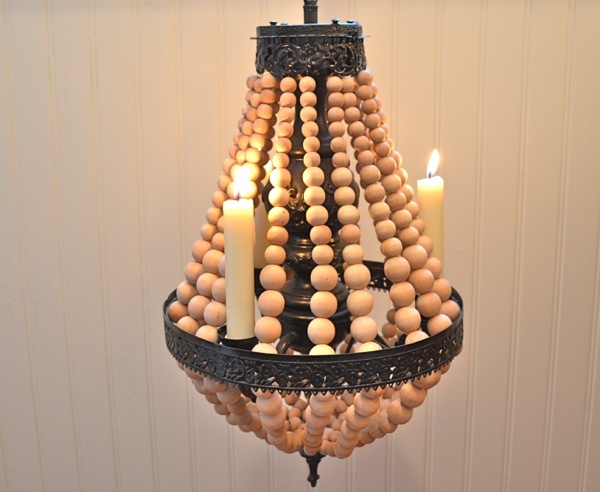 Here’s the one I made

Right now your checking…did I read tuna can? Yes tuna can! Anyway read on to see how to make one and just where the tuna can fits in.
I started with a small chandelier with electrical parts removed. I found mine at a thrift shop years ago {it’s been hanging outside.}
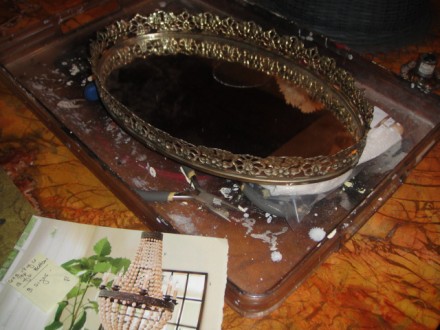
Next I took off the metal from the vanity mirror, these can be found in thrift shops and antique stores for a few dollars.
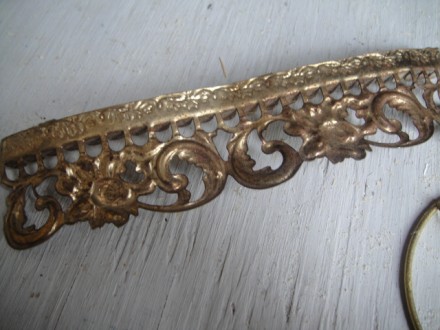 I cut a piece large enough to go around a tuna can.
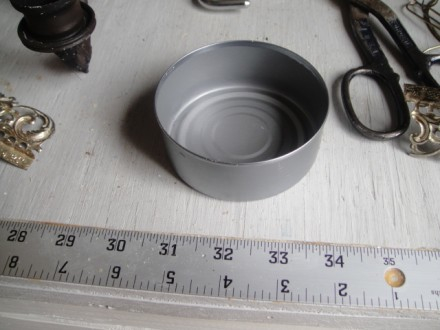
By the way, you can see the tuna can is empty and very clean. Below it will be spray painted along with all the over parts.
I attached the metal to the tuna can with small screws. Then drilled a hole into the center of the tuna can and added it to the top of the chandelier. Chandeliers have a long rod through the middle and the various parts are stacked and held together by screwing down the top and bottom finial.
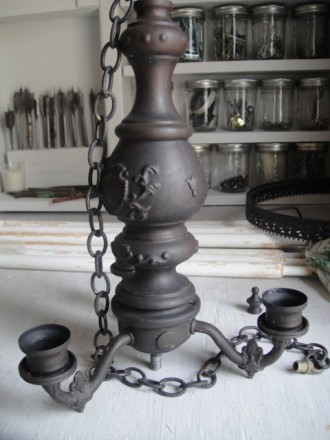
Next I have a metal part from an old lamp that I added.
I added it to the chandelier bottom. If I didn’t have that metal part I could have added the metal from the vanity mirror and held it place with wire around the “candle cups.”
All the bits and pieces are stacked on the rod and I tighten everything with the top and bottom finials, or those endscrewonthingamujigs!
Next I spray painted everything with two coats of rubbed bronze. Notice I used an extra long rod through the middle of the chandelier.
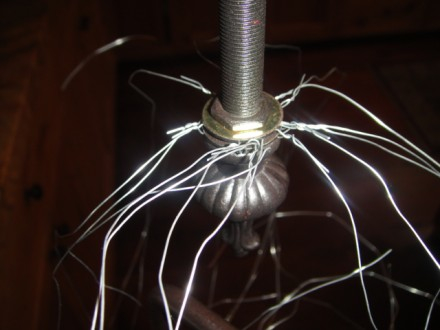
Now I removed a large washer from the bottom of the chandelier and wrapped 18 pieces of 26 gauge wire cut to approximately 22″ long to the middle…making a large spider! I measured from the bottom finial up to the tuna can and added 3″.
I added this large spider back onto the chandelier and held it in place with bolts and the bottom finial.
Be careful the wire “bites!”
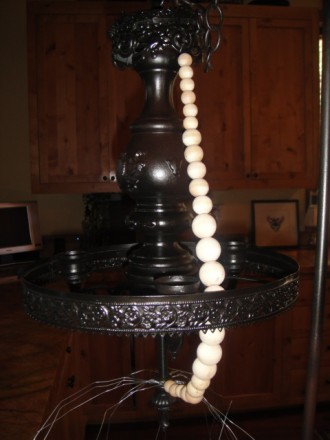
Now the fun begins…I start adding almost 600, yes 600 wooden balls which I ordered from Woodworks. Couldn’t believe it took THAT many! I used 1/2″, then 5/8″, then 3/4″ until I reached the large metal band. I ran the wire through the band and continued adding balls going from larger to smaller until I reached the tuna can. There I looped the wire through the metal on the can and cut off any excess.
I did this 17 more times.
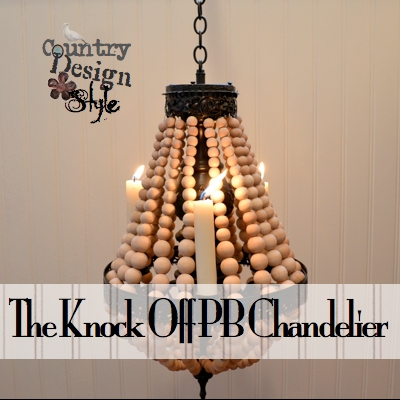
Then I hung it on an old birdcage holder and added candles.

For safety went we’re not paying attention to the knock off PB chandelier, I add battery candles.
Since I had everything but the wooden balls the total cost for this project was $40, the cost of the wooden beads. Mine uses candles {real or battery} and is a quarter of the size of Pottery Barn’s, but it fits into my budget just fine.


wow…that is sooo nice!! may well have to try this for the spare room….thank you so much for posting!!
xxjune
Thanks June, if you do one the your spare room post it on Hometalk.