
Empty Throne???

Are you watching Game of Thrones?
We are.
I don’t usually understand what’s going on.
Are there lots of Thrones, not enough thrones, empty thrones?
But I’m excited about the next season.
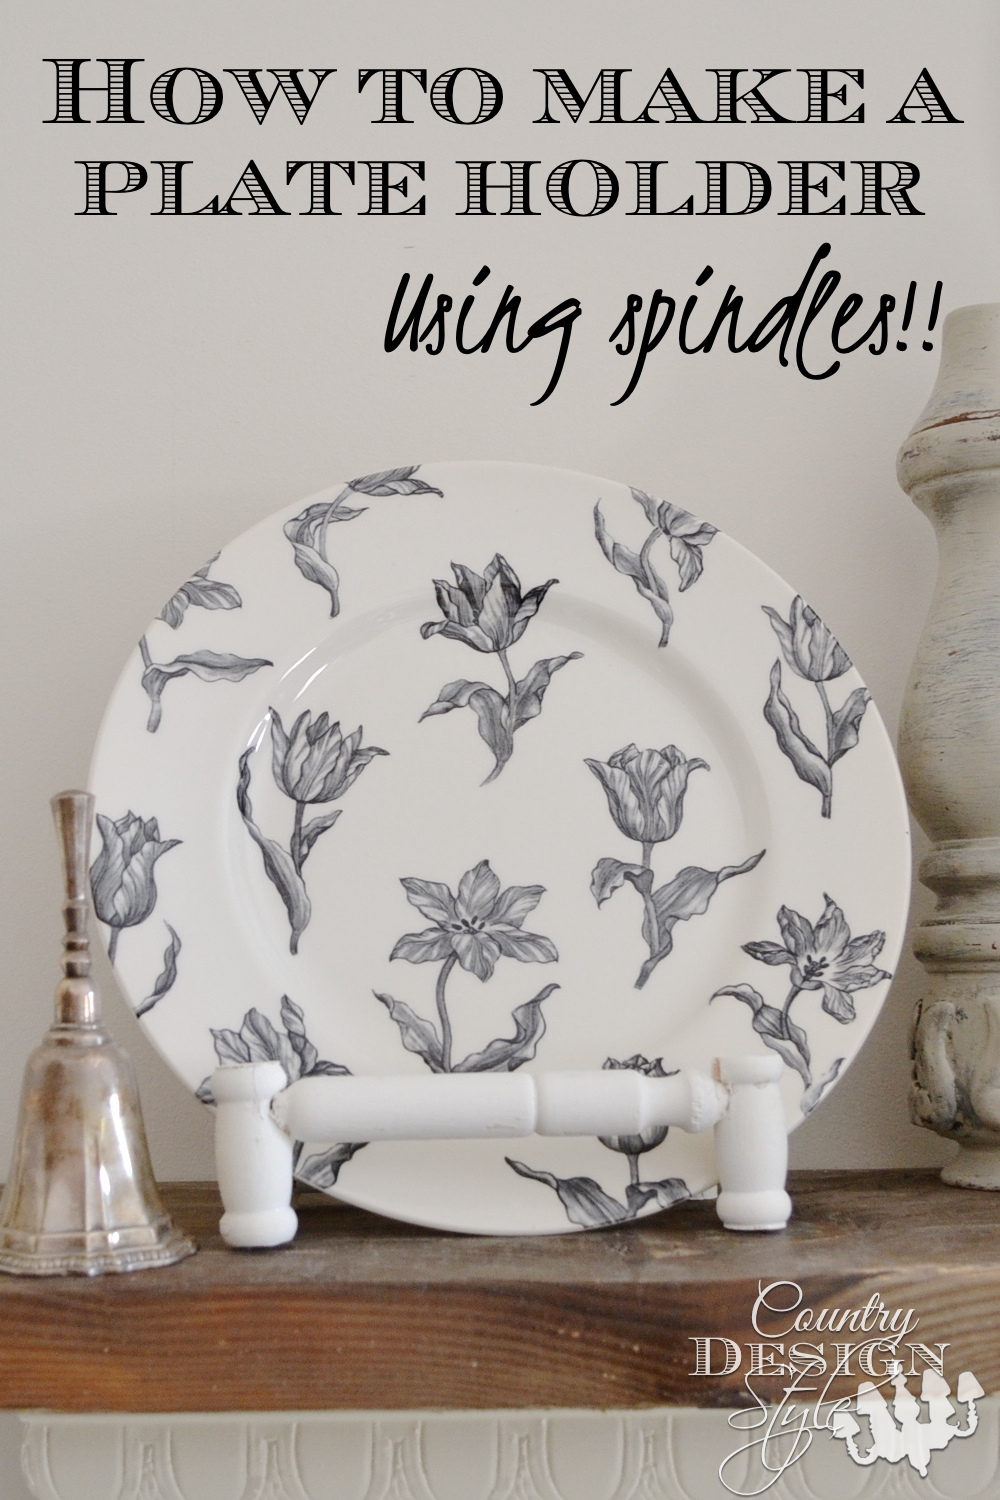
This is not really a tribute to Game of Thrones, but I made something that looks like an empty throne. Or a little deconstructed chair.

Last week I shared a metal chalkboard tray and the steps to mask off those curvy edges for chalkboard paint. You can read the post here. Readers about the plate holder in the photo. I made it many years ago from dowels. I hosted a thrift event at our local Humane Society resale store and raffled the plate holder along with the metal chalkboard tray and a chalkboard vase.
So I decided to share how to make the plate holder and recreate it.
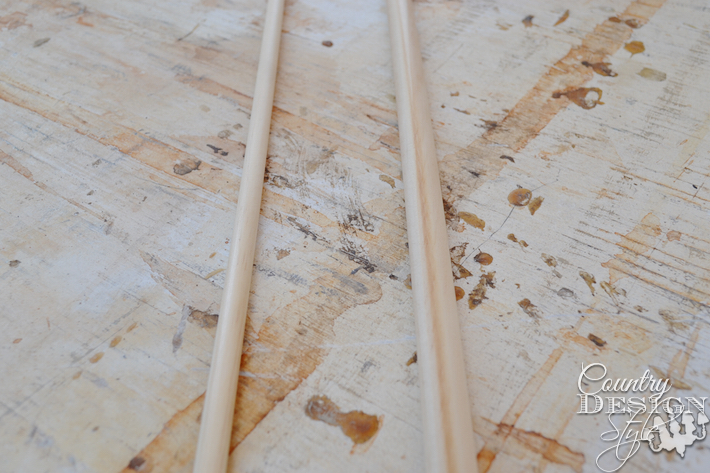
I bought two dowels. One 5/16″ by 36″ and one 1/2″ by 36.” Now realize I made the first one a long time ago, and I don’t have it anymore, so I was guessing at the dowel sizes! When I make another {and I will} I’ll use a 3/4″ dowel for the larger one.
Dowel Sizes

Then I cut them to the sizes above. Still guessing at the sizes to cut!
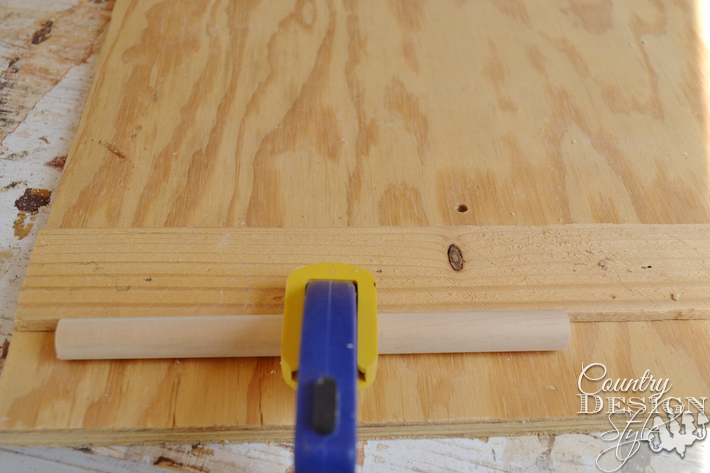
I used a “big board” I made to hold pieces for drilling, cutting and using a router. All this portion is a board with a thin piece of wood nailed in place. This will keep the dowel from rolling around…and down to the ground…while I’m drilling.
If this was going to be a “fine piece of woodworking” I would have set up a fancier jig and used a drill press. But to me, this project just doesn’t require all that! 🙂
Drilling
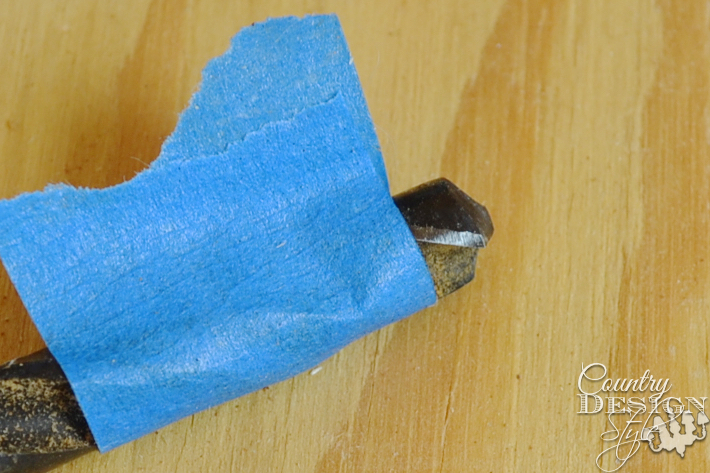
A drill bit ever so slightly larger than the 5/16″ dowel was used to drill the holes. The extra space give a place for wood glue to go and hold the dowels.
To help make sure I don’t drill completely through the dowel, I added painter tape to the end of the bit at about 1/4 inch.
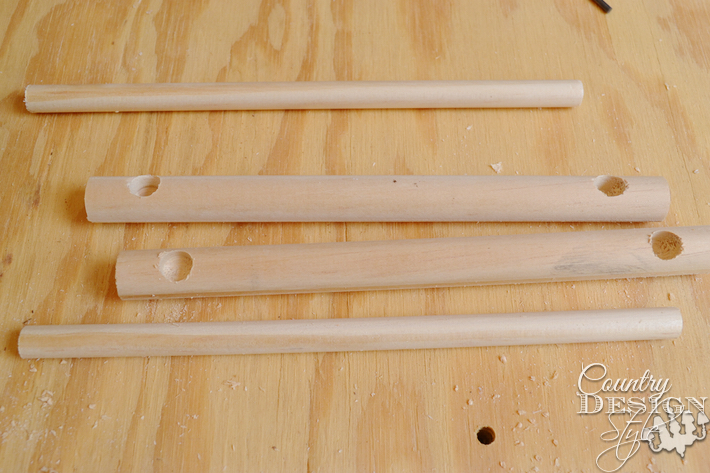
On each end of the larger 1/2 dowels, I drilled 1/4 inch deep holes a half an inch in. To help drill such a fat drill into a small curved surface, I predrilled a tiny hole. This gives the large bit a place to “sit” and will drill on top.
Gluing

Then I added a good wood glue and made a square!
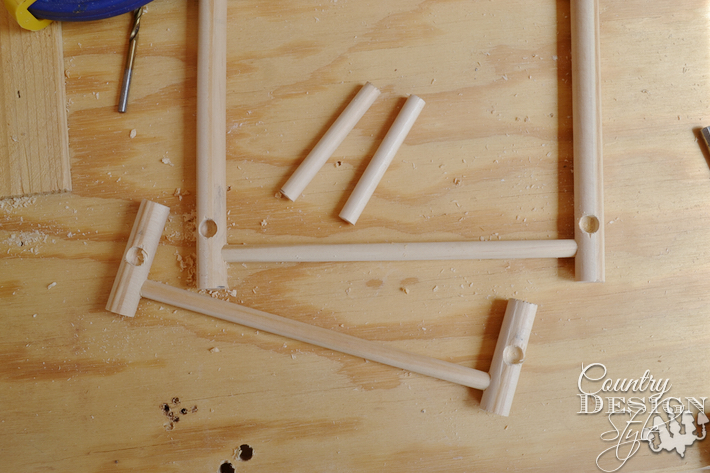
Next, I clamped the two smaller 1/2″ pieces and drilled the same way on each end. Then glued the 5/16″ piece. Let the glue dry!
Nothing like being in a hurry {which I do} and the pieces fall apart.
After the glue is dry the pieces will be firm. Clamp again the drill holes 1 inch up from the bottom of the four posts.
Now an empty throne

Insert wood glue and the 2 1/2″ pieces to make an empty throne looking thing. Let dry.
Then paint, stain {that’s what I did with the first one} or aged the dowels. That’s what I did this time. Back when I made furniture and home items I would charge extra if the client wanted something stained. I would rather smell the stinky ironed vinegar than stain. Plus it’s so easy to use the aging wood with tea and vinegar.

Recreated! A different metal tray, different plate holder, and different magnets. They are small pieces of scrap wood glue to a magnet.
If you follow along with me, you know I love the creative projects using old spindles!! So you might think this would be a fun project using old spindles…
and it is!!!
I would love to tell you I tossed this one together as easily as the dowels…
but I didn’t.
While it was made basically the same, it did need nails and reshaping some of the ends to fit. But I like it and I’m sure you will see it in photos around here. I love this set of plates but…

I like the spindle plate holder better with a clear plate so you can see the spindle in back.
Remember these are fun to hold frames too!

If you decide to make these try different sizes of dowels and cut to different lengths. The sizes I used to hold trays and frames better than plates. Smaller lengths for the 1/2 dowel would work better of plates.
These would be profitable to sell at craft fairs too. I spent less than $3 for the dowels and have enough to make another.


my eyes usually glaze over or roll back into my head if there is more than three parts lol but after looking again at the picture it made sense to me so i am so sure everyone else can follow ha ha xx
Yea! Thanks so much for the great tutorial! I appreciate that you give us the measurements AND how to keep those pesky round dowels still. And THEN the spindle one!!!! I LOVE that one!!!! Thanks so much Jeanette! Pinning and sharing on my FB page :}
Laura, thank you for sharing!!! The spindle stand is sitting on my desk holding a chalkboard sign that says, “Find the DIY in You!” It makes me smile! Hugs! Jeanette