
Make Easy Burlap CutOuts

Want to learn how to make easy burlap cutouts?
This tutorial on cutting out burlap without fraying and loose threads all over the floor has endless project ideas.
Most of my burlap projects make dust bunnies all over the floor as large as…

Bella!
Don’t worry, no puppies were really pulling a heavy cart during the taking of this photo!
Did you know I have a Burlap board on Pinterest? You can see more inspiring ideas for burlap by following my “Burlap! Oh so soft??” board. Of course, I busy pinning loads of creative DIY ideas. If you’re not following me on Pinterest, you can click here to follow all my boards.
My little disclaimer. This post contains affiliate links. What that means is you can click on the link to a product to purchase. If you buy from the link I receive a small amount from Amazon to help support this website. The cost to you is the same as if you purchased directly from Amazon. Now back to the project.
Here’s what you will need for the burlap cutouts:
Piece of Burlap
Paintbrush
Scissors
Print of easy shapes
Pencil
Wax paper
The steps
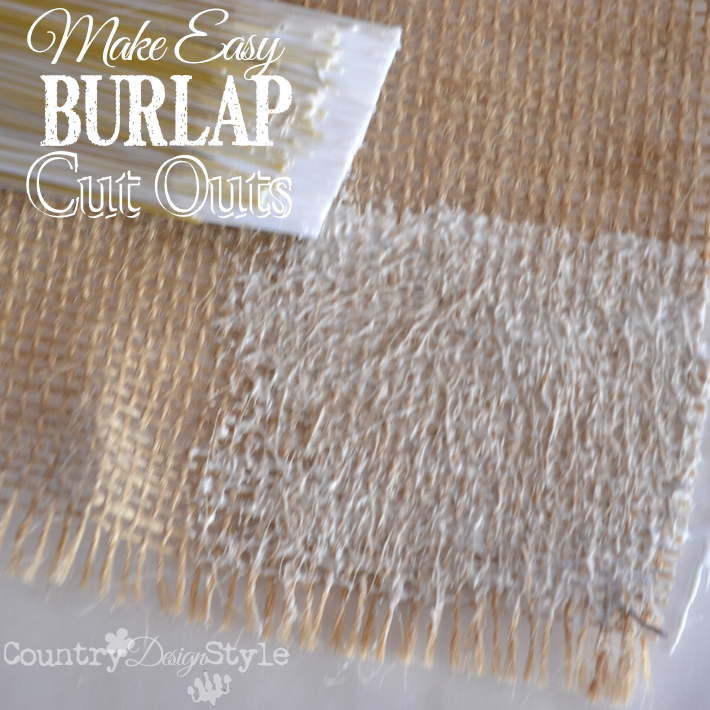
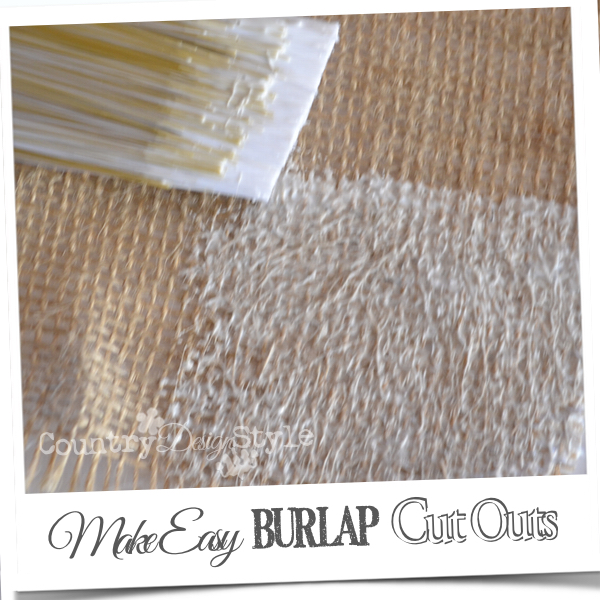
Step 1: Paint Mod Podge on one side of the burlap covering an area as large as your cut out shapes. If you do this on a piece of wax paper it saves clean up. I applied a slightly thick coat. Let dry.
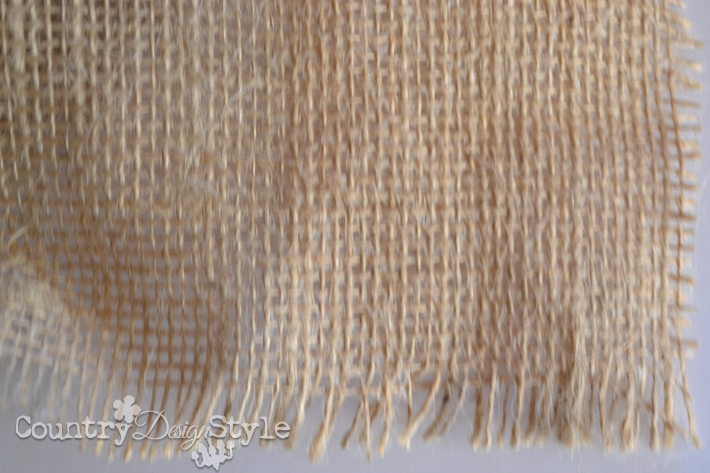
When dry the burlap is stiff and the edges are “glued” together along with the fibers of the burlap.

Step 2: Cut out shapes. Above I folded the burlap and cut out a heart…remember like in school!
Notice the threads are not fraying all over my floors!
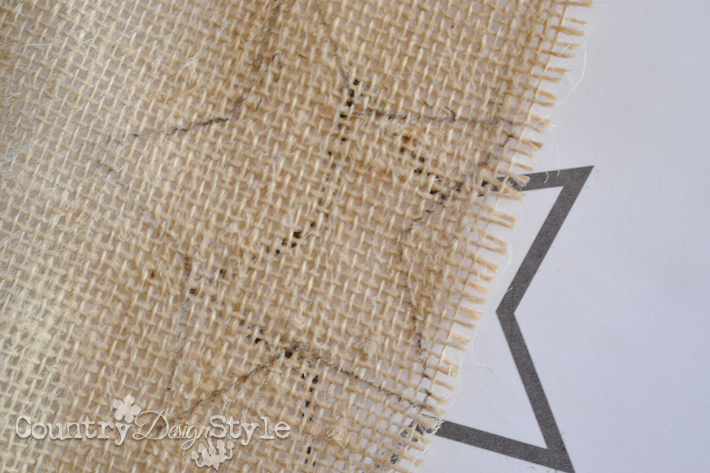
If the shapes you want are more than a “fold over heart,” then print out your shapes on the computer. Lay the printed paper under the burlap. You can see the shape through the threads. Draw the shape on the burlap with a pencil and cut out.
The burlap cutouts

Live DIY workshop
There’s something about the texture of burlap that looks amazing with the “off black” color of chalkboards!
For all email subscribers to Country Design Style, I’m hosting a Love of Burlap and Chalkboards LIVE tutorial this evening at 7 pm {MST.} You can create and chat along with me as part of the Design Workshop Online.
If you’re a subscriber, check your next email for more information. There are still spots available!!
If you’re NOT a subscriber, {and why not??} you can subscribe here and receive information on sign up.

Off the top of my head, here are some ideas for DIY projects using burlap cutouts.
- House numbers on a plaque
- Child’s name pinned on their bedroom wall. Update: I did this one with for our dogs. You can see it here at burlap name plaques.
- Number glued on a board like a large ruler…hum, watch for this one coming here soon!
- One of those fold over hearts glue on top of a box for any romantic holidays or anniversaries.
And now a video
Here’s a quick video showing just how easy this is to do.
Do you have any other ideas to use burlap cutouts?
My little disclaimer: I did not receive any product of compensation for any products mentioned in this article. All products were purchased by me to share DIY ideas with you and use in our home.


I don’t usually comment on posts, but I have to say I absolutely love this idea! I’ve got a drawer full of burlap just itching (literally!) to be used, but I avoid doing anything with it because it makes such a darn mess. Thank you for sharing this!
This is one of those “why didn’t I think of that?!” things. I have avoided some burlap projects in the past due to the mess. Now I don’t have to avoid them anymore!! Great idea!
Thank you Laura! I’ve got several ideas for some burlap projects now! Jeanette
I hope I can get on the right web thing – that will be the main lesson I will be learning besides the crafting!! lol! Can’t wait!
Andi, me too! Ha, ha! Actually it’s not too hard. Big Marker will send an email with the link well before the webinar. Just click the link and follow the steps. These are casual so no worries. Of course, I’m getting butterflies!! Jeanette 🙂
okay i am not the most computer savvy person in the world but i can’t get on the facebook chat page…… i am pretty sure i signed up for the web thingys but please forgive me if i fail to connect you know i love you and your blog xx
Chris, I updated the link and it should work correctly now. You are sign up for the webinar tonight perfectly! Hugs!! “See” you tonight! Jeanette