
Burlap Cut Out Signs

Combining two techniques into one creative project.
All using up leftovers and scraps.
I understand incredible cooks make things from leftovers and scraps too.
Wish I could cook that well. 🙂
Anyway, here’s my Burlap Cut out Signs…
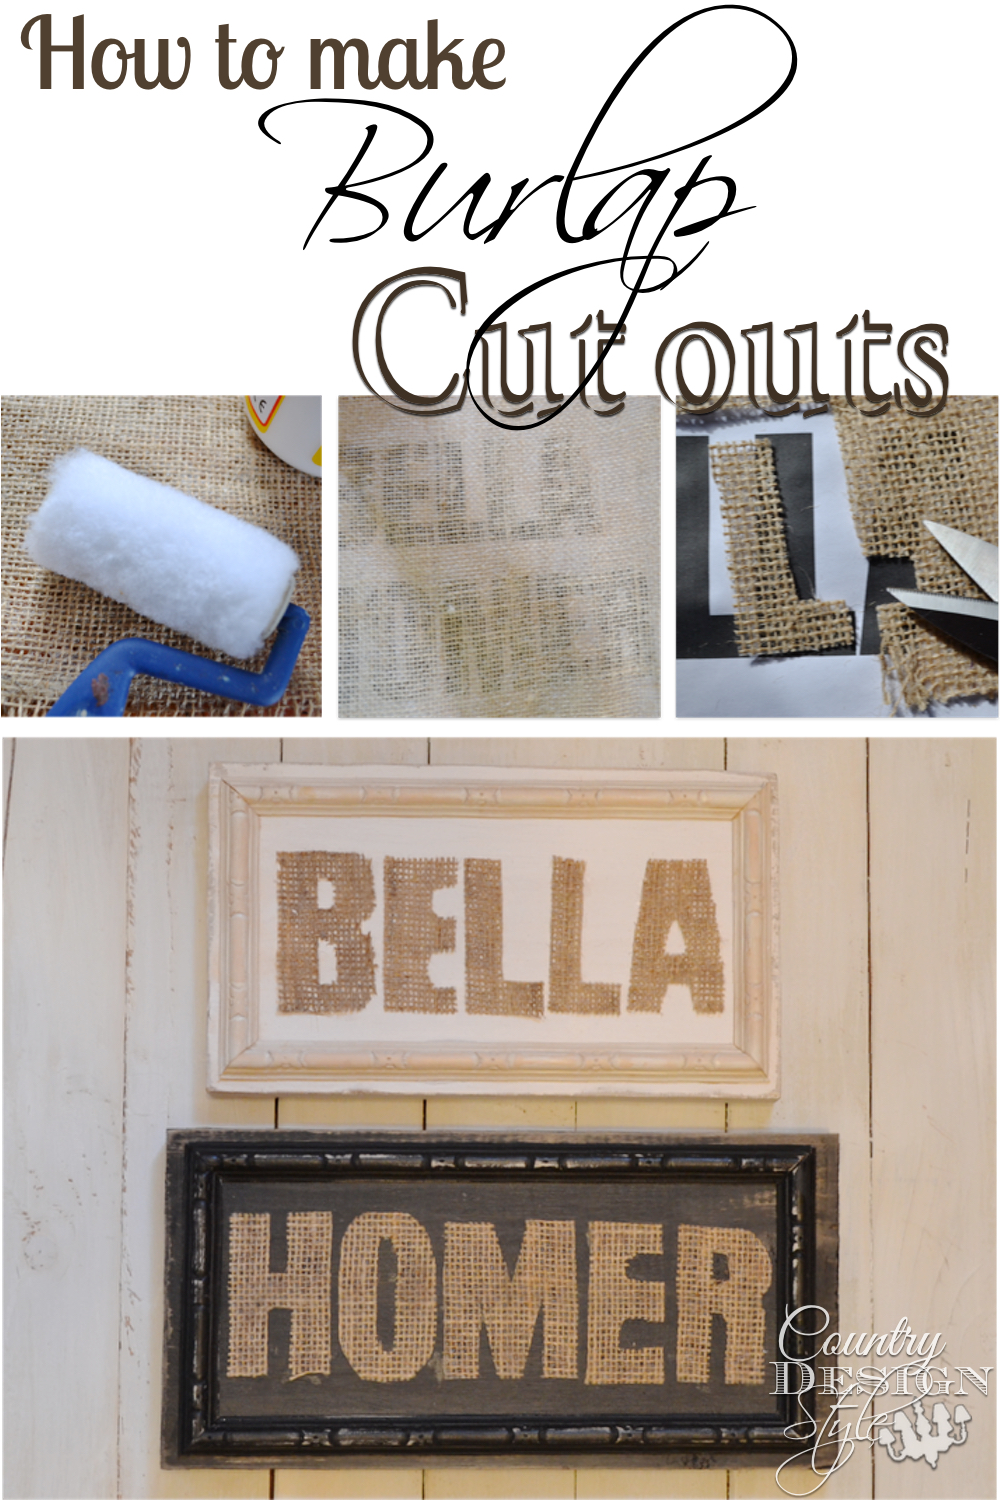
The image above shows the basic steps, but here are the details.
The boards were one from the test of chalky paint with ironed vinegar post. Click to see the test results and how the boards were painted.
I used the first two boards to make these signs.
Then I added leftover trim to the boards just for detail. {would be cute without the trim too}
For the burlap cutouts, you can read more here, it’s easy to do.
This time I used a small roller to coat the burlap with Mod Podge. Faster.
Using a bold text, I printed out “HOMER” and BELLA.
Then laying the print under burlap and outlined with pencil the letters. Cut out.
Then using a craft glue place the letters on the board.
Make sure to spell correctly. :/
That’s basically it!

Oh, the board in the chalky paint and ironed vinegar test with the gray stripes…
is now a simple sign for Saint Patricks Day.
I used freezer paper in 8 1/2 by 11 sheets to print the lettering and clover.
Click here for your free download of a “Lucky” sign. The download is flipped so the lettering is backward. Use the freezer paper transfer method of rub the lettering and clover.

The ideas for burlap cutouts are endless!
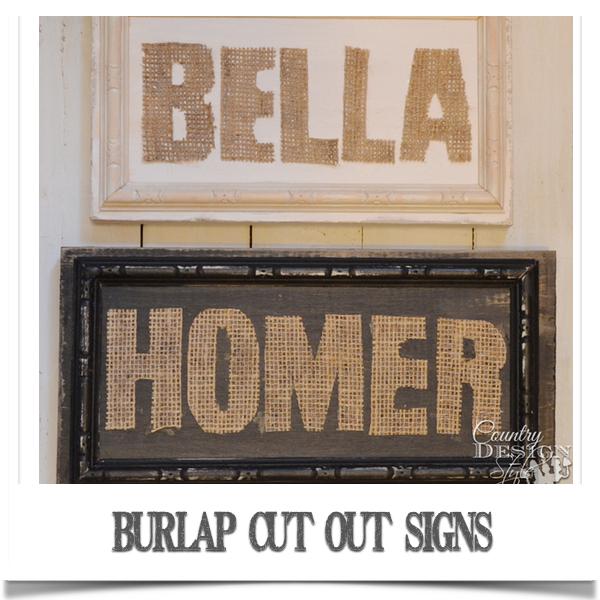
Oh, by the way, Homer and Bella are our four-legged family members.
They are the best! They just can’t read. 🙂
What are you’re ideas for burlap cutouts???


I have used your method for keeping burlap from raveling on several things lately- went to a junk shop the other day and she had a bushel basket full of spindles! Though about you that day! have a great week!
Yea! Laura, did you buy them?? Thank you for thinking about me! Jeanette
So darling Jeanette,what a wonderful idea! Now you have my brain working. LOL JO
Lol, Joanne! Let me know what you make with the burlap. Thank you for stopping by the little DIY website of mine! Jeanette 🙂