
Thrift shop project 2
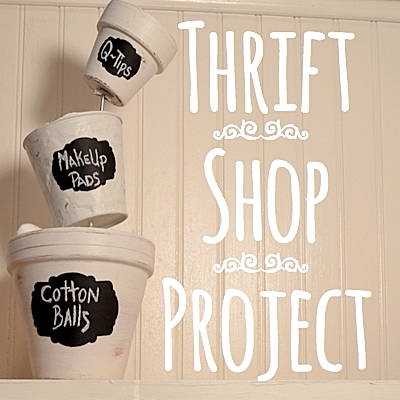 Thrift shop project 2 is a handy dandy topsy turvy bathroom holder for those essentials.
I love those topsy turvy fountains on Pinterest and have had the idea to make one for several months.
I plan to put this in the guest bathroom. Right now there’s a bag of cotton balls in the linen closet, a tube of makeup pads in the drawer next to the sink and not a q-tip to be found upstairs.
 Every second Monday of every single month I’m posting a redone, repurposed or upcycled thrift shop find.
Check out the first thrift shop project here for a great simple way to display photos.
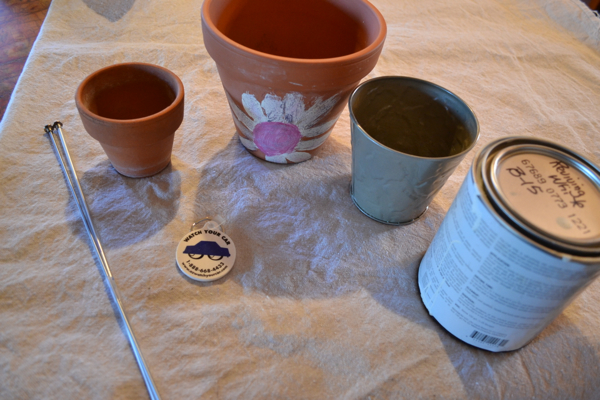 This month I bought two clay pots, a metal pot, knitting needles and a cheezy key chain. I spent a whopping $2.75 and one clay pot had a hand painted flower!!
That I painted over with a creamy white paint.
I painted all three pots kind of messy. Then used sandpaper to add a bit of distress.
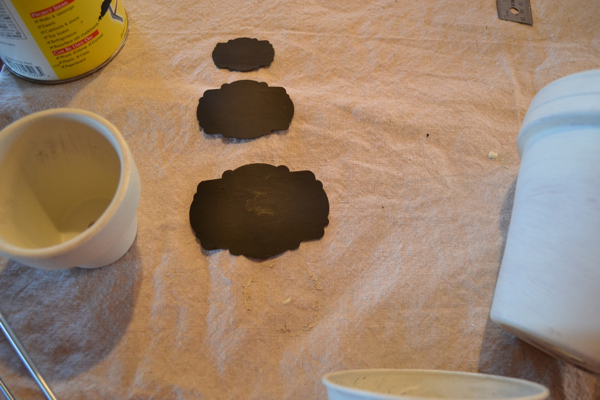 I looked for any type of labels at the thrift shop but didn’t find any so…
I cut three out using the silhouette. I think this would be just a cute with simple card stock rectangles. I then painted the labels with chalkboard paint.
 Next I glued each label to the correct size pot using white craft glue. I paintbrush is an easy way to cover the back of the labels with glue.
Notice the middle pot is bumpy metal. It’s at this point I wish I could have found a clay pot in medium. But this is about using what you find in thrift shops at the time. So a metal pot it is! 🙂
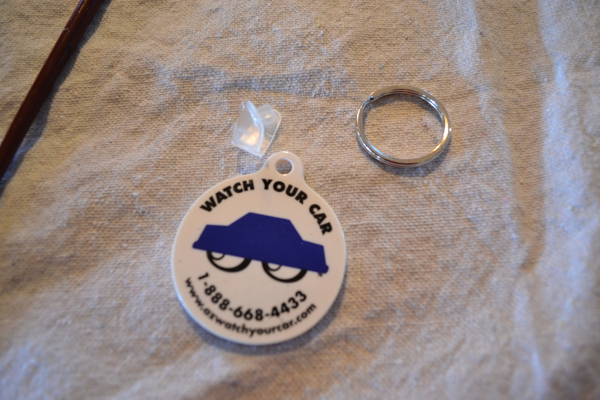 Now for the key chain. I thought this said “wash your car” when I first saw it. Wondered how they knew???
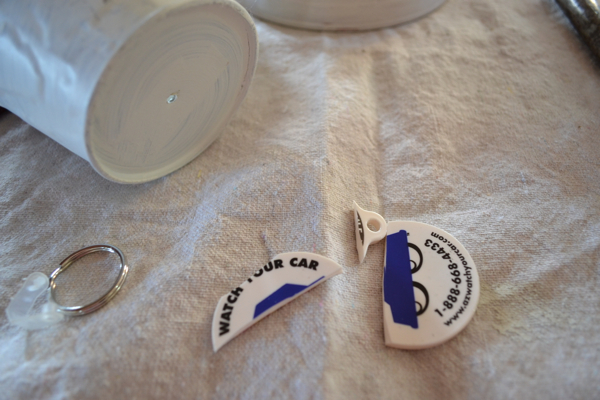 Anyway, I cut it up with scissors and poked one knitting needle though the largest piece. The key chain was then hot glued to the bottom of the largest pot with the knitting needle going up though the hole in the pot.
I used a nail to put a small hole in the metal pot and into the next piece of key chain. The piece of rubber key chain was added to the knitting needle and slid down about halfway. Then the metal pot and more hot glue.
I did the same with the small pot and the last piece of key chain.
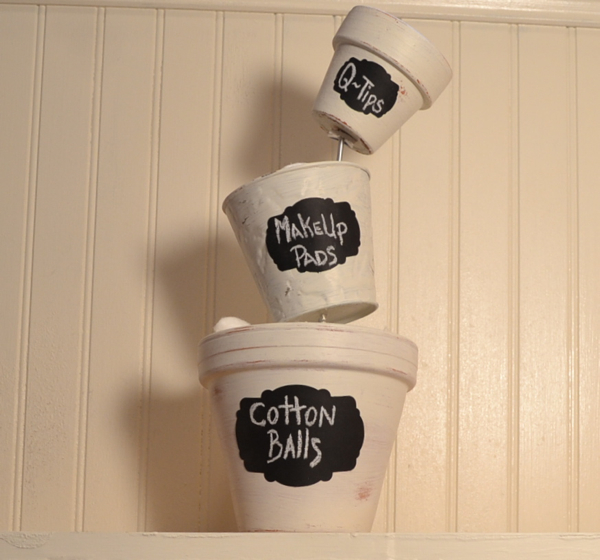
The topsy turvy part just happened! Love that!!!
Now guest can easily find cotton balls, makeup pads, and q-tips right on the bathroom counter.
I still have one knitting needle leftover! Any ideas on what to do with one knitting needle? I don’t knit!


Great idea! very cute
Thank you so much Lisa! Have a creative day! Jeanette