
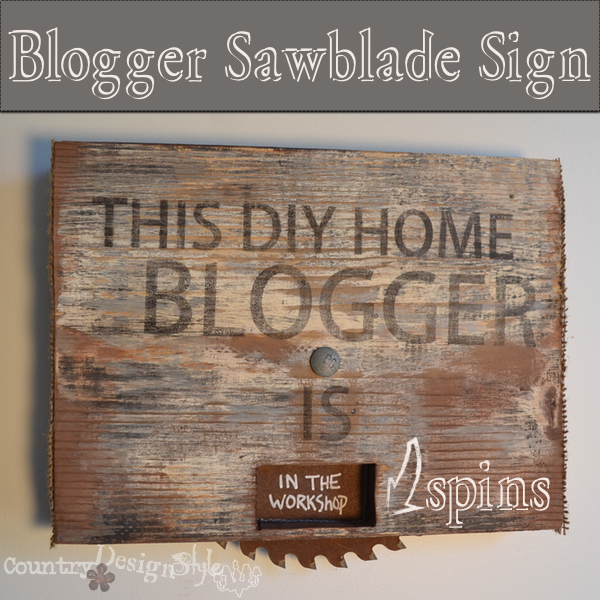
Spinning Chalkboard Sign
![]() I inspired myself!!
I inspired myself!!
That doesn’t happen often…
 but I made this sign for my craft room and it makes me smile every time I see it! 🙂
Then I thought why not a spinning chalkboard sign!
Then I could write anything I wanted. Or make one as a gift and they could use it to fit their needs, activities or whatever!
It took about 1 hour hands on time to make and the cost was under $7!
I picked MDF for to reasons. It paint great for chalkboards having a smooth surface. Plus it comes in ¼” thickness. Since I would be writing with chalk, I didn’t want to write in a deep hole.
My handwriting is not great anyway!
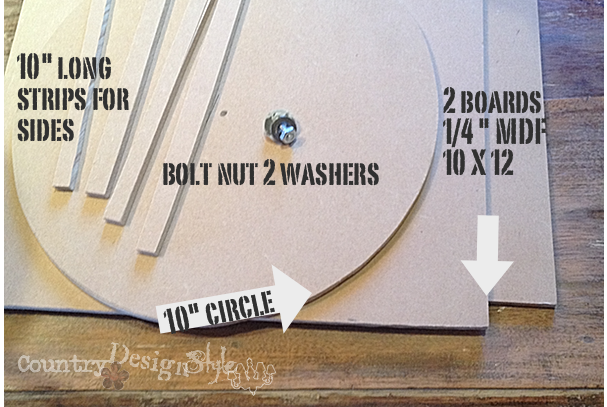 The cost was the sheet of MDF {Medium Density Fiberboard.} The 1″ bolt, nut and two washers I had.
The most important part is the lengthen of the bolt and those two washers!
The bolt on the “blogger sign” was 2 ¼” because I used wood boards that was ¾” thick.
The strips for the sides could have been any ½ thick wood, but since I had the MDF I cut four strips and glued two together.
Next make the hole for the bolt in the middle of the circle.
 If you use a nail and a stick like above when I made bases for my cloches. The circle will have a hole in the middle.
 But I didn’t do that, so had to measure, eak!
Then line the circle in the middle of the square but lower past the bottom edge about 1 inch.
Drill through the circle’s hole into the two boards.
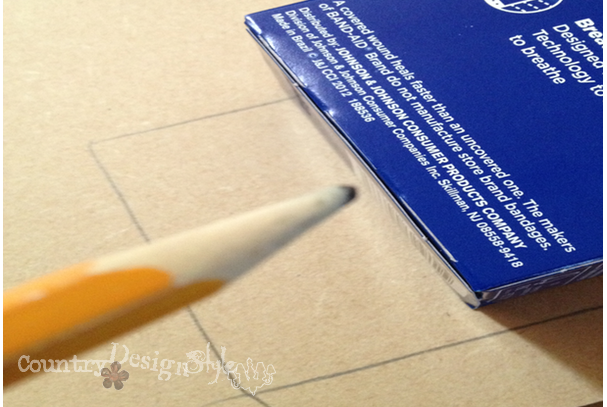 Now pick one board for the front and draw a rectangle. I used a box of bandages with size I wanted the hole to write through.
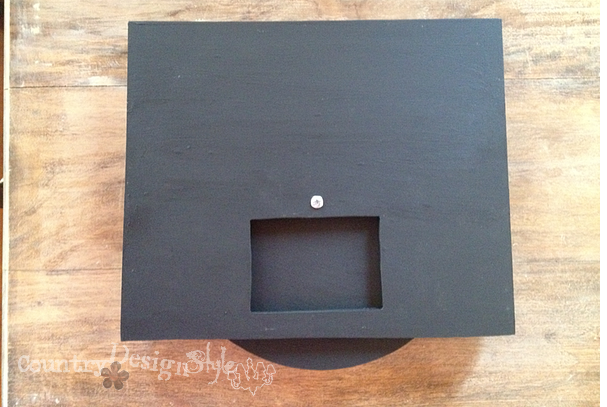
 One hole in the middle of the rectangle that fits my saw blade makes it easy to cut out the square.
 Now I started getting excited about the project and didn’t take pictures of the painting or putting it together!
On the back board, the one without the cut-out, glue on the 1/2 strips along the edges. Let dry. A quality wood glue works amazing with MDF and nails are not needed.
Now paint with chalkboard paint. I painted it all. Then add the top board with the cut-out on the bolt. Next add a washer. Then add the circle. Next the other washer. Lastly the back and add the nut. Before tightening the nut. Add a bit of wood glue between the ½ strips and the front. Tighten.
Hum, it needs something…
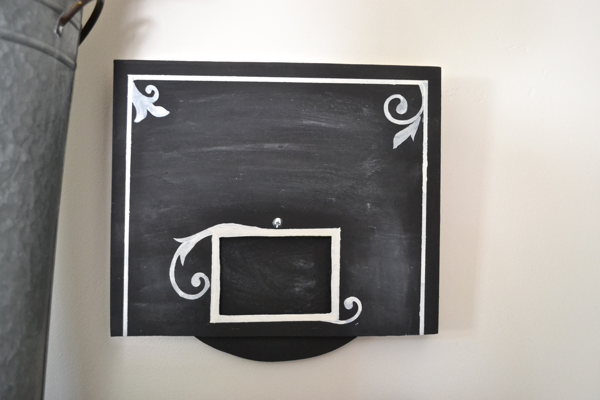 A little white paint designs.
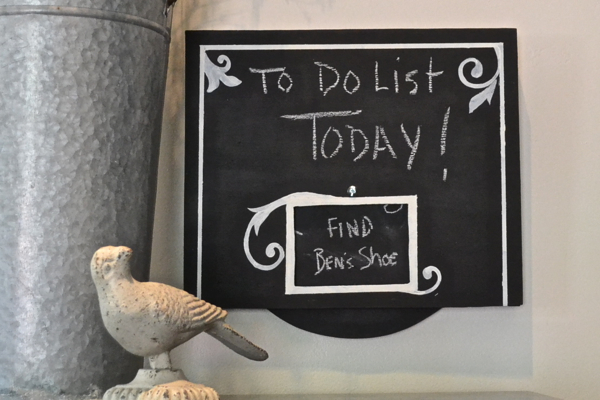 I started out with a “To DO” list.
I have no idea who “Ben” is and why I wrote to find his shoe!
I did clean out my closet the other day and had trouble finding and matching shoes.
Guess that was on my mind. If you know Ben, tell him I’ll find his shoe! 😀
 Rats! I do have a dentist appointment on Monday. Wish me luck!
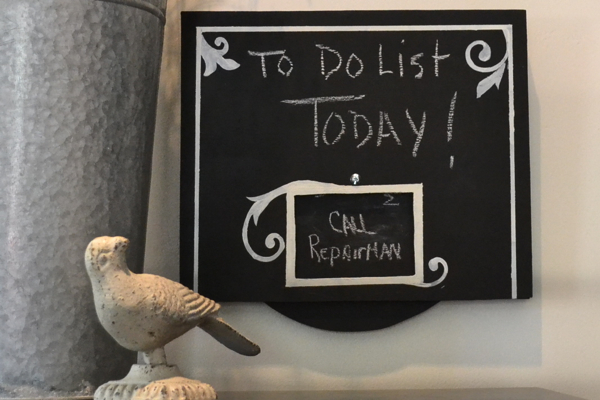 Our fridge is not holding the right temperature.
Rats…again!
Any ideas on how you could use a sign like this?
How about for the kids, when you get home from school….
Ideas for dinner…..
Little romance….I like that idea!

You can see more chalkboard projects here, lots more!


