
Decoupage Furniture
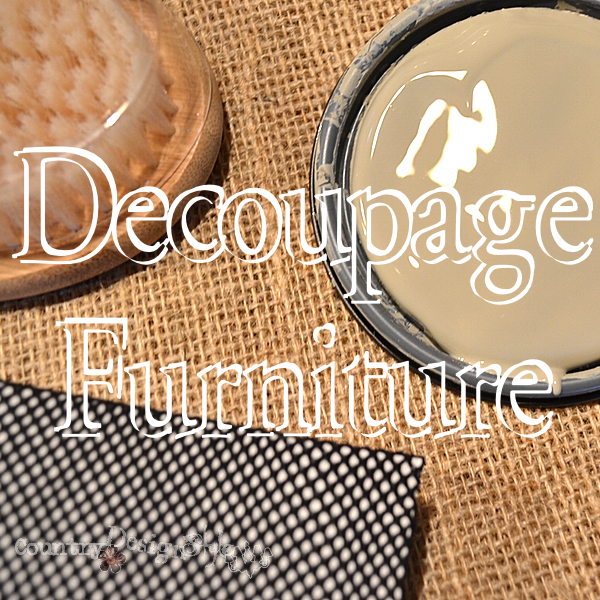
Decoupage Furniture
This post contains affiliate links. I make a commission for your purchase at no extra cost to you. This helps me maintain the website. Thank you for your support. Think of it as a friend letting you know where I found a product I use, love or want. Click here to read my full disclosure policy.
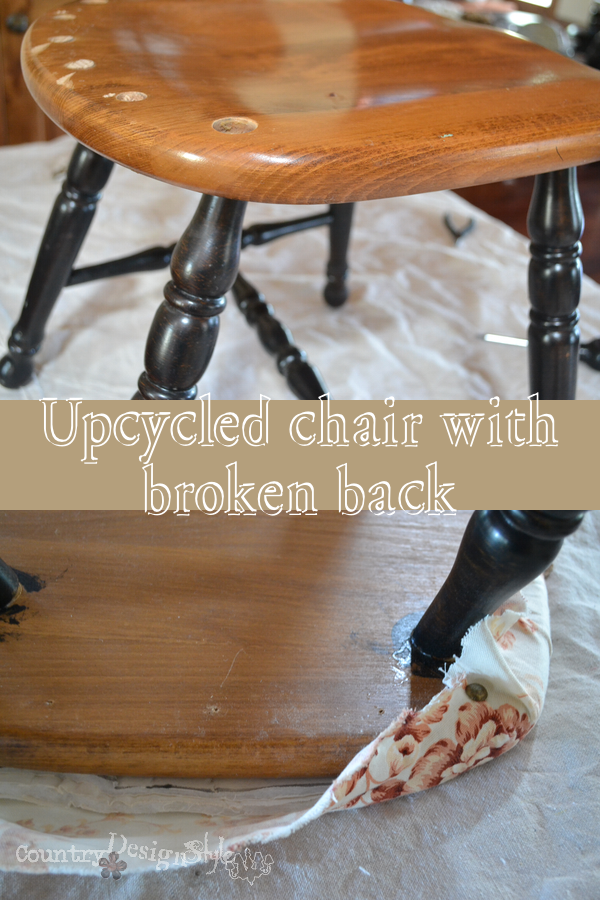
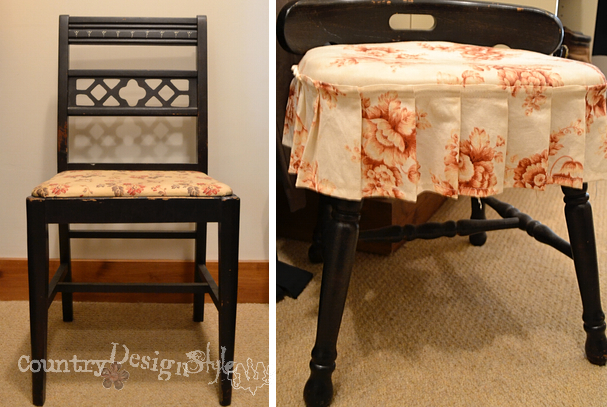 The furniture to decoupage was easy to pick. Mike and I have had these chairs in our closet for years and they needed updating. Fourteen years ago, way before blogging was a thing, we moved into a home with his and hers closets. I found these chairs and redid them. My chair on the right had a broken spindle. Wahoo! I’ve loved broken spindles for years! 🙂 I removed the spindles and reattached the back lower on the seat.
My Chair
 I removed the fabric.
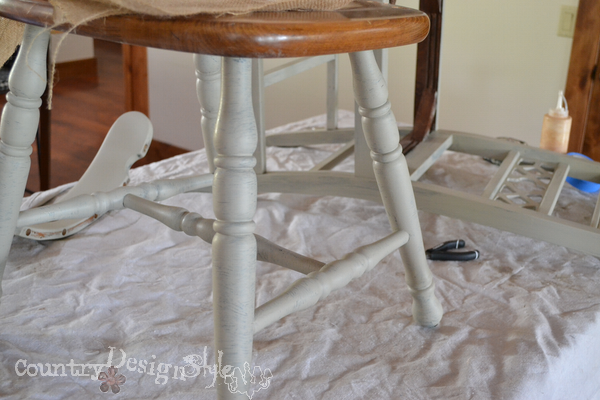 Then painted the chairs a soft greenish gray.
Remember the ham?
A week ago, we had ham for dinner. I removed the plastic black bag the ham comes in and ….hum…could I decoupage this plastic bag?? It looks like fishnet stockings.
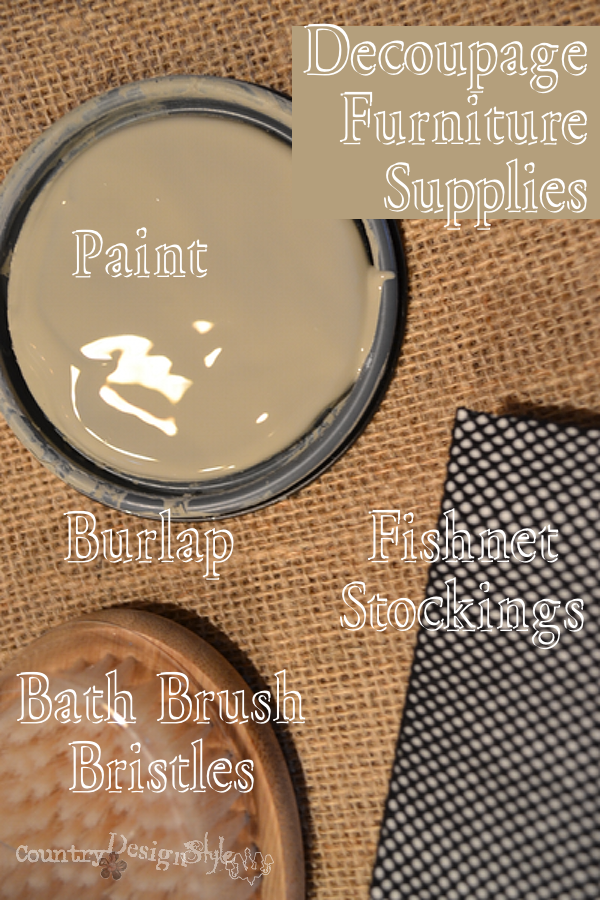 That’s it! Fishnet stockings and the bristles of a bath brush! That’s what I can decoupage on our closet chairs!
Now where the bristles of a bath brush came in I have no idea. But I bought a bath brush for this project at the dollar store.
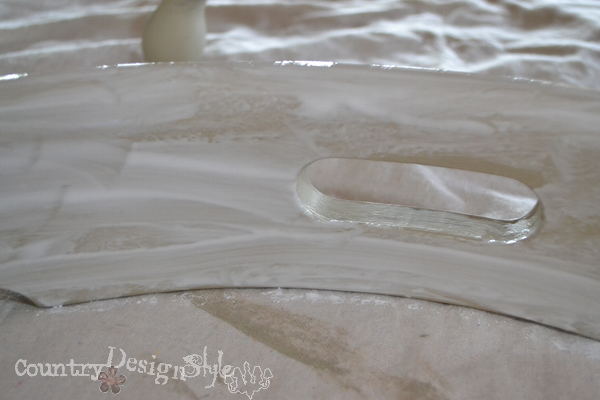 My chair first. I slathered on the Mod Podge onto that top back piece.
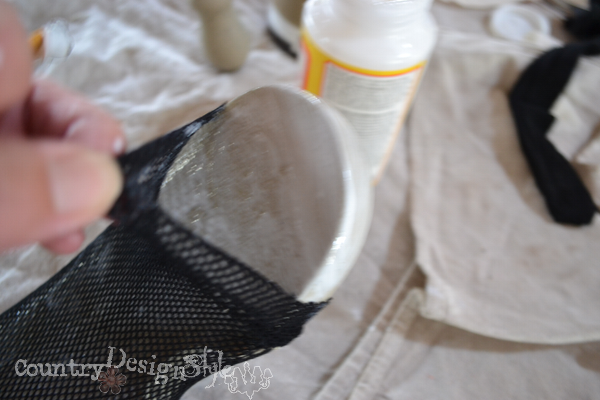 Then put on one leg of the fishnet. I have to say, fishnets are much easier to put on my legs than a chair piece covered with glue!
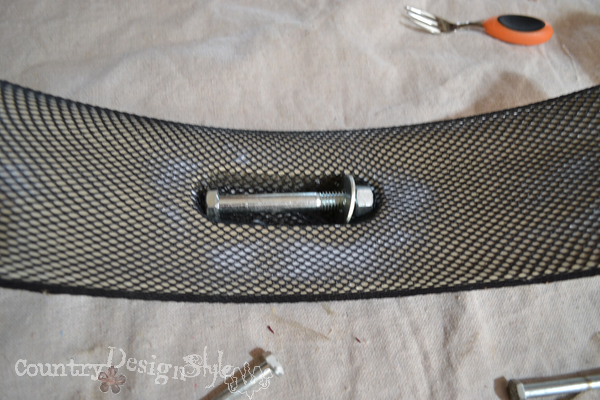 I laid the back piece on a couple of screws to keep it from gluing to my drop cloth. A large bolt “weighs” down the fishnet around the handle.
Mike’s Chair
 Mike’s chair next. I cut some of the brush bristles off into a pile.
 Then taped around the decorative cutouts on the back of the chair using painters tape. Painted on Mod Podge and sprinkle the bristles onto the glue. I used the other end of the paint brush to move the bristles from the centers of the cutouts and let dry.
 The fishnet for this chair was cut into a rectangle and sewed by hand in the back.
 Then I gathered the fishnet down one side, painted on the glue, and then covered the glued area with the fishnet. I made sure the seam was on the bottom.
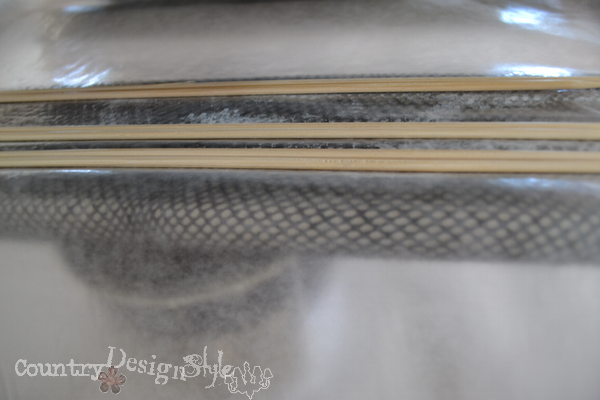 The chair has grooves and I wanted the fishnet to stretch down into the grooves. While the glue dried I covered it with wax paper. Then laid wood screws in the grooves and weighted it down with a cast iron skillet. Then walked away for an hour feeling like my dad!
This is something he would do!
After an hour I removed the wax paper and let the glue finished drying. All the decoupaged areas were repainted with Mod Podge including the brush bristles.
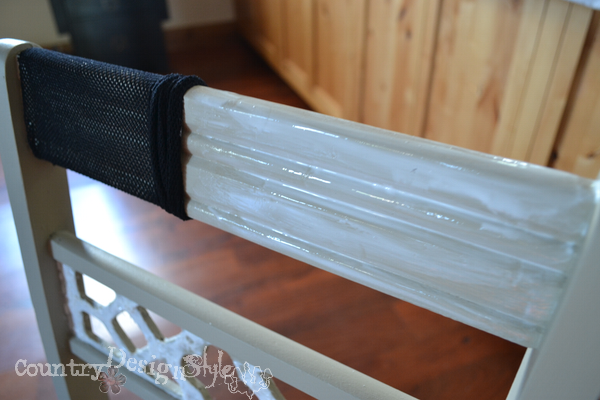
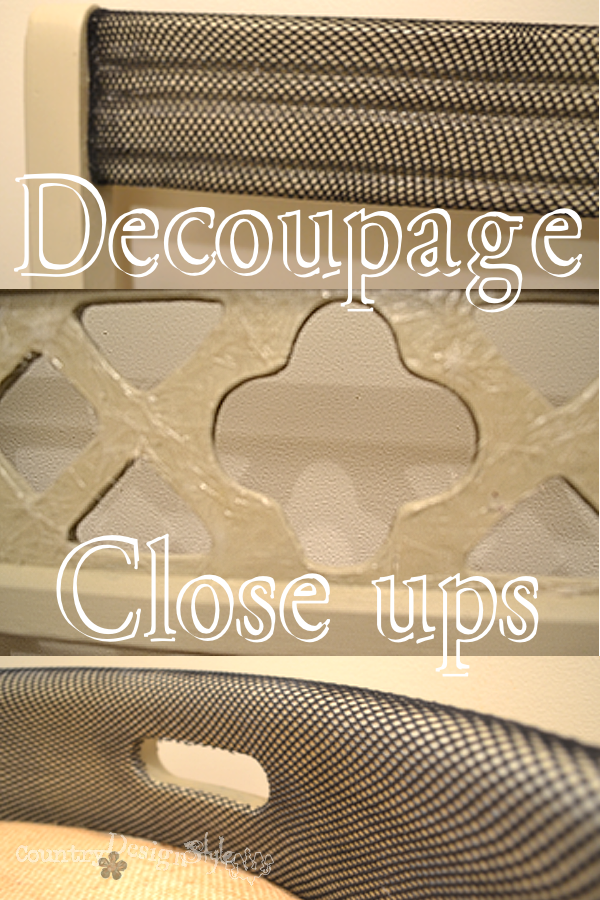 Here’s a close up of the decoupage areas of our closet chairs. I cut the fishnet from open handle area on my chair.
Before
 After
After


Ham! I’m so inspired by your fearless creativity Jeanette! xxoo
I need to start thinking outside the box more – such creative ideas Jeanette!
This is so unique! I love your use of materials. You just never know what’s going to inspire you!
Grab inspiration when it hits and run with it! Thank you Bre for stopping by. Great to be with such talented ladies. ~Jeanette
Sexy chair!!! I just love your creativity!!! So cool and unique! ~Christy
Heh, heh! Christy, I think Mike would have been happier if I wore the fishnets instead of the chairs! ~Jeanette
You are so creative! I never in a million years would have thought to repurpose a ham bag. Both updates are great and you must smile every time you see them in your closet.
Thank you Paula, they really changed the look of our closet. Now I have more closet items to redo. ~Jeanette
Now that’s out of the box for sure! Great job!
Beth, thank you!
I love your out of the box thinking! Super creative! ~Sonya
Gosh! Thank you Sonya. It was a fun adventure, but I don’t think I ever decoupage fishnets anytime soon! ~Jeanette
You’re so creative! Love the refreshed fishnets 🙂
Debbie
Debbie, thank you so much! Mike did ask when was the last time I ever wore fishnets after reading the post. :/ ~Jeanette
Girl, you get crazy with your projects! Fun ideas…I may steal!
Kathy, I get it from my dad! He once tried to make a hanging lamp with a large balloon, the colorful rocks for fish tanks, and a ton of epoxy! We had the most colorful garage in the neighborhood! 😀 I’m thrilled to be included in the tour. ~Jeanette
Girl, your creativity it just amazing! Who would have thought of fishnets? They look awesome though! Great job!
Thanks Shanna! I was so afraid of how this one would turn out right up to the very end. But they actually look great in the closet! 🙂 ~Jeanette
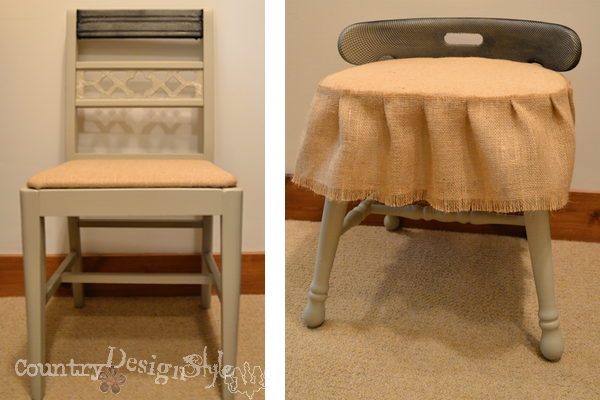
Now that is outta the box creative Jeanette!!! Love it! The burlap ruffle chair is my favorite! 🙂
Nancy
Whew! I almost left the ruffle off! This has been fun! ~Jeanette
LOVE that burlap ruffle chair! Cutest thing ever! Life to the full! Melissa
Melissa, thank so much for visiting. That ruffle chair gets used a lot! ~Jeanette
I love your idea of decoupage, Jeanette. The burlap ruffle is darling. Thanks for sharing your creativity. Very impressive.
Thank you Meegan.
Wow! Your project is crazy creative! Like you, I had no decoupage experience either. But it was sure fun playing with it! I love the burlap ruffled chair. It’s perfect as a closet chair especially when you need to sit and put on shoes!
Thank you! Those chairs usually have dirty or clean clothes on them according to if we’re coming or going! 🙂 ~Jeanette