
How to make a Cone Christmas Tree easy peasy
The cone Christmas tree what’s as large as it needs to be. If you’re planning Christmas in your small home, you will want to follow my holiday decor cause…
we are planning to spend the week of Christmas in the RV. In our 321 square foot RV. Our 9 foot Christmas tree and miles of garland is staying home this year.
This year our tree has to be less than 3 feet and garland much shorter. Unless we have it hanging out the window as we’re traveling down the road.
Then I saw cone trees about 4 feet tall in a magazine. They were sitting on each side of a large mantel. Nothing in the article said anything about the cone trees. They sat on the mantel calling to me. They said they wanted to go on our Christmas RV trip.
I decided they could come along as long as they shrink.
And they did…
The supplies
8-inch cones
1-Inch Paintbrush
Craft paper from a roll
Piece of burlap
Scissors
Craft glue {this is my fav}
Twine
Masking Tape {a bit helped me from going nuts}
The tutorial
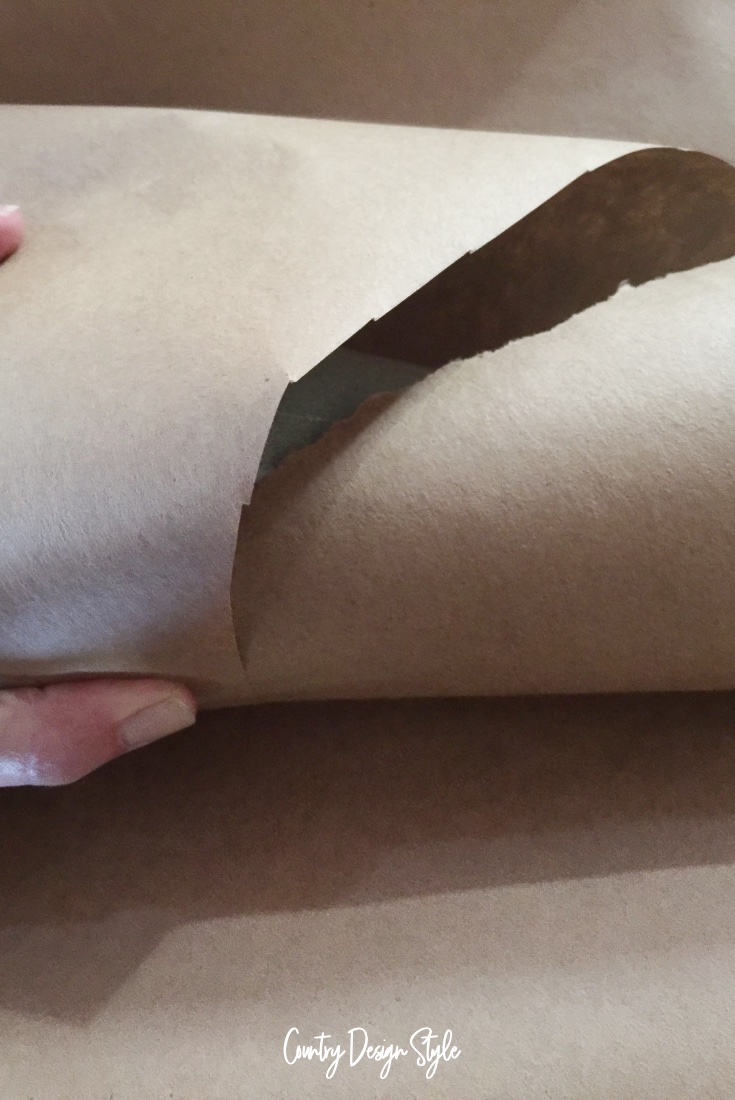
Cut a square piece of craft paper about twice as wide as the height of the cone.
If you’re good at geometry you can use a smaller piece. I’m not, so I went big.
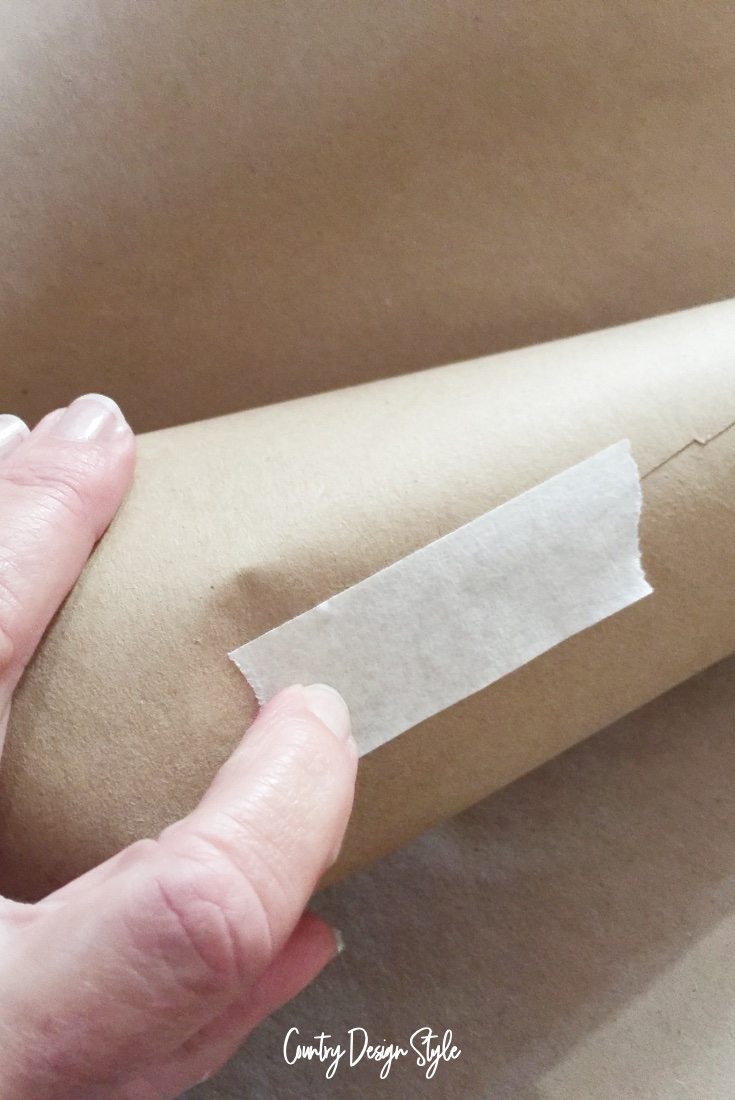
Wrap the paper around your cone tree and hold in place using the masking tape. Cut around the bottom of the cone.
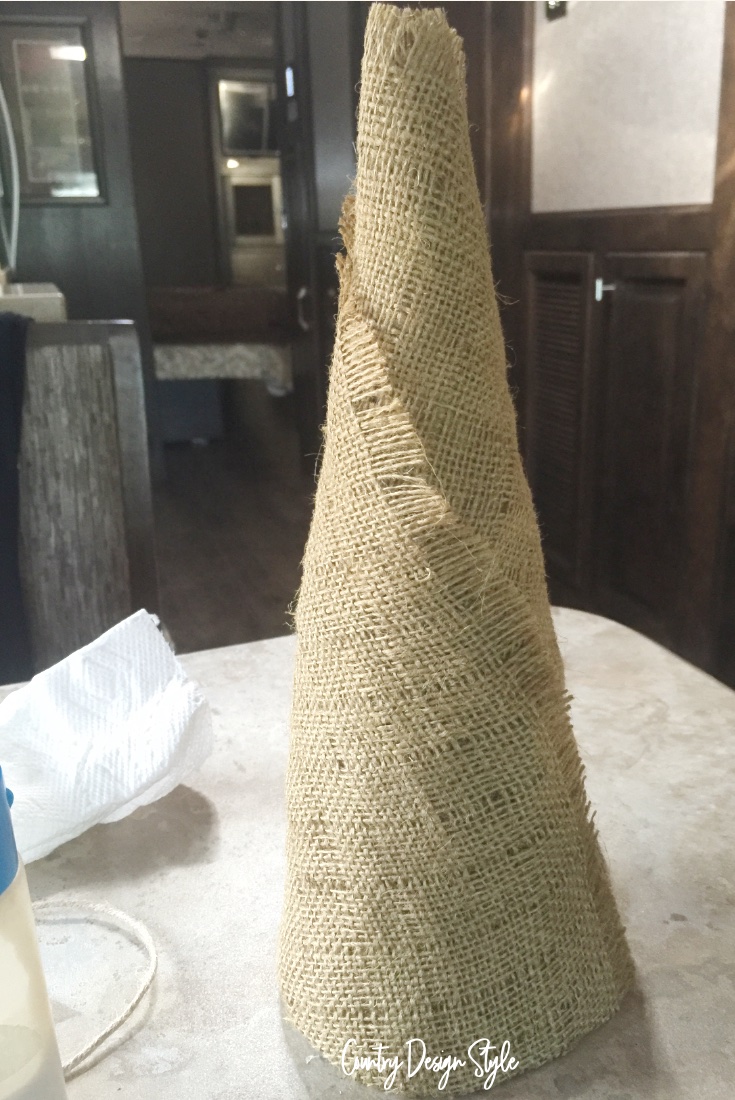
Now remove the paper and lay over your piece of burlap. Cut the shape about 3” larger on all sides.
Rewrap the tree with the paper. You may glue the paper to your cone if you wish. I didn’t.
Now let’s plaid the burlap!

Pull out about every tenth thread of burlap from one side. Please guess and don’t count the threads. My eyes are too old and guessing works fine.
Do the same for the other edge to make a plaid pattern in the burlap.
Wrap the burlap on the cone on top of the paper. Trim any excess burlap leaving about 1/2 inch on the edges.
Remove the threads from the edges making a 1/2 inch fringe.
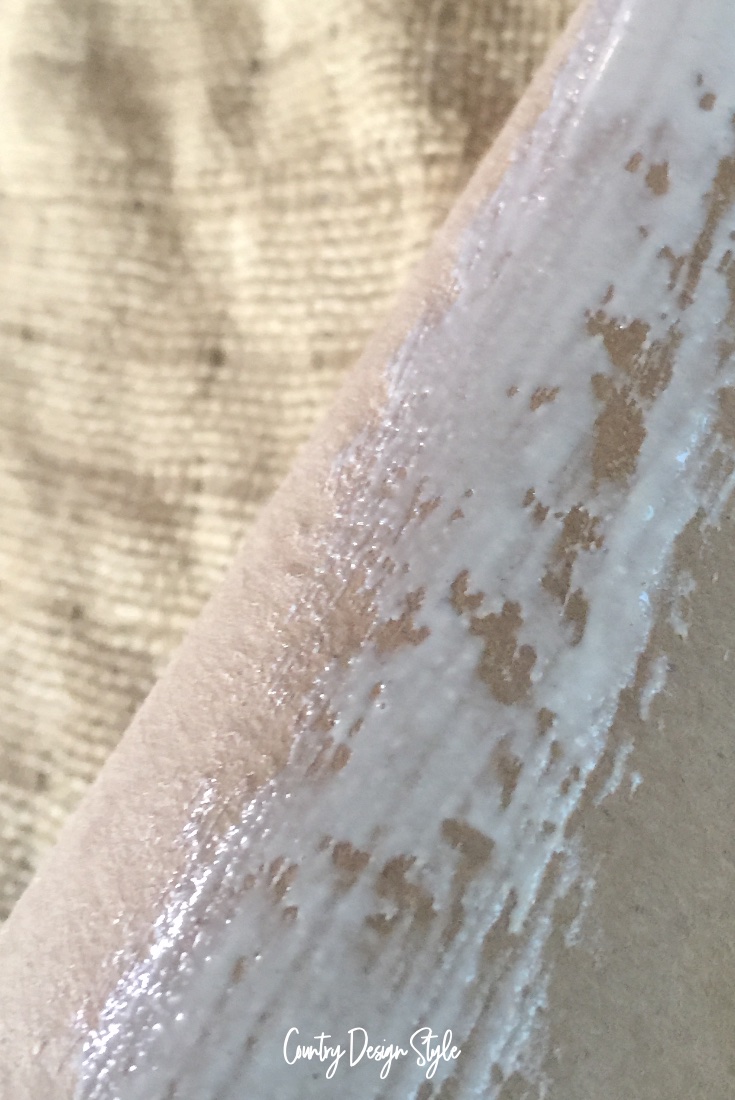
Using the paintbrush, apply a light coat of glue to the paper on the tree. Rewrap the burlap, gluing into place.
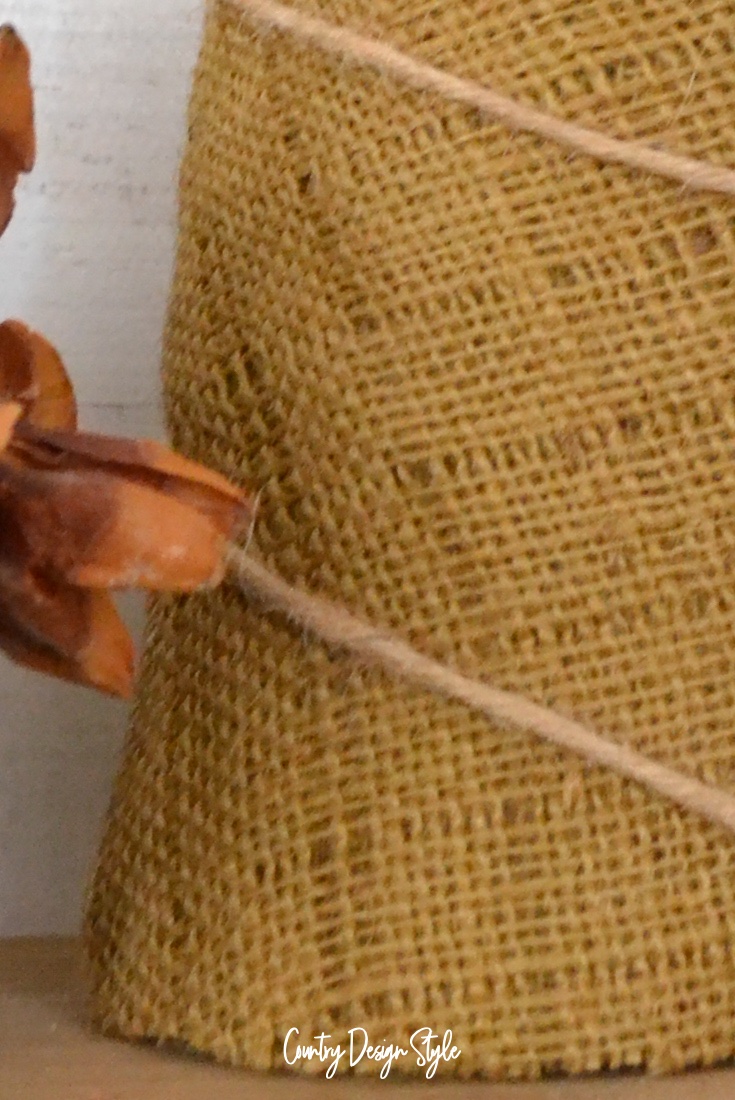
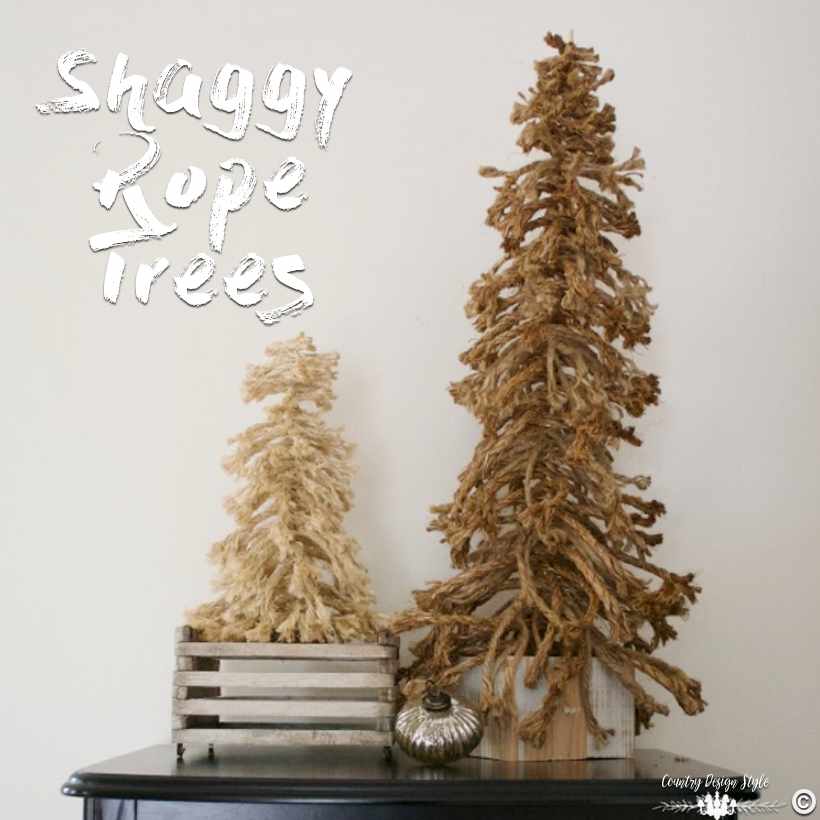
Everything is better with a piece of twine
Bit plain??
Add a piece of twine.

Glue one end at the top. Then wrap around the tree to your liking. Then glue in place at the bottom.
Make sure to follow, I plan on sharing photos of both cone Christmas trees in the RV decorated for the holidays.
Did you notice the different colors of the photos? I used my phone when taking the duller photos and my camera on the brighter photos. Need to work on taking photos with my phone!!!
After our last RV trip, I’m as large as I need to be! Too many snacks!!


I love the burlap plaid! I have to do this ( said as my Halloween project is waiting for assembly) yikes it’s tomorrow! Can’t wait to see your pictures.
Thank you, TK! I’m thinking about doing an intricate burlap plaid for the post…if my eyes can hold up!