How to easily apply flowers on furniture
You’re putting away your favorite T-shirt in your dresser and you think, if I could add flowers on furniture I would love this dresser.
This dresser has managed to not completely fall apart in a pile of splintered wood for 25 years. We bought it at a yard sale for $20. The only other expense was a bottle of wood glue. It needed firming up. I can relate nowadays.
It also had a massage with sandpaper then oiled with furniture polish. Back in 2016, it turned a bit darker with a small amount of chalk-based paint.
The drawers are wonky. But I open them twice a year since the dresser holds seasonal clothes. So, I’m okay with wonky.
This post contains affiliate links. As an Amazon Associate I earn from qualifying purchases. Click here to read my full disclosure policy.
Don’t have a Prime membership? What are you waiting for?
Click to Start your Amazon Prime 30-Day Free Trial now!
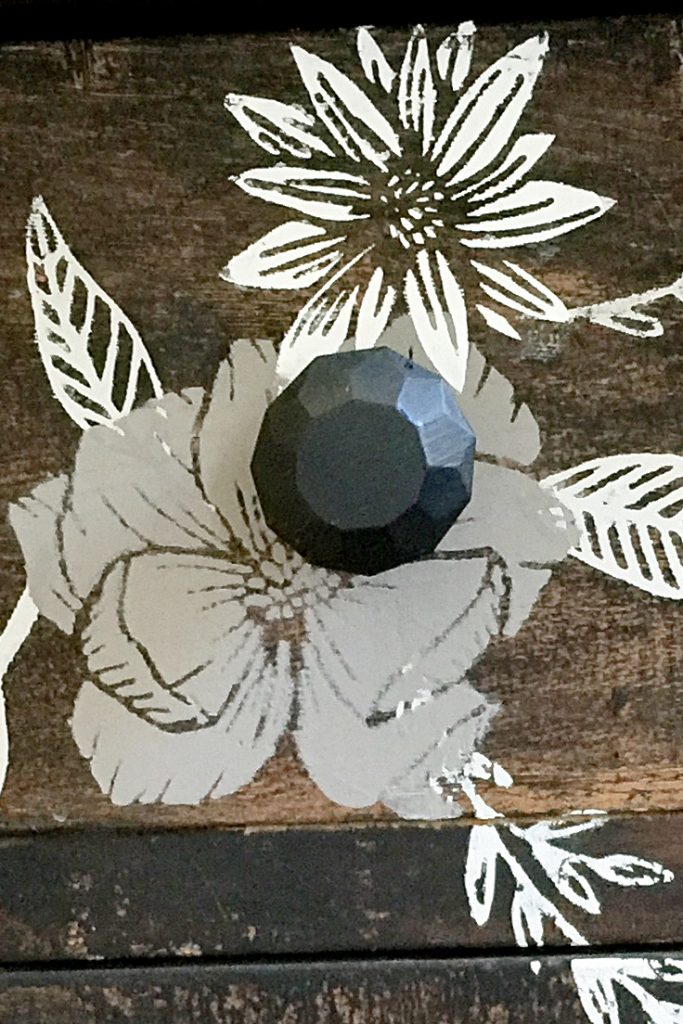
This is about an EASY technique. No hand painting, no glue, no mess! So, I used Chalk Couture. If you haven’t heard about Chalk Couture take a moment and read the how to use Chalk Couture post. I’ll wait.

Shop for supplies
I used four other colors, but I suggest you pick your favorite colors to add flowers on your dresser.
I did the project in the flesh on Facebook. It was a mistake. I jump in without thinking it through. Bad lighting, too much jumping around, way too long and I kept the dogs in the room. More on that below.
Here’s what I should have done.
- Light one area of the dresser.
- Only film one area. Do the other areas before filming and show the finished dresser at the end.
- Remove the dogs from the room.
Directions
Plan where you want your cluster of flowers on furniture piece. I suggest an odd amount of clusters. One, three, five, etc.
Start with leaves you want to peek from under the flowers. You can overlap the chalkology paste when the bottom layer dries. The paste dries fast.
Fill in with flowers applying larger flowers first. I worked from the largest flowers down to the smallest. It’s easier to tuck in smaller flowers than a big one.
Fill in with a few more leaves. A couple of leaves now overlapped petals of flowers.
Most important, have fun.
The big mistake I did was to try applying the flowers LIVE on Facebook with two dogs “helping.”
This is just a few things that can go wrong when you’re LIVE on Facebook with two dogs “helping!”
- The dog’s tail will fan across the wet paint or chalk in my case.
- They will start playing which in their case means growling, biting, and running into the tripod holding the phone.
- One tries to lick the artwork.
- The other runs away with the roll of paper towels.
- One sees the open container of wet chalk paste and takes a lick, then the other one doesn’t want to miss a treat and takes a lick before you can grab the container.
I might have said a bad word, but the two of them got their mouth washed out with soap!
So, save your sanity and keep the dogs out of the room.
(by the way, they were okay and actually got very little in their mouth)

Now for the kids…let them in to help! Chalk Couture is fun for kids. And better than crayon flowers on furniture!
And you’ll have a beautiful wonky dresser to store your favorite t-shirt.
Please tell me you have a wonky dresser too!
Let me know in comments below or tag me @countrydesignstyle on Instagram.