
Wood Tags and NO Headaches!

These wood tags saved me from a massive headache. The knot on top of the head kind of headache.

I was developing a habit in my little workshop that could lead to dangerous situation.
Before it turned ugly, I decided to DO something about it.
Click to read on about the wood tags….
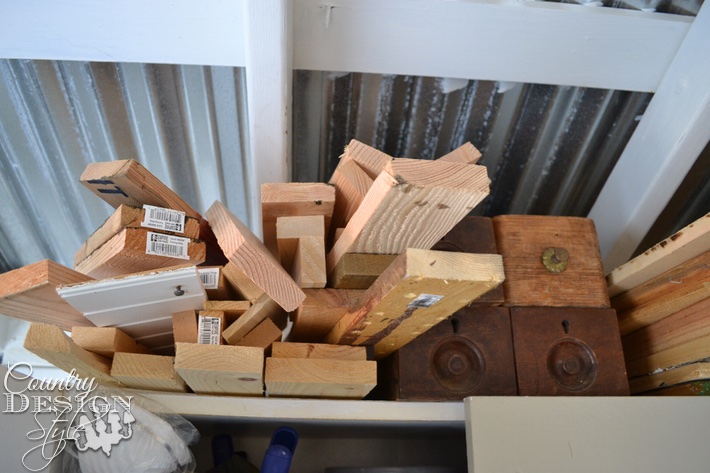
Here’s my bad habit. Haphazardly stacking scrap wood on top of a 6 foot cabinet.
Just waiting to fall on my head.
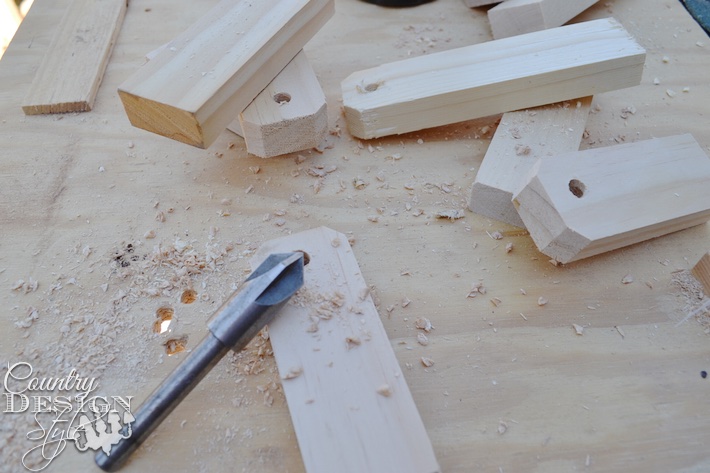
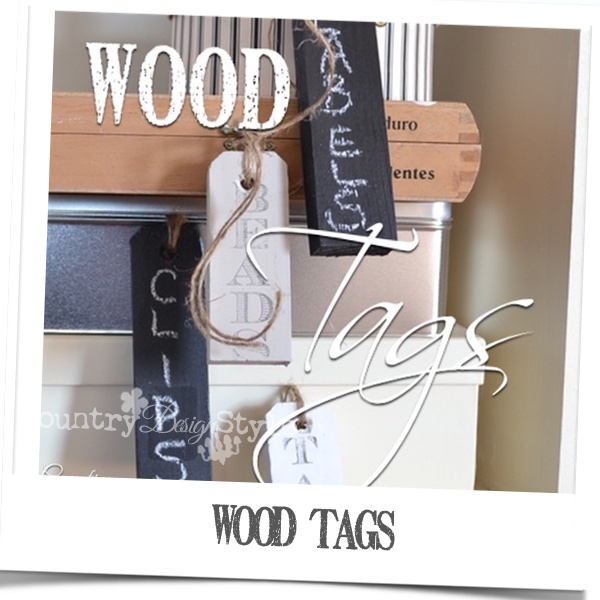
So I pulled all the leftover scrap bits down and made wood tags with all the 1 by 2 pieces. Fun chunky wood tags. The bit above is a countersink my dad gave to me. It added a nice detail to the hole for twine.

Out of all the 1 by 2 scraps I got 9 chunky wood tags. I didn’t worry about the length. Some are short, some are the same size and some are long. Six tags were painted with three colors of chalky paint and three painted with chalkboard paint.
To label the painted tags I used the freezer paper technique. Did you know freezer paper comes in 8 1/2 by 11 sheets!!!
You can read the steps to transfer prints to painted wood here.
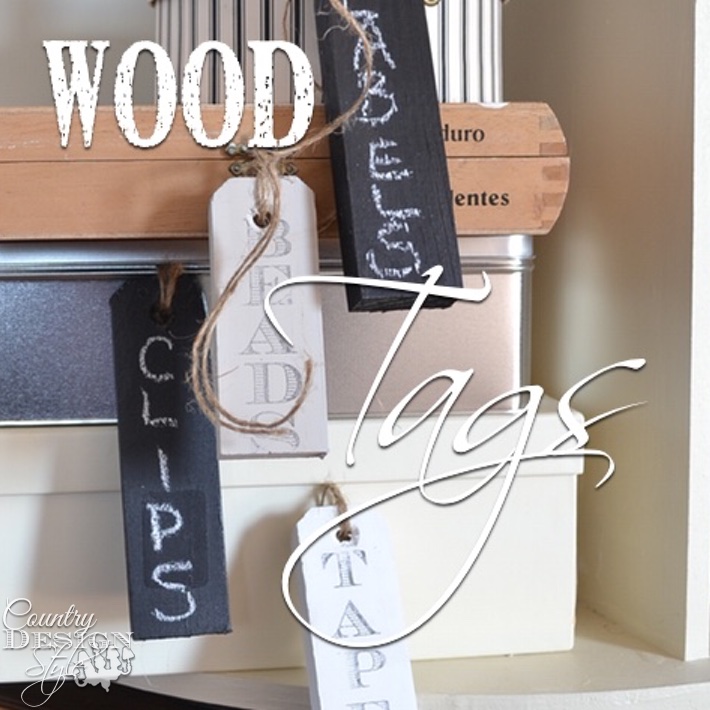
I used chalk to label the chalkboard tags.

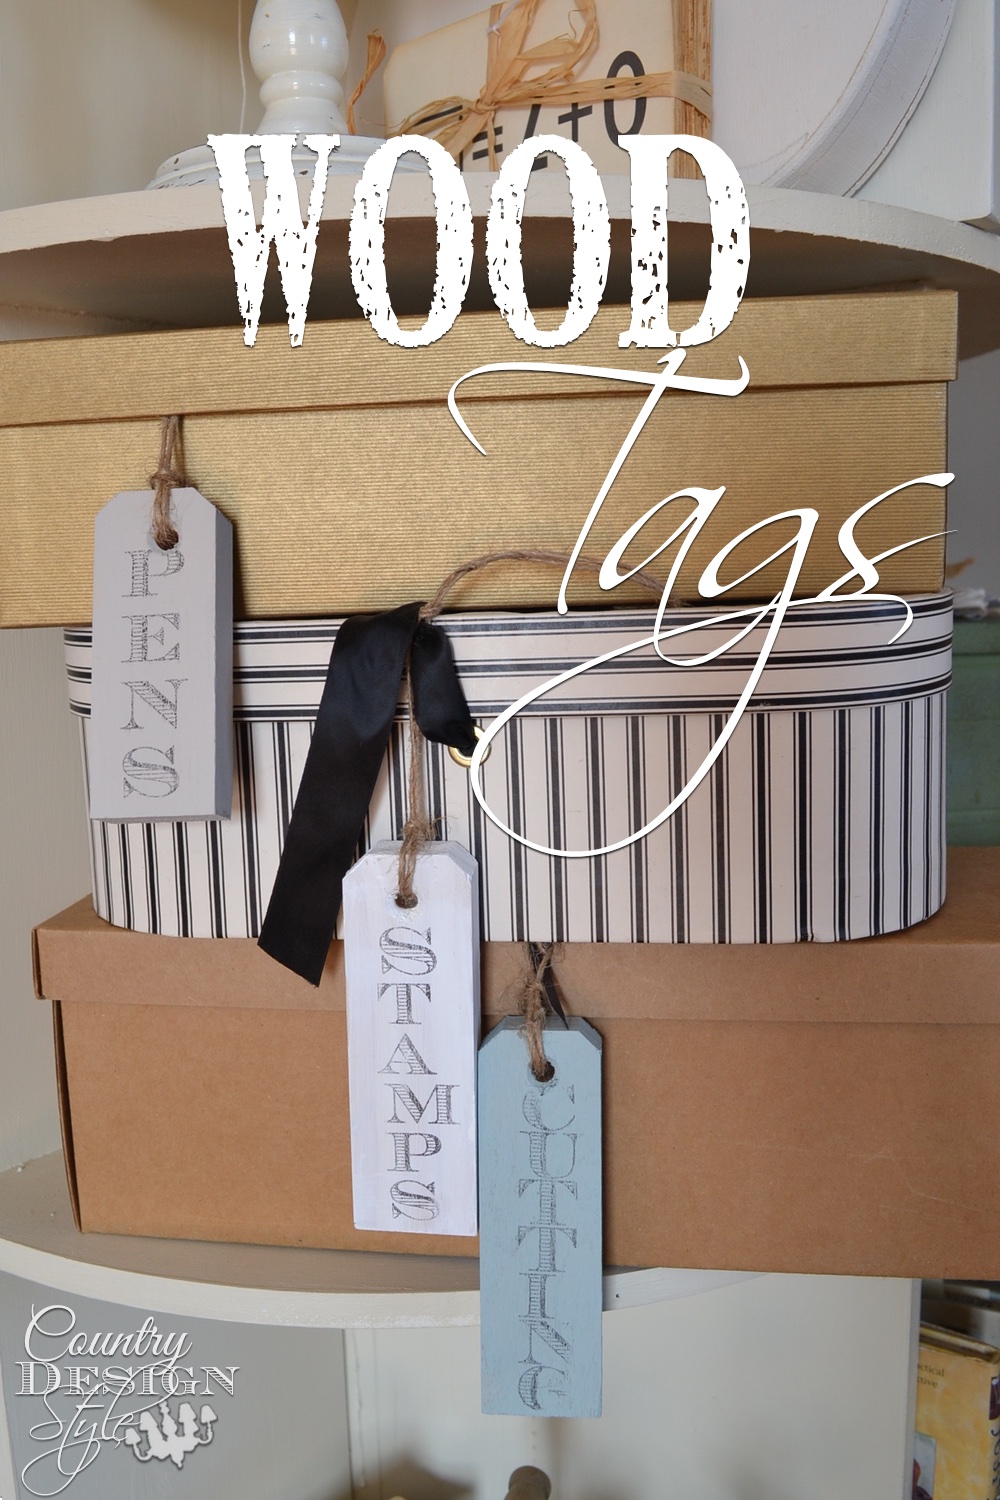
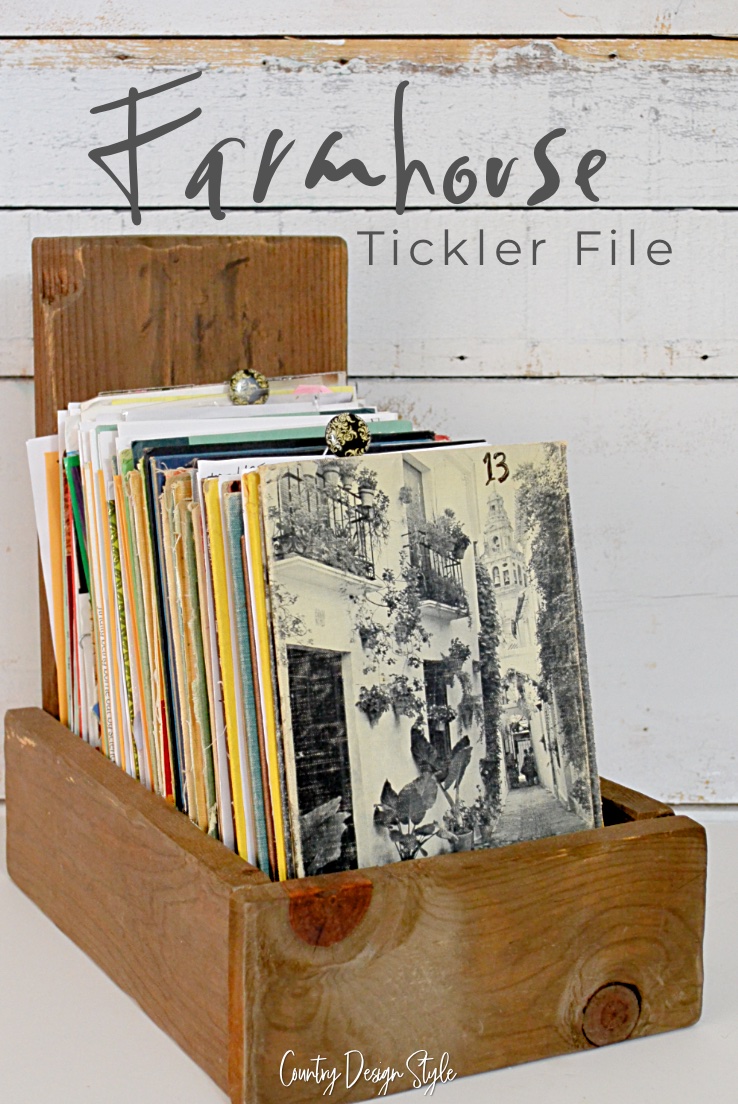
I have a collection of boxes made from cardboard, tin and wood. I filled them with crafting supplies then tied on the label with twine.

I stacked the various boxes on my revolving bookcase in the craft area upstairs.
Now I just hope the stacked boxes don’t fall on my head!
Did you notice the other sizes of wood stacked on that cabinet??
Next post is the other organizational project for the craft area.
Have you tried the freezer paper transfer yet?? For subscribers to Country Design Style, we are having a LIVE demo on the transfer technique this summer. Make sure to subscribe below if you’re not receiving posts in your inbox!!


How did you make the revolving bookcase
Jennifer, here’s the link to the steps I took to make the revolving bookcase. I was inspired by one at Pottery barn. https://countrydesignstyle.com/revolving-bookcase/
Thank you Jeanette! I have a countersink and never thought to use it to finish empty holes – just screw holes! I love that revolving bookshelf with decorated boxes and the tags just fit right into the scheme!
Thanks Andi, and the best part of the rotating bookcase…I can hide the ugly stuff in the back!!!! ~Jeanette
How cool! I have bought a roll of freezer paper to try this technique with but didn’t know they came in 8×11 sheets! That is awesome! And I LOVE your rotating craft shelf- gonna check that out too!
Laura, freezer paper in 8 1/2 by 11 sheets is the bomb! It always took me forever to get the roll paper to lay flat and feed into the printer. Jeanette