
Create this Windmill wall decor easily
How you can make windmill wall decor without a lot of bucks. Take the kiddos crayons…

We think of coloring as a childhood activity. This crayon art is a grown-up version that might end up over the mantel instead of under a magnet on the fridge.
I do many live videos to demonstrate DIY home decor projects. Over the years, I learned to test the idea before going live. My first attempt at this idea was a total fail while live on the internet.
The idea for this was placemats we made in Girl Scouts. It starts with wax paper on an ironing board. Then, adding broken pieces of crayons on top. Then another piece of wax paper over the crayons. We used an iron to melt the crayons and wax paper together into a placemat.
My first attempt was the same, but I added a piece of burlap. I hoped to melt the crayons just enough to adhere to the burlap. But the iron gets too hot, and they melt and then don’t stay within my lines. Instead of a Christmas tree, I got a big blob of gloopy goo.
This post contains affiliate links. As an Amazon Associate I earn from qualifying purchases. Click here to read my full disclosure policy.
Don’t have a Prime membership? What are you waiting for?
Click to Start your Amazon Prime 30-Day Free Trial now!
I was more determined than ever to figure out a way to make this and get the desired effect. Now I’ve got it, I’ve made a cool windmill wall decor.
Windmill wall decor instructions
Start with a basic shape. Coloring books for youngsters is a great place to find a basic form.
Materials needed:
- A piece of burlap {mine is 12 by 14}
- A bit of 1/2 plywood cut about an inch more than the burlap
- Paint for the plywood. {I used chalk-based paint in parchment}
- White craft glue
- Glue Brush
- Pencil to draw your basic shape
- A box of crayons in one color {you can buy boxes of one color online at Amazon}
- Large butchers knife
- Cutting board or scrap piece of wood {do not use your food cutting board}
- Craft heat gun
- Craft spray glue
Prepare the board
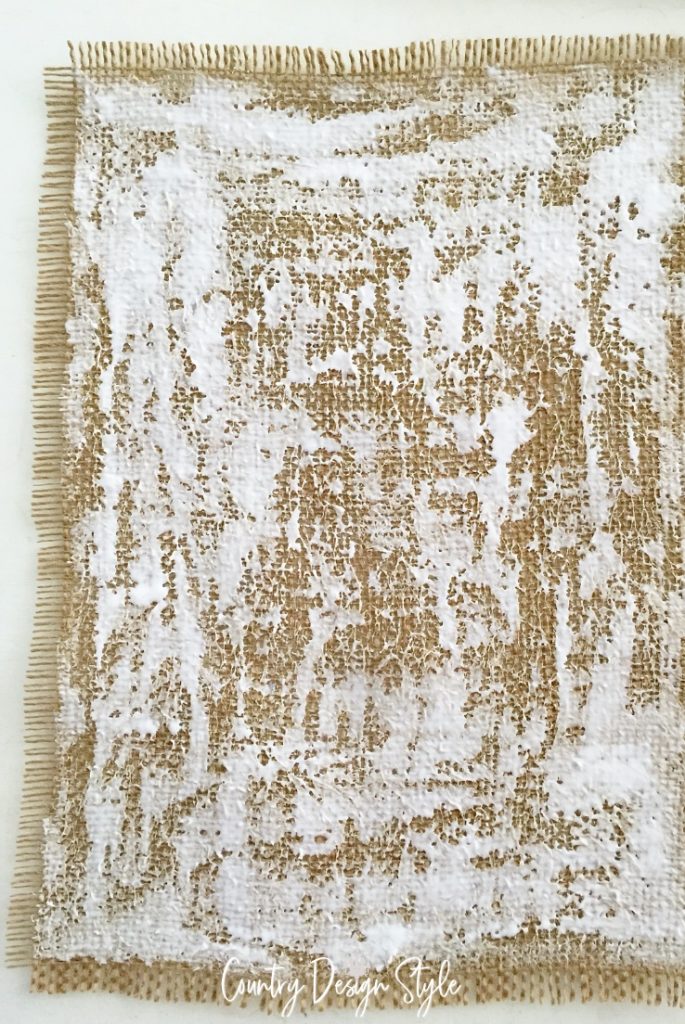
Paint the plywood with two coats of paint, letting it dry thoroughly between coats. Do realize the paint color will show slightly between the thread of burlap.
Cut the burlap to size. Then remove 3 or 4 threads from each side. Removing the threads gives a frayed look to the edges.
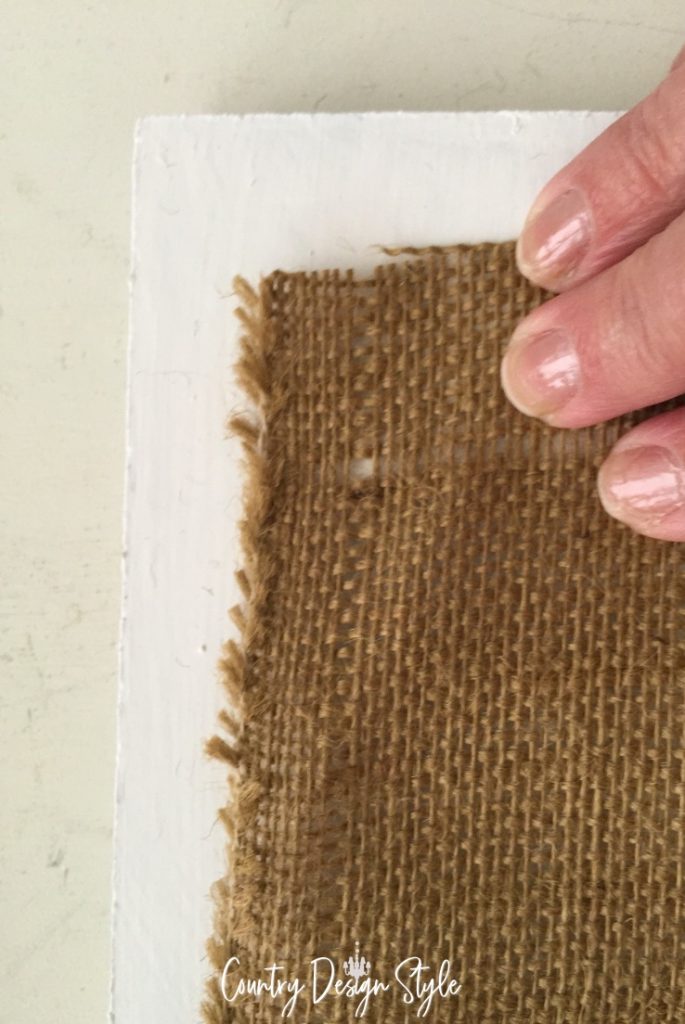
Apply a thin, even coat of tacky craft glue on one side of the burlap. Then center on the plywood and smooth down any lumps. Make sure the edges are straight on all four sides. Let dry.
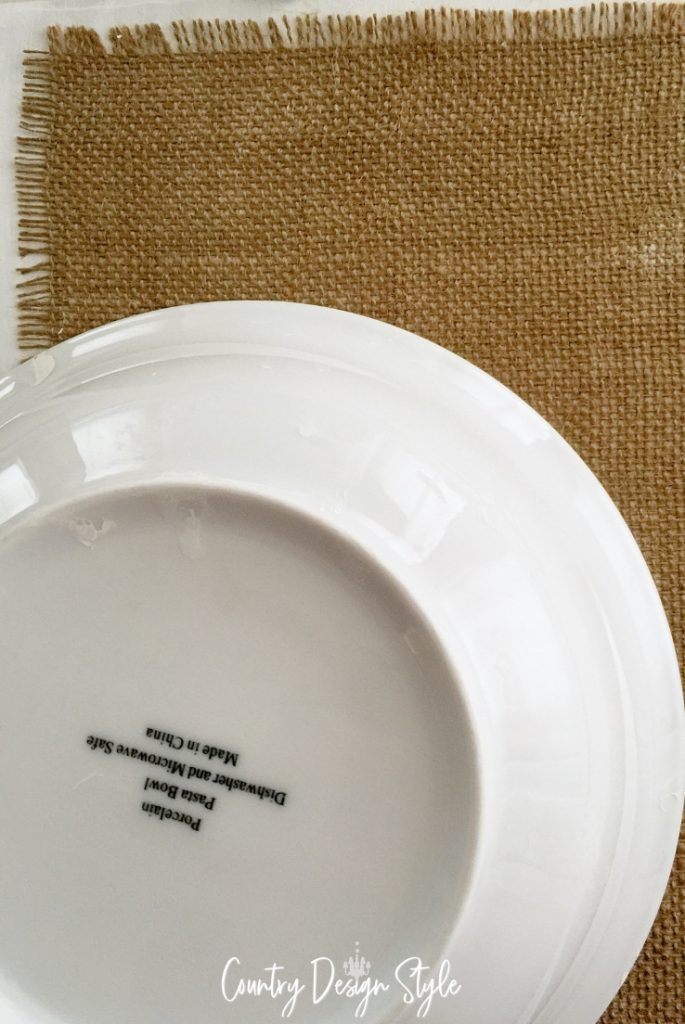
Use the pencil to draw the shape lightly on the burlap. Use a plate to help make a circle.

Add marks like a clock to make the windmill blades. Windmill wall decor turns out best when you use basic shapes.
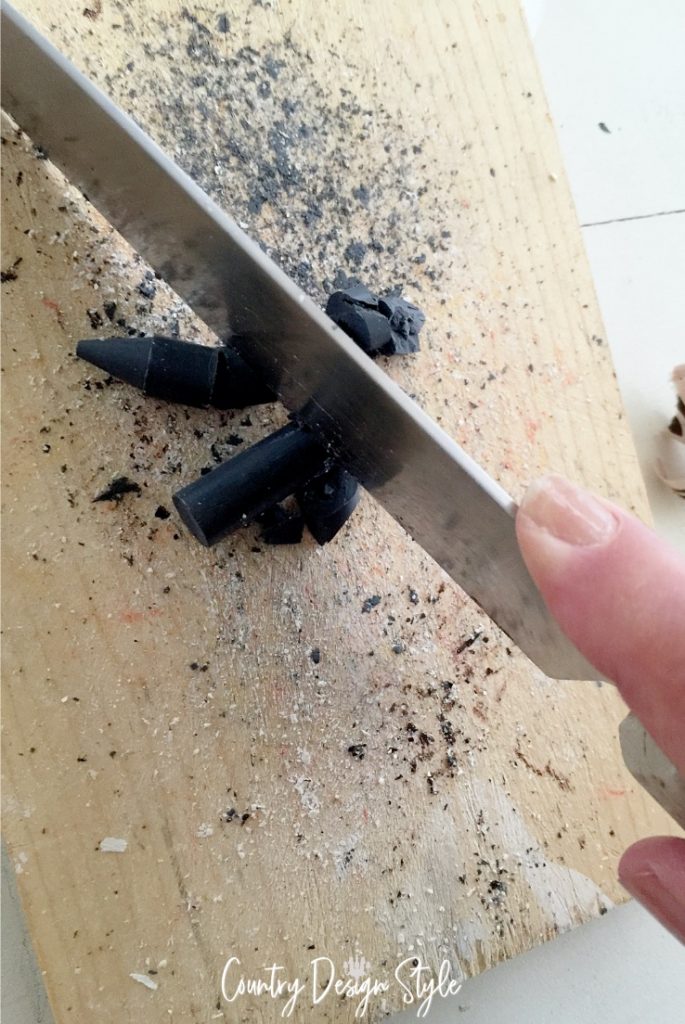
Chop crayons
Remove the paper from a crayon and start chopping like you would chop carrots. Leave the tip of the knife on the cutting board and hold it in place with your open palm. Then use your other hand to cut. The rocking motion makes chopping easier.
Continue chopping crayons until they are pea-sized or smaller.
Take the board and burlap outside to spray lightly with spray glue. This extra step helps hold the bottom layer of crayons in place while blowing heat over them.

Sprinkle crayons
Start sprinkling your crayon bits in your windmill fan blade shapes. Make sure to create an even layer of crayons on the burlap.
This is the point where I’m thinking, “the windmill wall decor such a fun project!”
After your form has an even layer of crayon pieces to the edge of your pencil lines, you’re ready to melt the pieces.
Melt crayons
Turn on the craft heat gun. Hold the heat gun, pointing straight down away from the art piece. Then slowly move over the crayons, staying about 12-inches over the work. Continue moving the heat until they start to melt.

The crayons will quickly melt onto the burlap. Work slowly by areas, keeping in mind crayons melt fast.

Tips I’ve learned
Don’t leave the heat over one area too long, or the crayons will melt into an oily puddle.
Don’t use a hairdryer!! A hairdryer doesn’t get hot enough but has more wind power than craft heat guns. A blowdryer will send bits of crayons across the room!
The basic idea is to melt the crayons into the burlap but still keep the bumpiness of the top crayons.

Have a few extra crayons to add to areas if needed.
Use a small artist paintbrush to move pieces that get away from you, not your fingers. Remember, the crayons may be hot.

The finished windmill.

The windmill wall decor among my other windmill art items.
The little windmill on the table is a kit. I came in the box that’s framed in the long black frame. Someday, I may try this wooden windmill kit.
The other framed windmill was found in a vintage store.
More projects like the windmill wall decor
Besides the farmhouse windmill wall decor, these are other crayon art pieces I’ve done: a white pumpkin that’s perfect for your neutral fall decor.
We can’t have Christmas without this little crayon Christmas tree. I adore the silver glitter of the star.
Do you remember the sound of crayons as you move your fingers through them, looking for the perfect color?
The old windmill and the cellar are the only things left from my grandparent’s farm. The farm was sold and eventually resold into lots. But those memories remain.


I would have loved to see this on a wall.
Thank you, Sandra, for pointing it out. I simply forgot to add them. They are included now. Blogging is hard! 😉