How’s your TV hanging?
How’s your TV hanging?
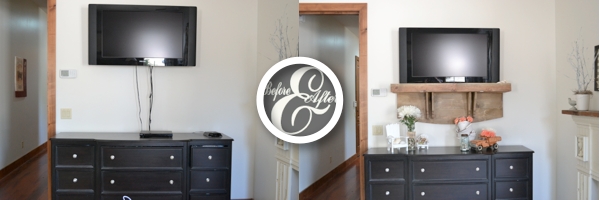
Our TV in our bedroom was hanging in the middle of the wall with the wires exposed. Exposed unless I hid them behind a tall vase or something. Even with the wires inside the wall, I don’t usually like the TV to be hanging in the middle of the wall. It’s okay in a streamlined, modern space, but that’s not our home. Plus there’s a cable box and DVD player to contend with.
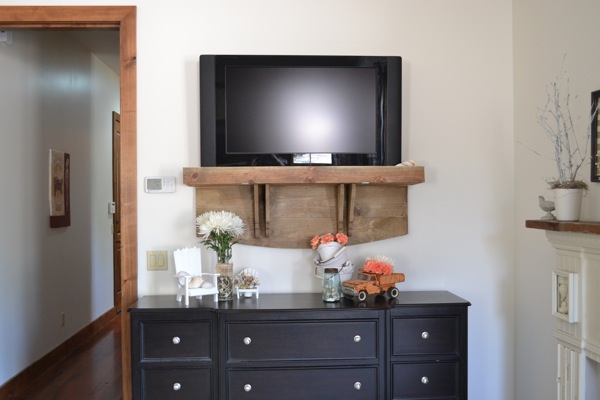
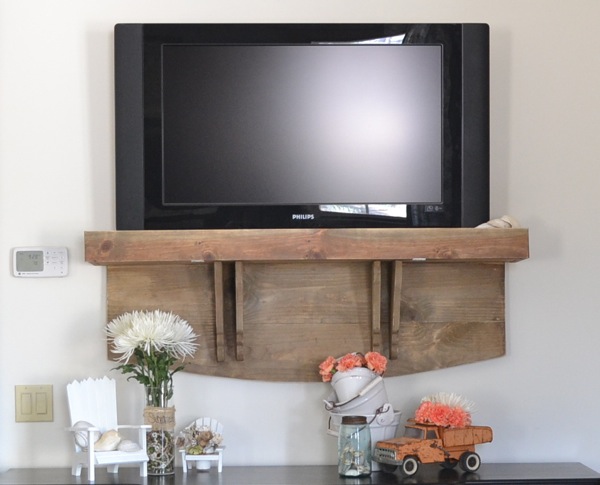
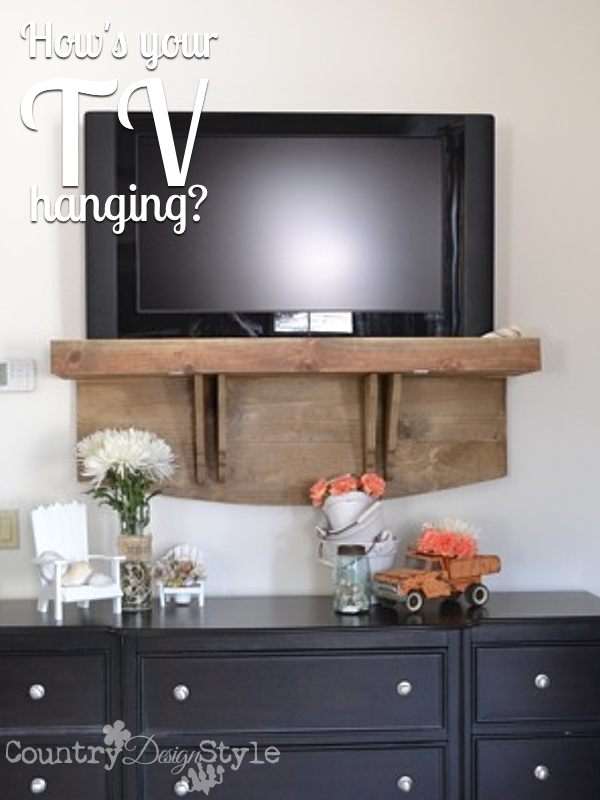
So my answer was to make a shelf that hangs just under the TV. The TV is still hanging on the wall with one of those tvhangingcontraptions.
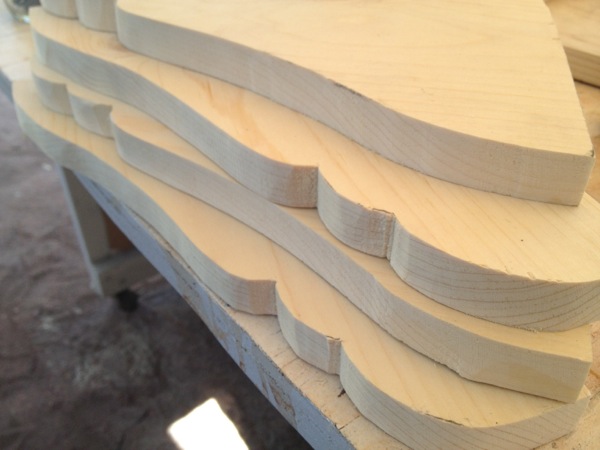
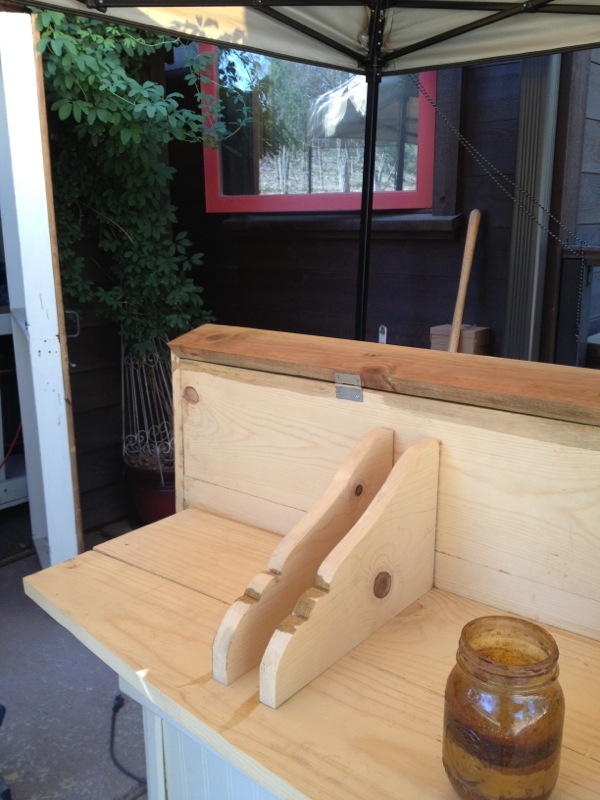
I drew a simple bracket shape on one board. Cut it out and drew the shape on three other boards. Here’s a stack of rough cut brackets waiting to be sanded.
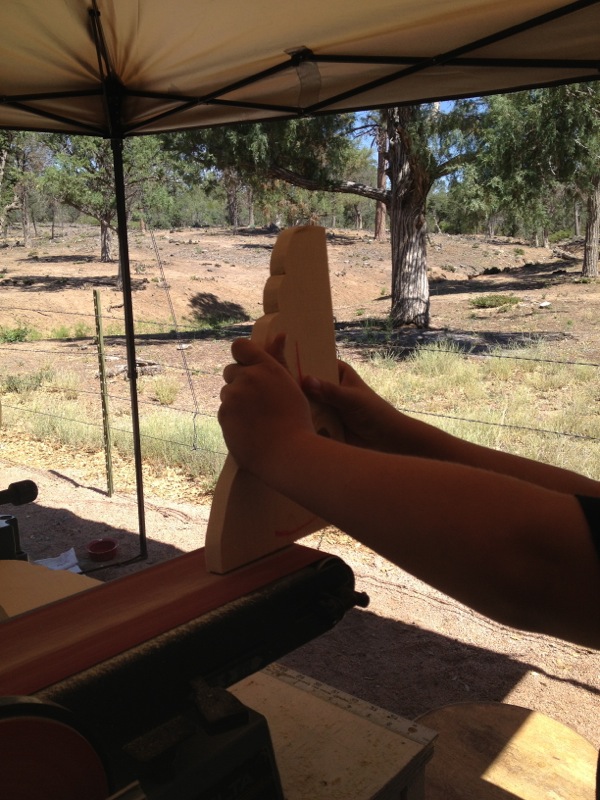
Our grandson is visiting for a few weeks this summer, so I had a helper. Here’s he’s sanding the brackets we cut out with the jigsaw.
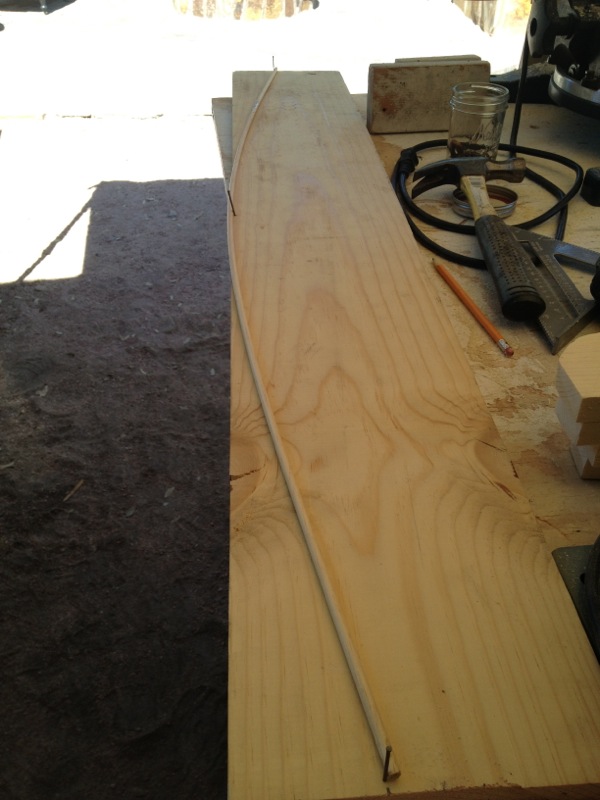
The bottom of the shelf needed something…a soft curve? I nailed two small nails along the board edge about two inches from the bottom, and one nail in the center on the bottom edge. Then using a 1/4 inch dowel I placed it on top of the nails on the end and below the nail on center. Then drew the curve to cut out with the jigsaw.
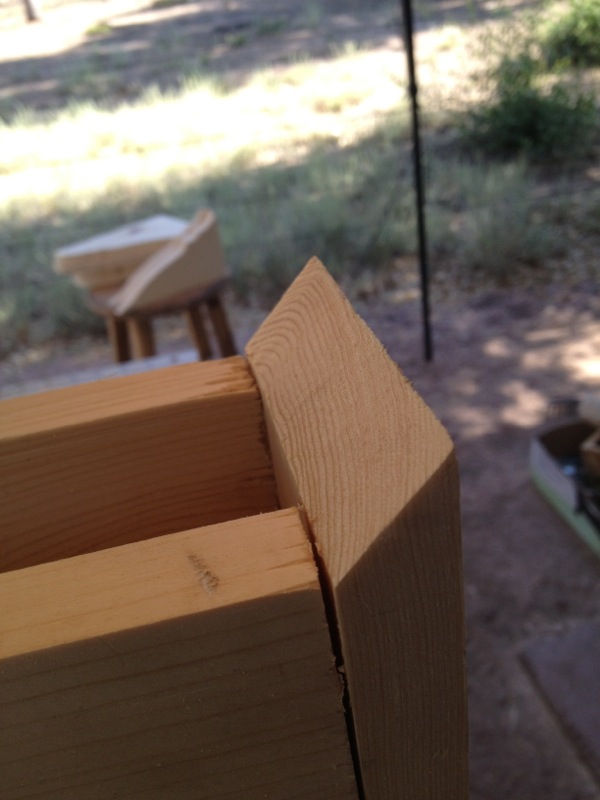
I wanted the shelf to look thick, but open up so the remote works when we’re watching TV. So the shelf part is actually a long box. Above shows the side with a 45 degree cut. The “door” will sit into this 45 degree cut. As least that’s what I’m hoping for!
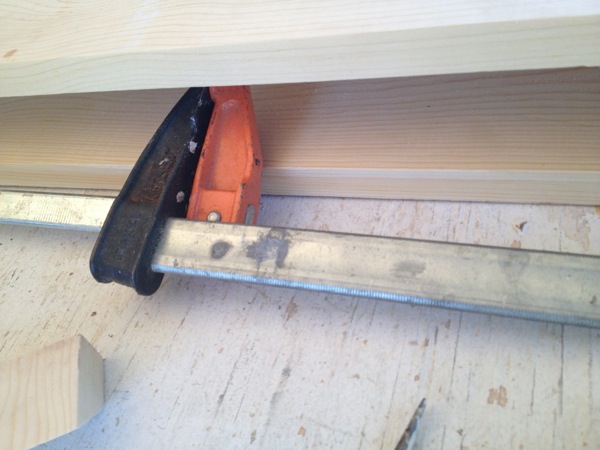
The long box is 4 feet long and I don’t have clamps that reach that long, so here’s a tip. Extend your longest clamp all the way and lay in place. Then hook another clamp into the head and tighten.
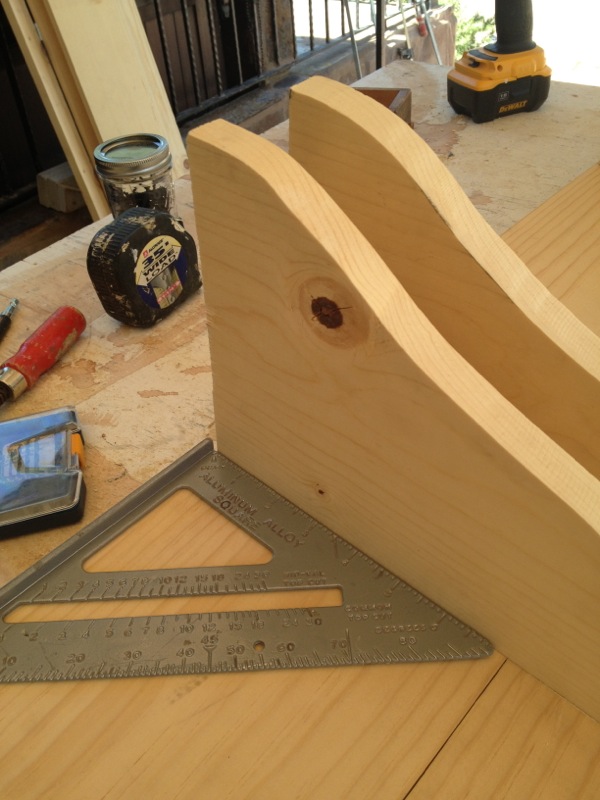
We used a carpenters square to lay out the brackets.
Next the box was attached and the “door.” I introduced our grandson to the new wood to barn wood technique. He wasn’t fond of the vinegar smell, but he did like the technique.
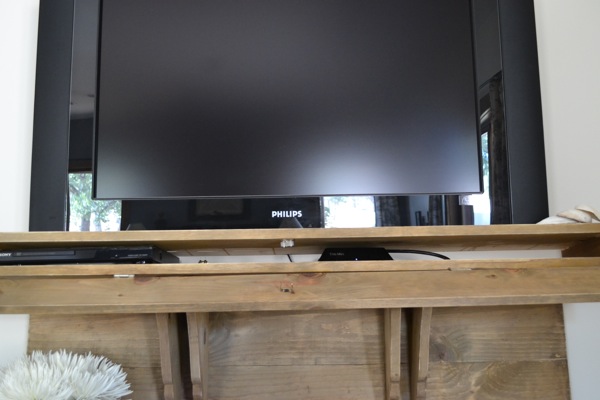
We hung the shelf directly under the TV. Above shows the “door” open and the cable and DVD boxes. I routed the wires inside the wall for about 24 inches behind the shelf to behind the dresser.
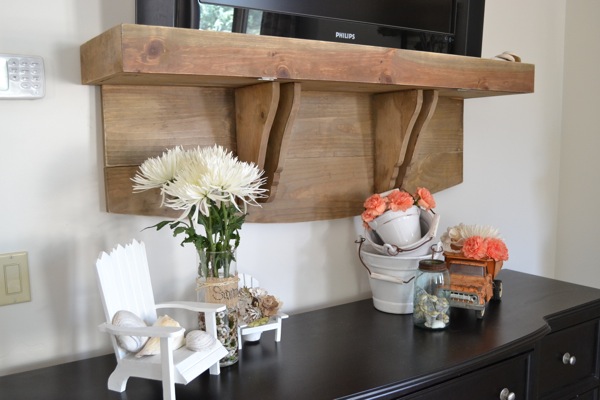
We decorated the dresser for summer with sea shells, wood thrift store beach chairs, my favorite toy dump truck, a stack of beach buckets, and fresh flowers.
Now we need to watch an old Gidget movie!
Love the rustic look mixed between the black TV and dresser.
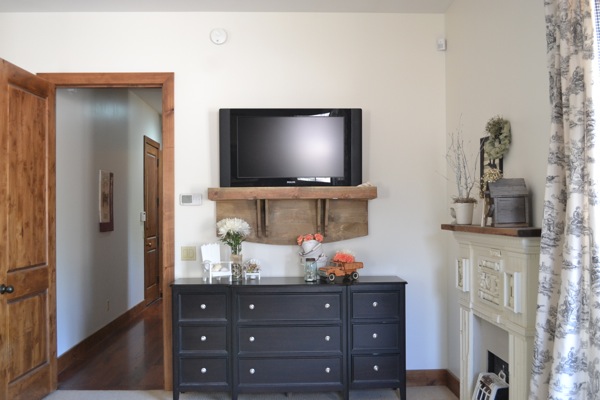
That’s one corner of our bedroom. Notice the faux mantle it’s made from scrap wood? You can read about how I hid the cable box in the living room too.
Let me know in comments how your TV is hanging.
To see more Rustic Style check these project out.
Join the newsletter

Subscribe to get our DIY HelpLetter each Thursday. Plus grab your Interior Decorating Ideas e-book.





We are going to make this come this weekend. How did you mount the shelf to the wall? We are beginners… any other tips for this project?
Nicole, I so excited! This is a great beginner project. Just to be clear, the TV is not actually sitting on the shelf. The TV is still hanging on the wall with one of those TV holder thingys. The shelf ended up being hung right up under the TV by screwing from the front side straight through to studs. I started to hang the shelf iwith two large heavy duty “D” that are attached to the inside of the bottom shelf! Hope that makes sense. Then I hung two large flush hooks into the studs. The problem was the shelf was about 1/4 inch below the TV. That bothered me, so that’s when I moved it up the 1/4 inch to the bottom to the TV and then drilled through with large 3 inch screws. The screw heads are actually showing under the shelf but you can barely see them.
I would love a picture of your shelf when you’re finished. Please let me know if you have any other questions. ~Jeanette
Jeanette, I love how you made it look like a mantle. Absolutely adorable. Thanks for sharing at Throwback Thursday!!
xoxo
Denyse
Our bedroom TV above in mounted 63″ from the floor to the bottom of the TV. We do have a very high bed that sits 12 feet away. It would be uncomfortable to watch with the TV any lower. We have our living room TV over the fireplace. It would not be my first choice, but the cable outlet is actually in rock of the mantel. The mantel is 56″ high and the sofa sits 10 feet away. It’s not uncomfortable for us and we usually sit in our chairs which sit even closer. Try putting a picture or even newspaper the size of your TV where you want the TV to get an idea if it will be comfortable.
How high is your TV mounted? Is that a comfortable height for viewing? My hubs wants to mount the TV over the fireplace, but I think it might be too high there.
Hey Jeanette!
LOVE THIS!!! I have a tiny house and my dresser has turned into the TV ‘holder’…needless to say it looks horrible and cluttered! I’m going to have to give this a try 😉 By the way, while looking at your tutorial I noticed the trees in the background…sure did look familiar till I checked out your ‘about me’ page….hello fellow ‘Zonie’!!! 😉
Hi Tiffany and a new “zonie” reader. Wahoo! It’s funny I have so few readers that live in Arizona. I would love to see a picture when you get your tv arranged. 😉
I love this! I think it’s just what I’m looking for but I’m still a borderline beginner with my wood projects. What kind of wood did you use (and how thick)? and did you do a 45 degree cut on all sides of the opening door or just the sides?
Thanks!
Ann, thank you. I used 1 by 8 and 1 by 4 pine boards to build the shelf. The “shelf” part the hides the cable boxes has no back so the 45 degree cuts were only on the two sides on the front. I left the back open for cable wires. Let me know if that made sense!
So cool! And, it will always be special to you, because of the help from your grandson. I love the weathered look – it just pops! Awesome… as always! 🙂
Thank you Heather!
such a fun project Jeanette. I especially like the door concealing gizmos … and love to see classic techniques like the bending the stick (cpvc works well too) between the nails to get a smooth curved radius trick. Well done.
Thank you jb! Coming from Building Moxie that’s an awesome compliment!
sheer brilliance!!!!! I love it! I can’t wait to show this to The Husband 🙂
xoxoxo
I’m pinning and shouting about it too! I love it that much xo
Thank you Robin so much. Your kind words thrilled my grandson:)