
Floor Mirrors
Floor mirrors are expensive! Would you like to learn how to make your own cheaper? Read on.

I love them and how they open up a room.
Although I’m not a thereisamirrorgottocheckmyhair kind of person.
Because my hair is usually covered in sawdust!
I wanted two large mirrors to lean against a wall.
This post contains affiliate links. I will make a commission for your purchase at no extra cost to you. Think of it as a friend letting you know where I found a product I use, love or want. Click here to read my full disclosure policy.
Mirrors similar to this Pottery Barn Benchwright Floor Mirror.
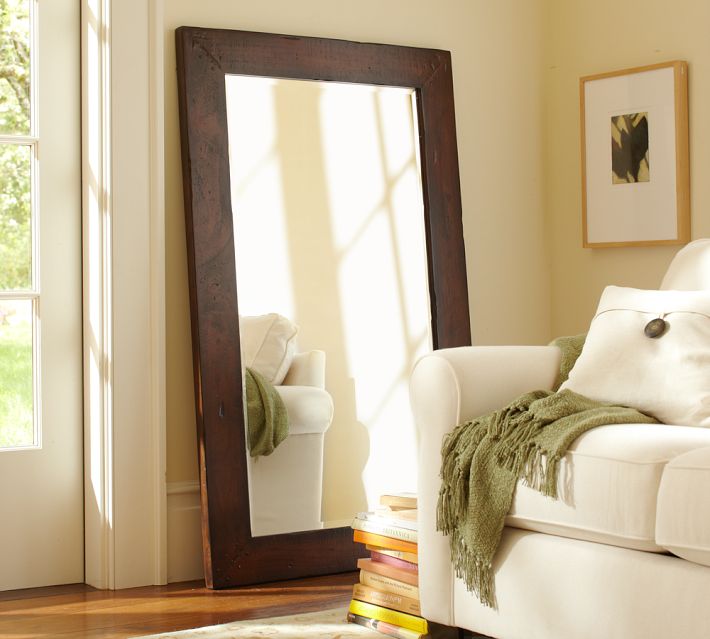
Stunning isn’t it!
This could be a matter of which came first…I saw the Pottery Barn Floor Mirror and I had already made one. Actually two!
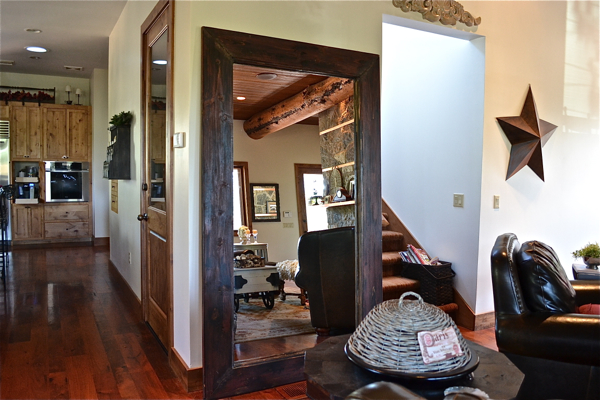
Here’s the one in the living room.

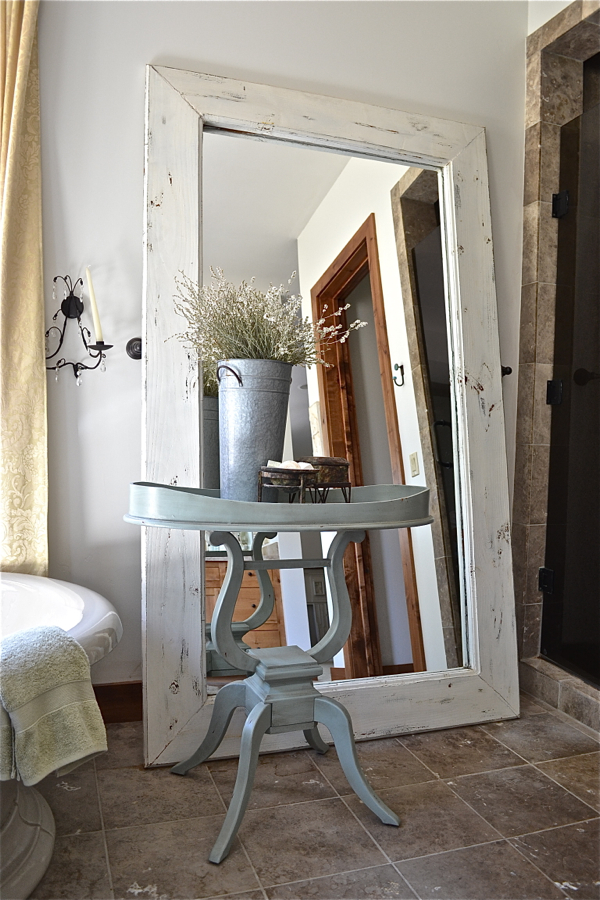
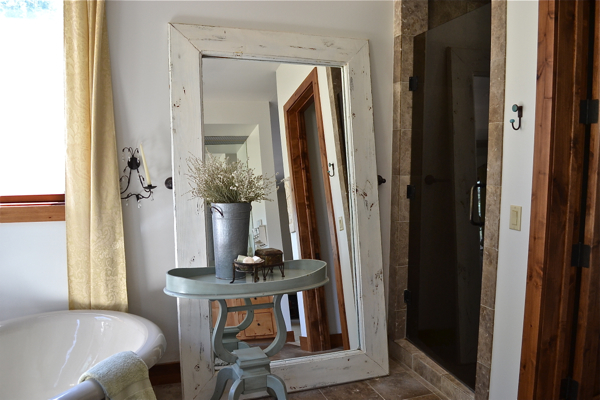
 And here’s the one in the master bath.
Here’s how I made the mirrors
I found two closet sliding mirror doors at a yard sale both for $15. Large mirrors are usually easy to find at restores too. The sliding closet doors have silver or gold metal all around the edges. I used a screwdriver and removed the screws from each corner and was left with two mirrors 3 feet wide by 6 feet high. The mirrors were made in our driveway…it was way HOT and I didn’t take pictures along the way:(
At our local lumberyard, I purchase four 2 by 8 boards and four 2 by 6 boards, plus two 4 x 8 sheets of 1/8″ hardboard. {It’s cheaper than plywood.} Still, I spent $90. I had the paint.

Along one side of each board, I routered a 1/4″ rabbited edge to insert the mirror.
On the other side I a routered decorative edge on both sides. The beaded edge is my favorite decorative edge.
Next, I mitered the boards just like making a frame. Only on a huge scale!!!
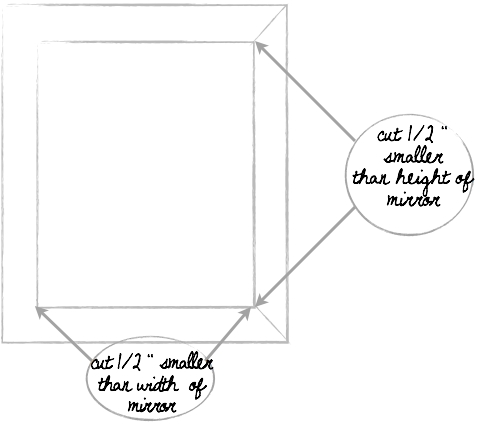
The mitered edge was 5′ 11 1/2″ to insert the mirror. Basically, the inside edge of the frame needs to be 1/2 inch smaller than the mirror to keep the mirror from falling out!
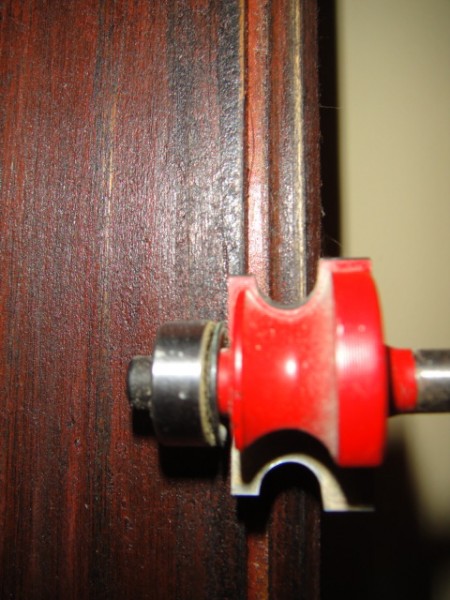
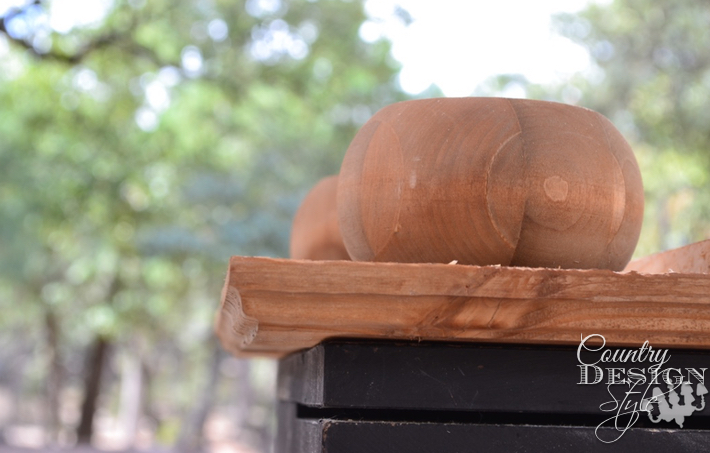
Dowels
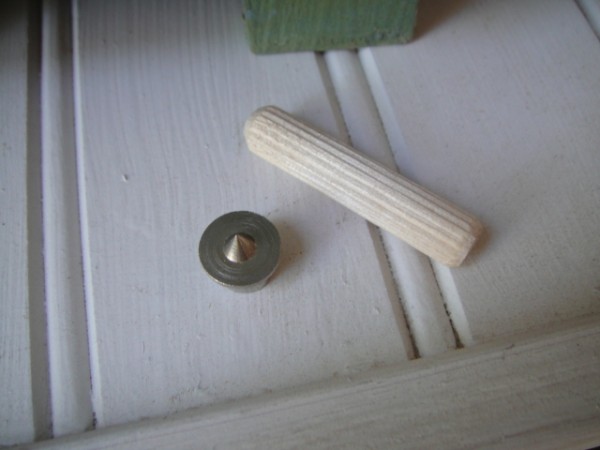
The silver dowel centers above help in the layout.
 The dowels are drilled into the mitered cut. To use the dowel centers drill a hole the size of our dowel into the center of the cut. Drill down half the length of the dowel. Insert the dowel center then line up you miter cuts with the next board and press together. The dowel center will leave a mark. Then drill at the markdown half the length of the dowel.
To assemble I glue dowels and loads of Elmer’s max wood glue in each corner.
After all the glue dries. I added the mirror with help from “my guy”, didn’t want to break a mirror this large!
While it was still laying in the driveway I screw the hardboard onto the back that was cut to 4′ by 7′. I used screws instead of a hammer and nails. Hammers and mirrors don’t go well together. Especially mirrors lying in the driveway.
I painted one very patchy with almost black {mix 2 parts black with 1 part dark forest green}, dark brown, and reddish brown. Sanded, then stained with a dark stain. The other was covered in knothole areas and the edges with Bri~wax in Tudor brown and painted a creamy white, sanded and distress quite a bit.
I spent $105 on my two mirrors. The Pottery Barn Benchwright Floor Mirror is $499. {Which is a great price!}
I found this collection of floor mirrors on Amazon. Making this large mirror is challenging.

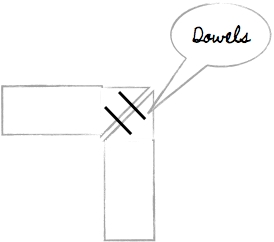
Leaning Mirror Tip
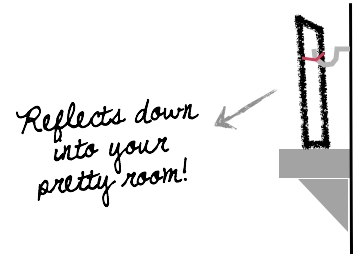
Mirror tip: Carefully place mirrors in a room making sure what the mirror reflects is something you actually want to see. The problem with leaning a mirror on a mantle is it will reflect the ceiling! To overcome this layer something in front. The mirror still reflects light into the room. Another fix, drawn above, is to anchor the mirror to lean a bit forward. Then it will reflect your pretty room.
If you’re enjoying reading my ramblings on decorating, you might enjoy grabbing my Interior Decorating Ideas e-book. It’s free!

Here are a few reviews of the book.
- Excellent! Simple and easy to read and it all made sense. Well done. Sandra C.
- Not your basic decorating list of do’s and don’ts. I expected to see a bunch of tips I’d heard a million times, but these principles are original and just plain good advice. I recently put together a giant 7ft x 12ft collage wall just using items I loved and had collected over time, and what do you know, they all coordinated beautifully. So I especially agree with tip #1. I live by tip #3 as well, since I don’t like things to look cluttered. Great reminders for adding your own style to your home and making it look good. Jenifer M.
- I love it, it is pretty simple and understandable, it’s a back to basics when our brains are so full of Pinterest ideas that we can’t see clear enough what we really need to achieve ” our very own style”. Andrea G.
I work hard to make myself available to readers the help them decorate their homes. If I lived closer, I’d help paint! 🙂
Join the newsletter

Subscribe to get our DIY HelpLetter each Thursday. Plus grab your Interior Decorating Ideas e-book.


Hi! Love your mirrors! My mirror door is 48 x 94 inches. What size lumber do I need to buy?
Thanks 😊
The cream distressed mirror..did u paint brown first then white?
Yes, I did! Sorry for the delay in replying!
I was thrilled to see your mirrors. I have 2 closet mirrors . Did you say you removed all of the silver metal that frames the glass ? I can’t wait to start my project. Thank you so very much for your tips and advice.
Donna, yes. Just remove all the metal from the mirrors. Do make sure to add a backboard to help support the mirror back.
GORGEOUS!!!!
Thank you, Bethany! They open up the room. Jeanette
Love the mirror and admire your carpentry skills. Just can’t imagine having one in my bathroom! Good for you!!
Lol! Liz, I can turn a blind eye to any mirror no matter it’s size. That gets easier as I get older too! Thank for reading. ~Jeanette
Love your mirror ideas! Thank you so much for taking the time to leave such detailed directions! Will definetly use this!