
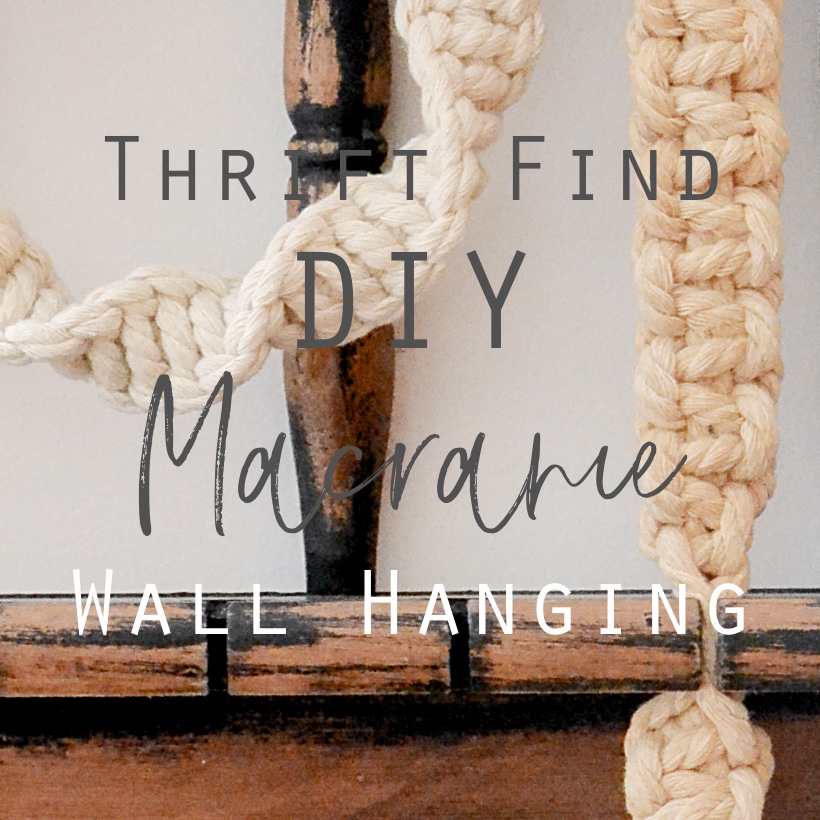
DIY Macrame Wall Hanging
Are you loving the DIY macrame wall hangings on Pinterest, but have no interest in the time to make all those knots? Me either. So I did this instead.
This DIY macrame wall hanging uses only a few knots..and some feathers.
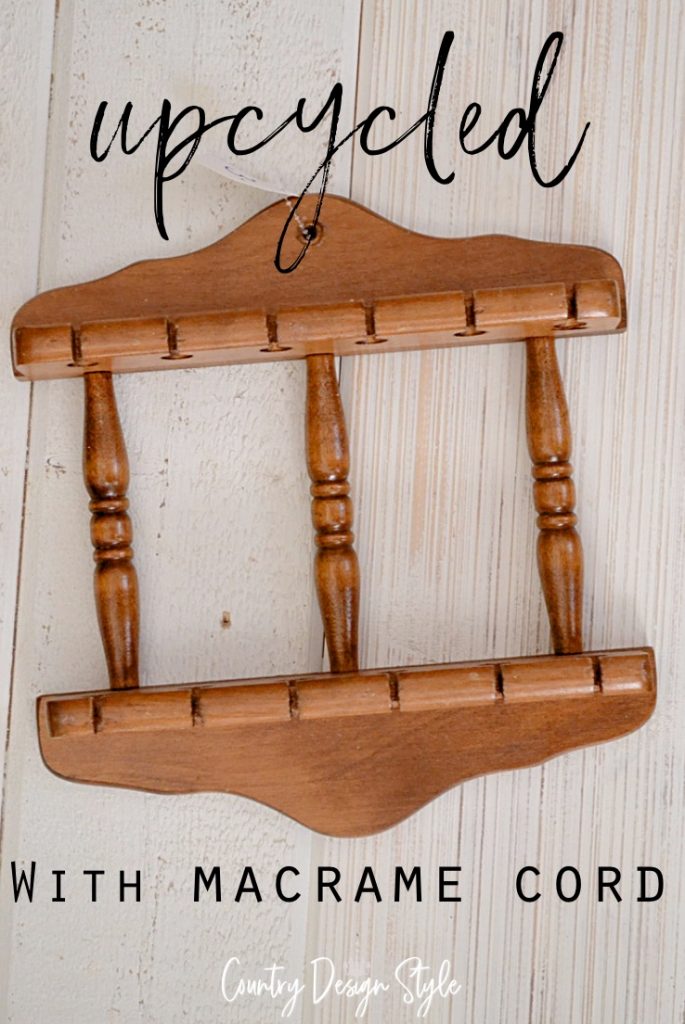
This starts a thrift store spoon holder. Now, I have to admit, this is the second repurpose of the holder. The first idea involved painting it black and using it as a hand towel holder in my craft room. It looked cute, but I rarely used it.
This is why I love creating. If you find you don’t like it or use it, change it.
This post contains affiliate links. As an Amazon Associate I earn from qualifying purchases. Click here to read my full disclosure policy.
Don’t have a Prime membership? What are you waiting for?
Click to Start your Amazon Prime 30-Day Free Trial now!
Wet Sanding Chalk-Based Paint
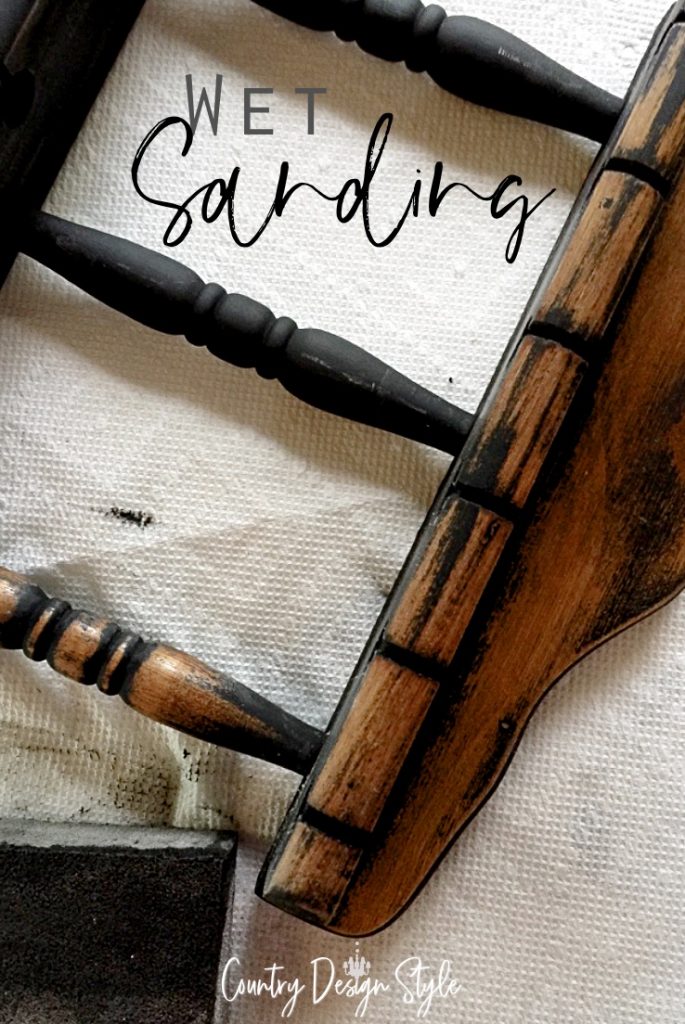
To bring back the wood and still leave the black paint in the grooves, I decided to wet sand the paint. I used a sanding sponge with a medium grit of 240. Wet sanding is just as it says. Wet the sanding sponge with water, and sand as you normally would.
Be aware, this is a messy job, but the softness of the paint that’s left is awesome! Use an old rag that you never will use again to clean up the holder.
The last time I created a macrame project, I was wearing bell-bottoms with a headband and flowers in my hair. Well, most liking, no flowers, but very sure I was wearing bell-bottoms.
Cutting the macrame cords
I used this 5 mm macrame cord to create my wall hanging.
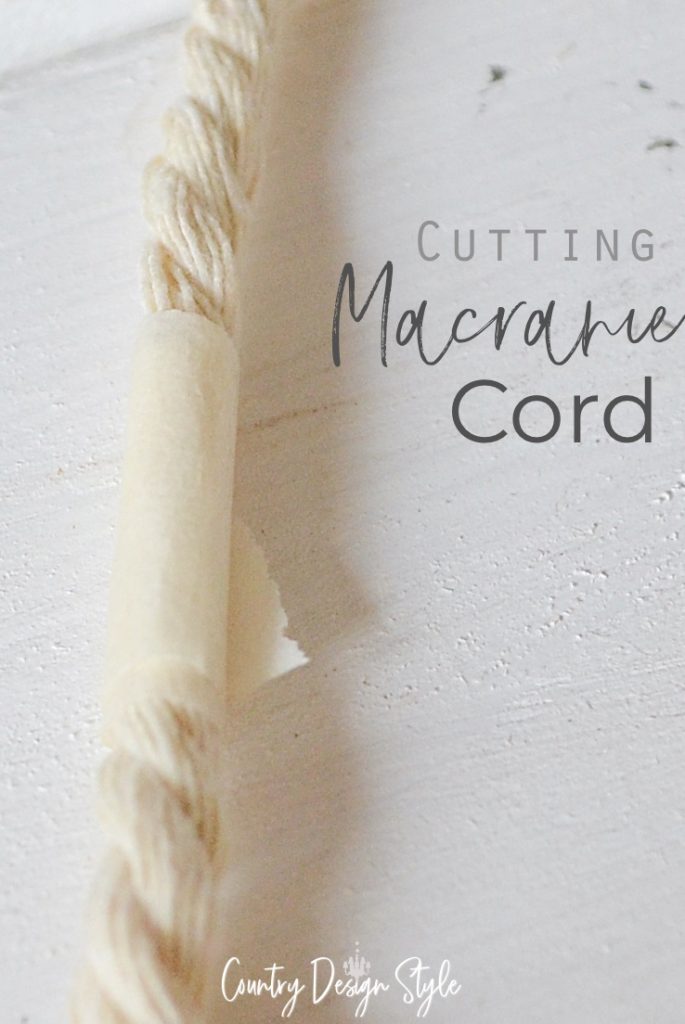
I remembered using masking tape to cut the macrame cord. This keeps the cord from unraveling too much.
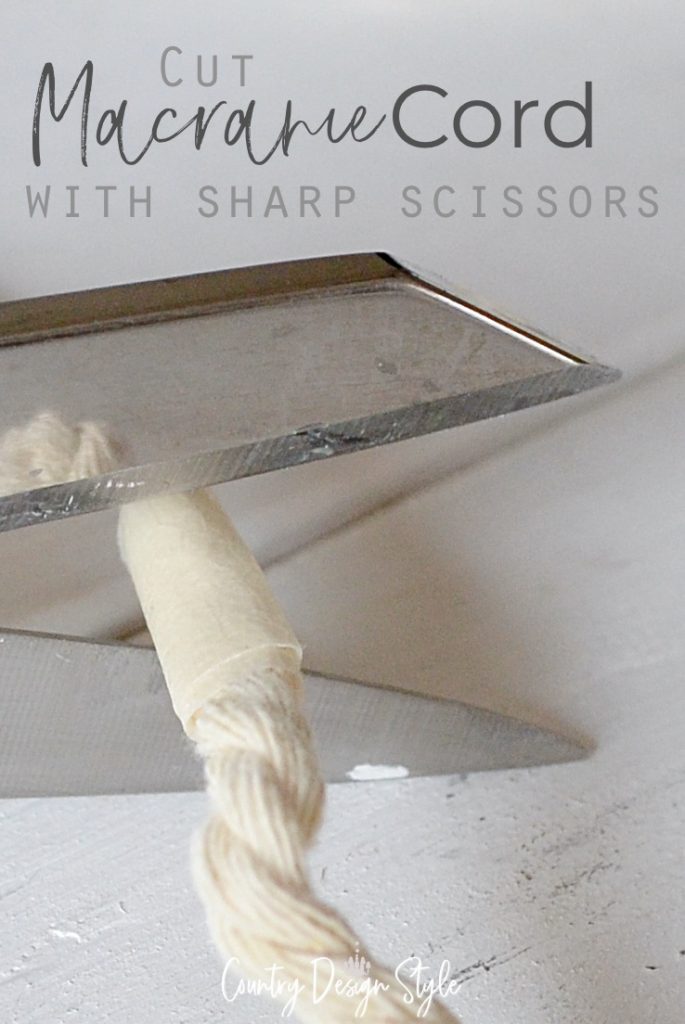
Cut right through the masking tape and leave the tape in place while tying the knots.
Tea Dyeing the Cord

I decided to tea dye 14 feet of cord with tea. This is how I did it.
- Cut the cord to length. Make sure to leave the tape pieces on the end.
- Boil 2 cups water.
- Add 2 tea bags into a glass or metal container.
- Pour water over bags and let steep for 1 minute.
- Remove the tea bags.
- Dampen the cord with water, then add to the tea.
- Leave in the tea overnight.
- The next morning, squeeze out tea and hang outside to dry.
Top Knot
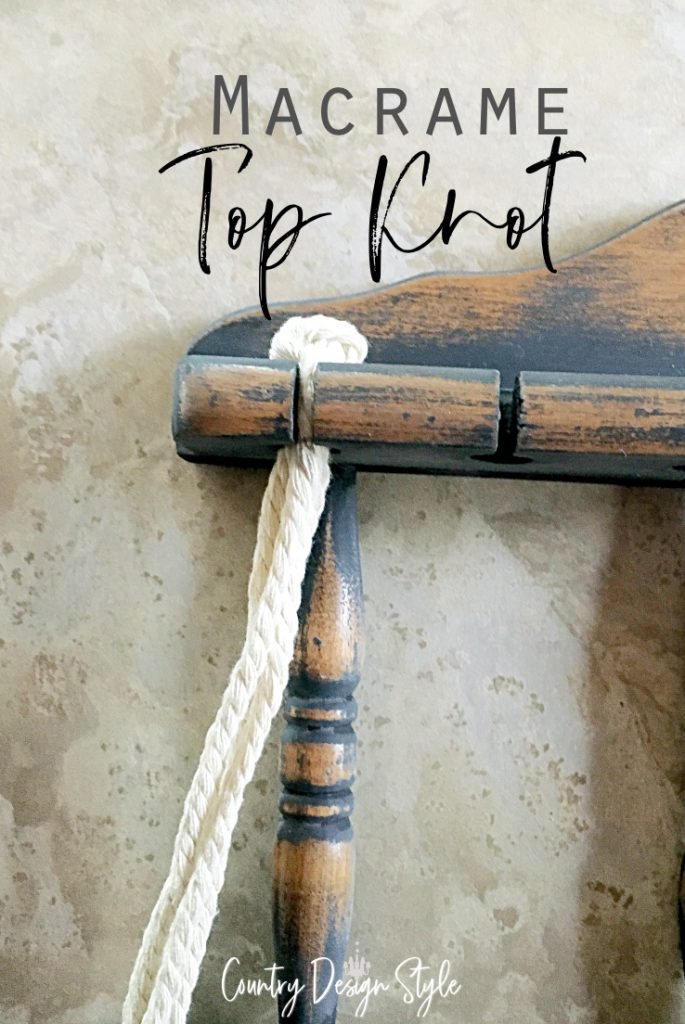
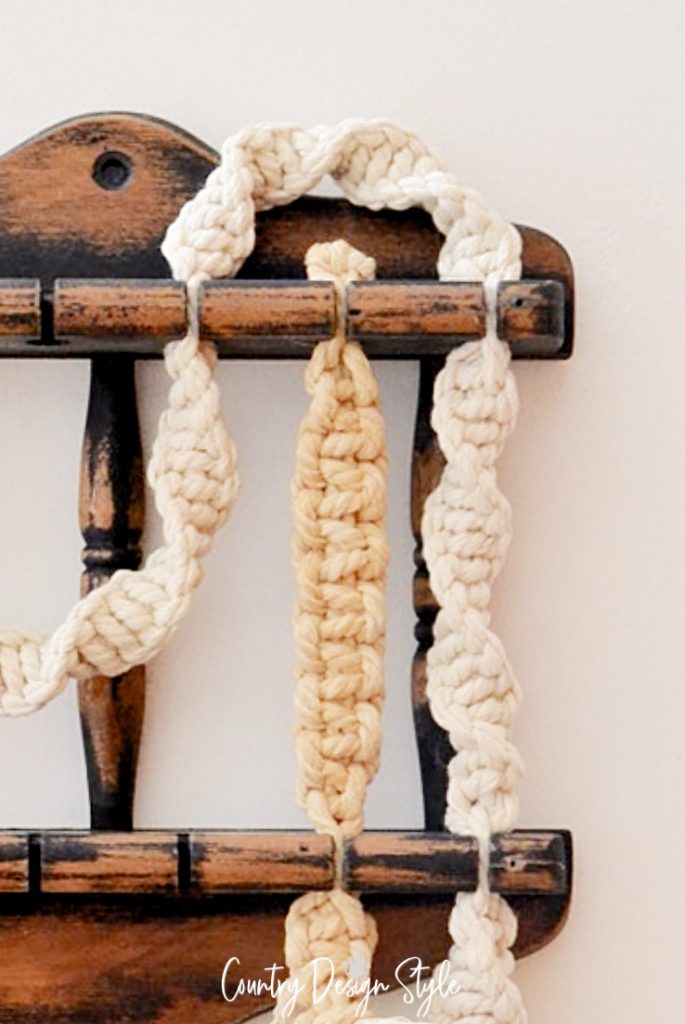
Most macrame projects start with a hitch knot. But I’m sliding the cord into the spoon slots of the holder. I cut two pieces of cord 12 feet long. Then, holding the two pieces together, I made a simple knot in the center. The knot slips into the spoon holder with the four strands hanging down.
Spiral Knot
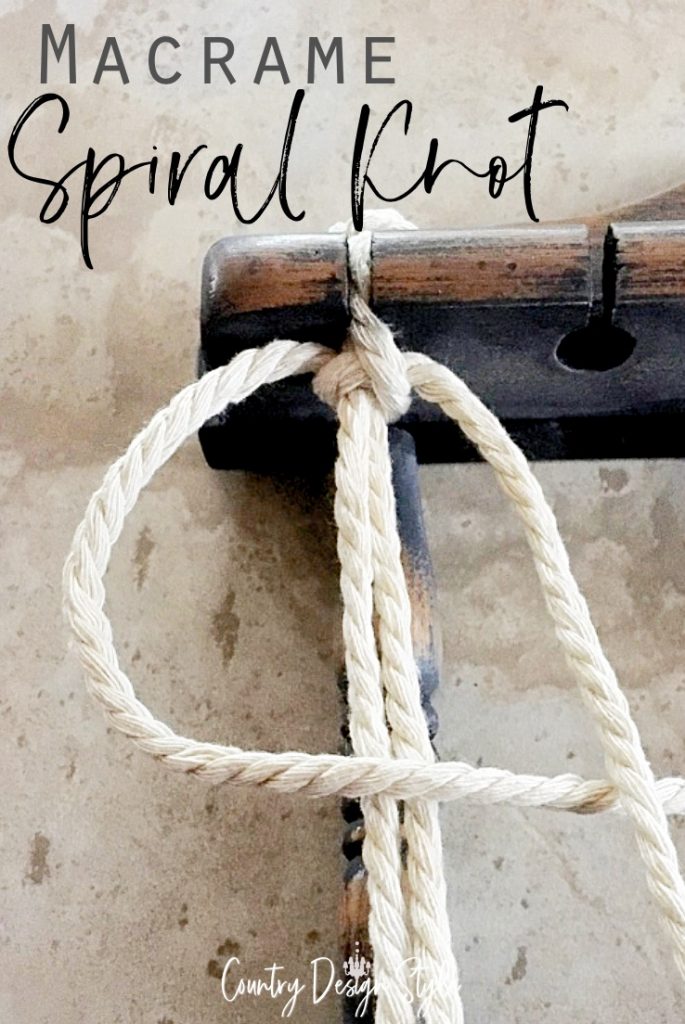
To me, the spiral knot is the easiest. It’s a repeating knot and once you get going it’s hard to stop.
The two center cords are not used in the knotting. The knots are tied around them. You can place the two centers into the bottom spoon holder to hold in place.
The left cord is laid across the center of the two cords. Then the right cord is placed over the left cord. Notice the backward D.
The left cord comes up behind the two center cords and through the D. Then pull the cords up to the top of the two center cords.
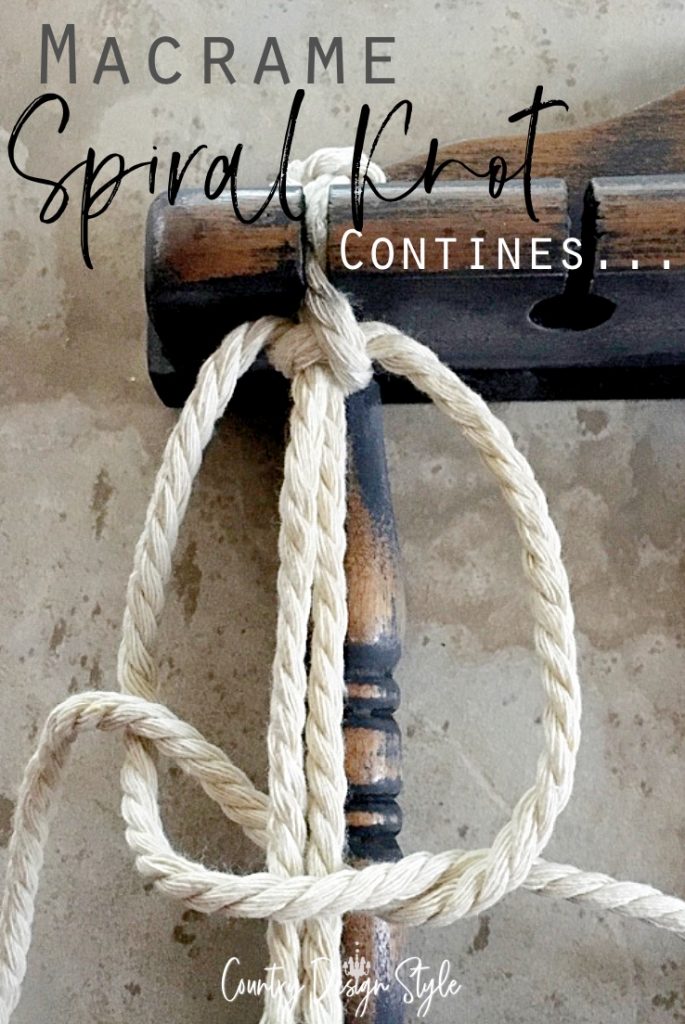
Continue making this same knot down the two center cords.
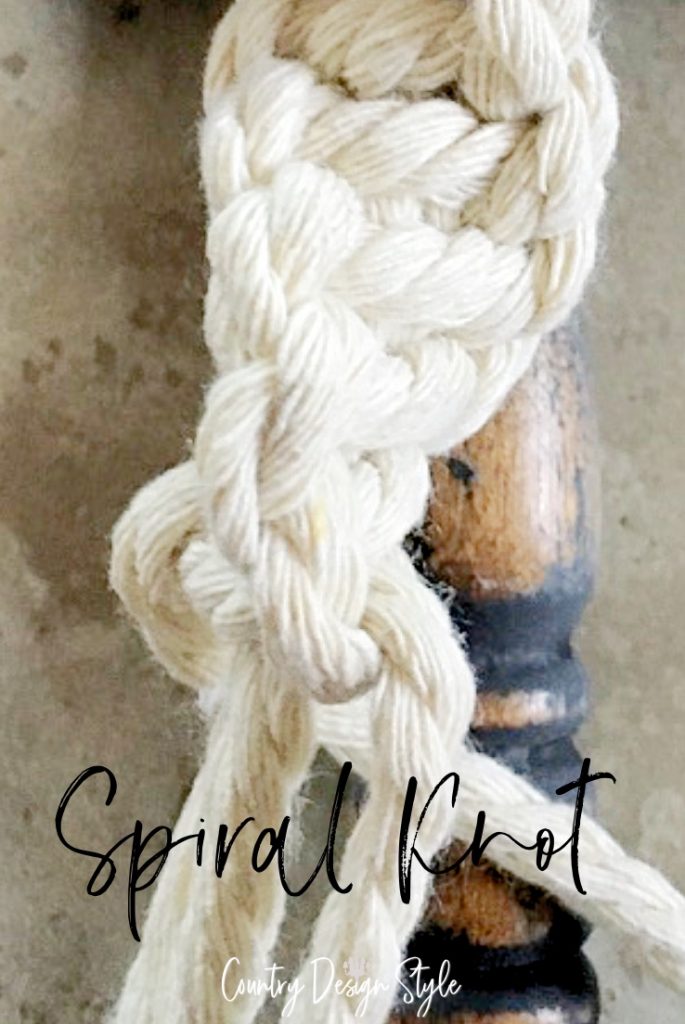
You’ll quickly notice the cords are starting to twist. Continue knotting.
As I neared the bottom, I decided to make a loop. Keep knotting until you can reach another spoon holder slot.
Add all the cords into the slot. Then continue making the spiral knot, but I switched the cords. Knotting shortens the outer cords. So, I placed them as center cords. Continue knotting and small loop.
Slide the cords into another slot and continue the serial knot until you reach the bottom slot.
Slide all four cords into the slot. Leave the extra cords to help tie on the feather.
Macrame hanging square knot
I used the dyed cord for the square knot.
First I cut two 12″ pieces of macrame cord to use as the center cords. Then, cut two pieces 5 feet long. Again, I made a top knot and slide the four cords into a spoon slot.

The square knot is the same as the spiral, except after each knot, the “D” changes sides.
Made a backward D using the left cord, pulling the right cord behind and through the D.
Then make a D using the right cord, pulling the left cord behind and through the D.
Keep repeating down the center cords. At the bottom spoon slot, insert all four cords.
Macrame Feathers
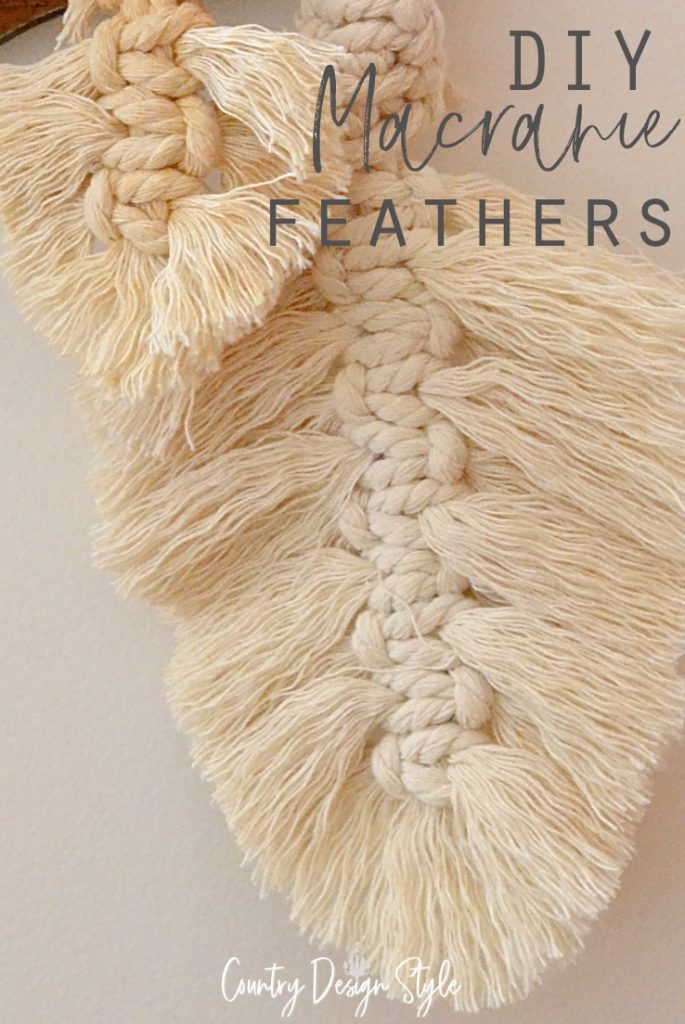
Now for those amazing macrame feathers (which are very easy to make), I’m going to have you pop over to Honestly because her tutorial is amazing.
There are a few things I did differently.
- Mine are small to teensy. It could be the smallest one ever made.
- I didn’t use a fabric stiffener. The rustic look works for me.
- I used a dog brush instead of a cat.
I’ve never made a macrame feather before, but I will make more of them.

To add the feathers, I slid the loop over the cords hanging from the slots. Then I continued tying the knots. Spiral or Square until I reached the feathers.
Update: I created a macrame feather during a Facebook live! Click here to watch the video.

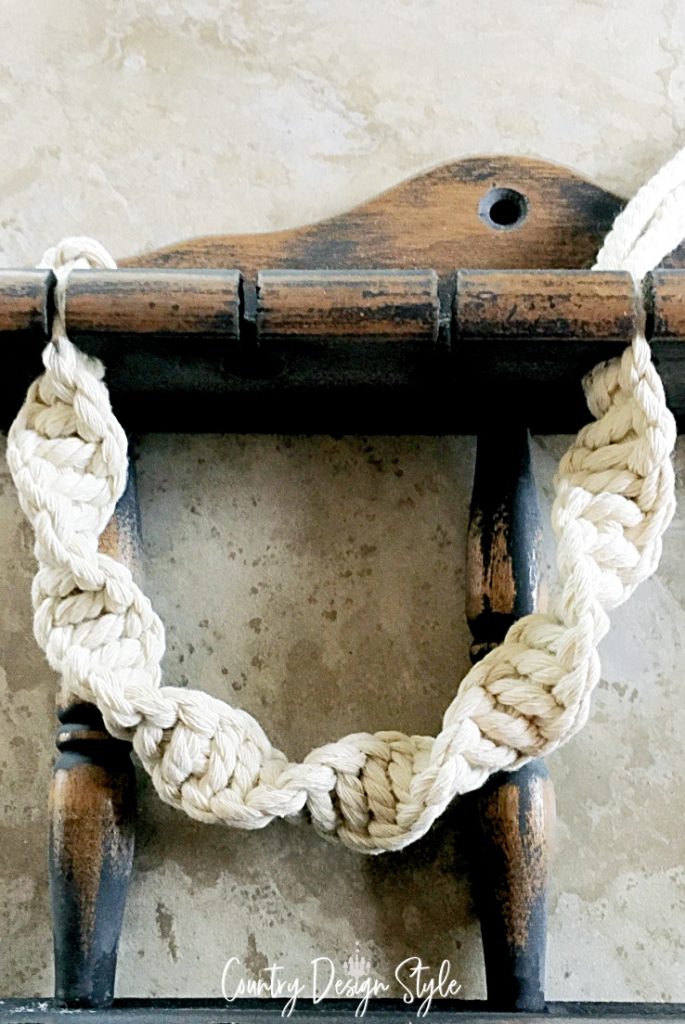
Here’s my final DIY macrame wall hanging with feathers. I’ll be sharing the first project using the spoon holder soon.
In the meantime, you can see the twine wreath that’s another project made with very little work.
If upcycling is your jam, this idea for to upcycle a tin can is popular on Pinterest.


Hello Jeanette…..I have been practicing Larks knot…easy attaching cord to dowels, square knots and double half hitch….it’s still just little bc I have to do on my lap….I’m going to make a bigger one after I can stand! There is a YouTube gal her name is Emily Faith she is a great teacher on this topic…..thank you for sharing this cool feather technique…..hugs, kim
Love this.
I’m thinking a bookmaker with a couple of tiny feathers as a dangle. 😊 I love macrame. Thanks for this post!