How to make an easy DIY chalkboard using scrap wood
Are you a DIYer that doesn’t always follow the DIY rules? You’ve mixed colors to make a “new” color. Use a product in a way different than intended. Or hung something unusual on your wall like a spindle.
Then you will enjoy this project.
DIY Chalkboard
This post contains affiliate links. I will make a commission for your purchase at no extra cost to you. This helps me maintain the website. Thank you for your support. Think of it as a friend letting you know where I found a product I use, love or want. Click here to read my full disclosure policy.
Today I’m going to give you the proper way to make a chalkboard and then some fun improper ways to make a chalkboard.
What is the difference between chalkboard paint and chalk based paint?
Both are flat paint. The difference is chalkboard paint has additives in the paint that give it a very slight roughness to accept chalk. Plus elements that help in erasing chalk over and over again. Chalk-based paint can be used for a chalkboard. It may need to be repainted more often.

How to make a blackboard
The surface of the chalkboard is usually made with a hardboard or MDF product. The surface of these boards is smooth. The first chalkboards were slate.
Cut the surface to fit your frame. Ideas for frames are thrift store frames, kit frames, or make a frame. If making a frame from scratch is overwhelming, try this idea.
How to make a rustic frame
Cut two pieces of wood the length of your chalkboard. Cut two pieces for the sides the height of your chalkboard minus the width of the boards times two.
For example, your chalkboard surface is 48″ by 24″ and your boards for the frame are 3 1/2″ wide. Cut two boards 48″ long. The sides would be cut to 17 inches. 3 1/2 x 2 = 7 24 – 7 = 17
Then simply glue the boards directly on top of the surface of the chalkboard. This is an easy way to make any rustic frame or chalkboard.

Now for a bit of improper! I love rustic and have made several chalkboards using wood.
Yep, plain o’wood.
Wood has grain and knots. The grain and knots give a rustic style to chalkboards.
My board is large. It measures 48 inches long by 17 inches wide and 1 inch thick. The arrows above show where the wood was glued to a larger piece.
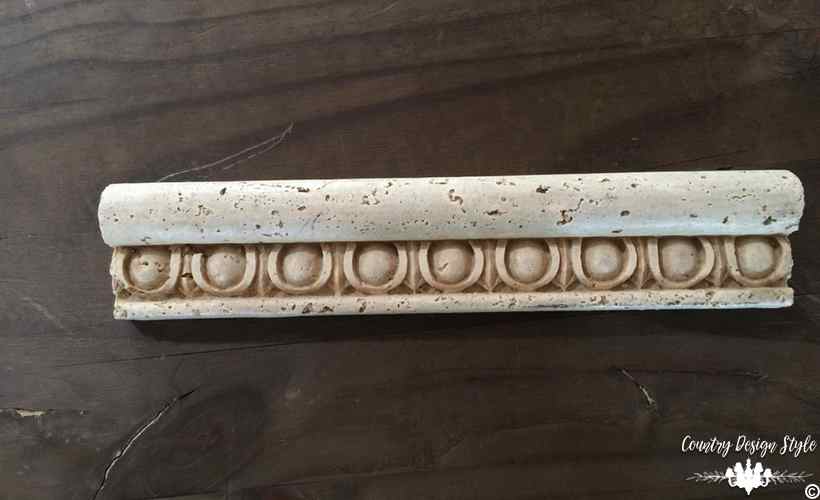
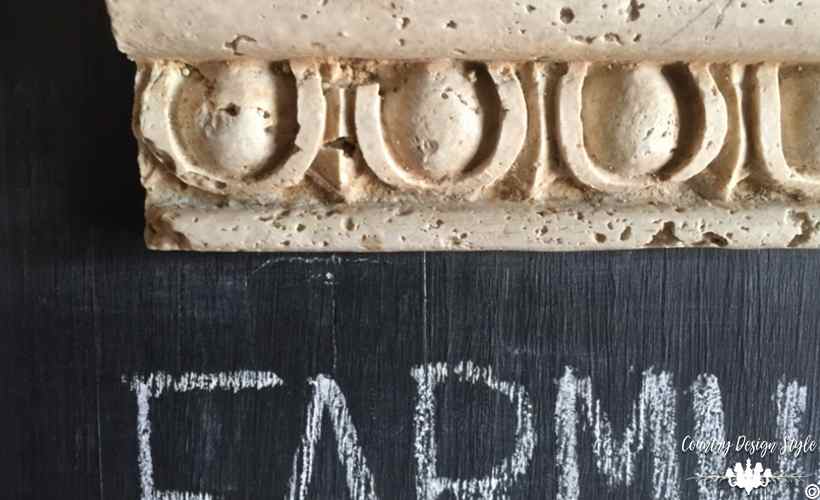
The other side of the wood was painted a dark brown. Behind the scenes…I used it as a photo backdrop. The stone egg and dart piece of molding will fit into the final project.
How to paint a chalkboard
Chalkboard paint is easy to use. The paint is great for beginning painters. It comes in spray or cans. The spray is oil based and tends to hold up best. The cans are water-based {usually} and clean up is a breeze. For any paint check the clean up to see if it’s oil or water-based. Some labels don’t say on the front. Oil will need paint thinner to clean. Water with clean with soap. My tip: I like to use regular hair shampoo and conditioner to clean and condition my brushes.
Spray chalkboard paint
- Clean the surface. I use a damp cloth.
- Protect the area with a drop cloth. Spray outside.
- Set the board in the center. I use scrap wood pieces to raise the surface.
- Mix the paint by shaking the can well.
- Spray moving the can completely off the sides of the board.
- I prefer 2 or 3 light coats. Letting the paint dry well between the coats. On a hot day in Arizona, it can dry fast. On a cold day on the central coast of California, it can take all day.
- Sand between coats with a fine sandpaper if you have bumps or rough areas. I don’t sand if I have a smooth finish.
Can or bottle chalkboard paint
I like using those small rollers to apply chalkboard paint.
Complete 1 through 3 above.
4. Mix the paint well. Pour paint into the tray. I try to guess an amount to cover one coat.
5. Cover the roller all the way around with paint. Roll out the paint making a bunch of “W’s” while watching for roller marks. The sponge rollers tend to leave marks along the edges. Lighter pressure works best.
Continue with steps 6 and 7 above.
Want more improper?
I also like to apply chalkboard paint with a paintbrush!!!! Yes, I get brush marks, but I like the hand look of the marks on my chalkboard.
My personal favorite chalkboard paint
The spray, I have two favorites. Rust-Oleum and Valspar. Valspar is more expensive but I used it when doing work for clients. I used Rust-Oleum to make my large calendar chalkboard. This chalkboard is holding up GREAT! It gets used every day.
The Can paint I love Rust-Oleum. In the bottle craft types of chalkboard paint, I like American Craft. It’s the only bottle of craft chalkboard paint I’ve liked. I even had one peel off, even with the proper prep. Ugh.

This chalkboard was painted with Rust-Oleum in a can with a paintbrush.

Then I squeezed and squeezed and squeezed out enough liquid nails adhesive to hold the stone molding along the top.
The next morning then the adhesive dried…I wondered, “Should I have glue it to the bottom to hold chalk??” Oh well.
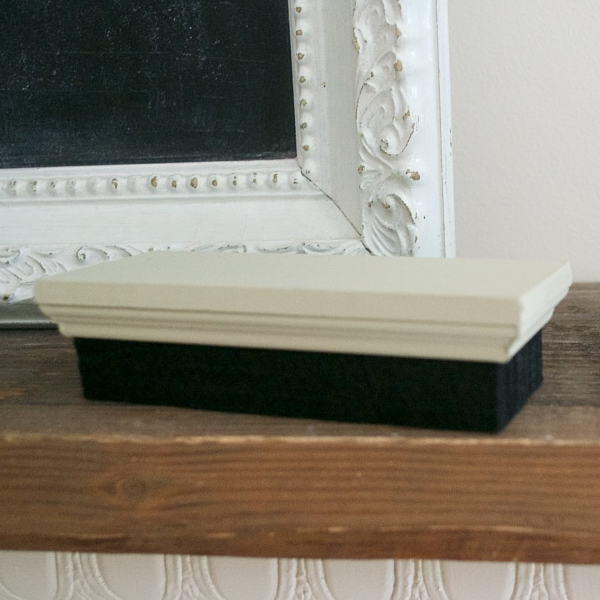
I hung the chalkboard in our entry area. It hangs by keyholes made with a router bit. If you have a router, this is a must have router bit.

How to prime a chalkboard
It’s important to prime a chalkboard. I’m asked other why the chalk doesn’t erase completely. It’s due to not priming the chalkboard first.
First, prime only when the paint has dried 24 hours.

To prime, lay a piece of chalk on the side and completely cover the surface. The erase. Not the board is ready to accept chalk and remove chalk.
How to clean a chalkboard
Felt erasers are the best to clean a chalkboard. I make wood tops for my erasers and will be returning them to the shop in the near future. But any felt eraser works.
Remember in school getting to clean erasers by going outside and clapping them together? That still works today. It’s hard to clean a chalkboard with a chalky eraser.
Occasionally at lightly damp cloth can remove chalk if the build-up is heavy.
How to erase a chalkboard

The chalkboard primed and completely erased using my felt eraser. This board has wood grain, knots, and areas when the boards were glued together. I followed the grain of the wood and a clean eraser. If this was a regular hardboard surface I would erase in two or more directions. It’s okay to rub well to remove chalk.
Again usually I’m asked this when the chalkboard wasn’t primed first.
Can you repaint a chalkboard?
Chalkboard paint is flat paint and can handle repainted. I suggest a light sanding first, then follow the steps above.
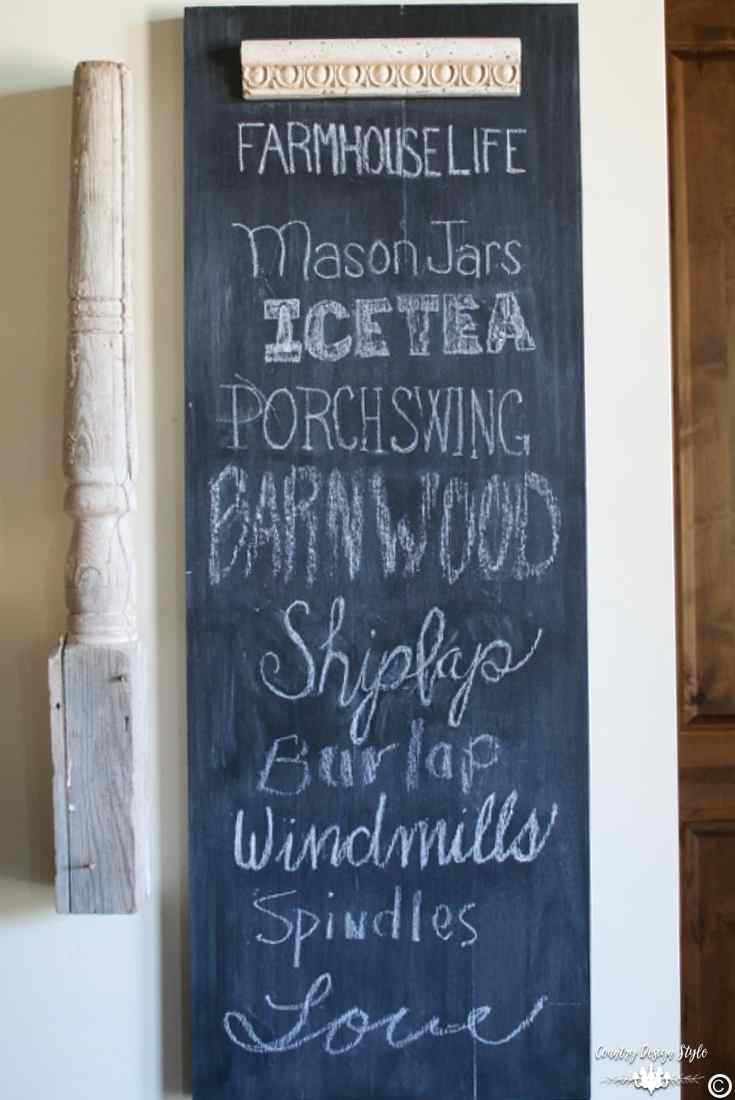
Oh, and yes that’s a spindle hanging on the wall. 🙂
Do you have any more tips or tricks for chalkboard paint? Let me know in the comments below.
Join the newsletter

Subscribe to get our DIY HelpLetter each Thursday. Plus grab your Interior Decorating Ideas e-book.

![Dizzy Lazy Susan [DIY] Marbles](https://countrydesignstyle.com/wp-content/uploads/2017/02/Revolving-tier-closeup.jpg?x17166)