
Secret Santa Tour
You know that feeling as a child waiting for Christmas? You’re excited for people to open the gift you made specially for them, and you’re excited to open gifts.
I’m having that exact feeling today!
Today Santa has finally arrived in blogland for our Secret Santa Blog Tour. A group of DIY blogging friends are sharing creative DIY holiday decor. The decor we made and received. We’ve had DIY Christmas secret Santa gift ideas sent across the country.
We used an online tool to match our names. Nancy who blogs at Artsy Chicks Rule was my pick. She is extremely talented and has such a fun website. Take a moment to pop over and follow Nancy,
I’ll wait!
Didn’t I tell you? I love Nancy’s style and her DIY on a budget projects. Now I have to decide what to make for Nancy to display in her home for the holidays?? I wanted something that reflected her playful beachy style with a touch of my rustic scrappy style.

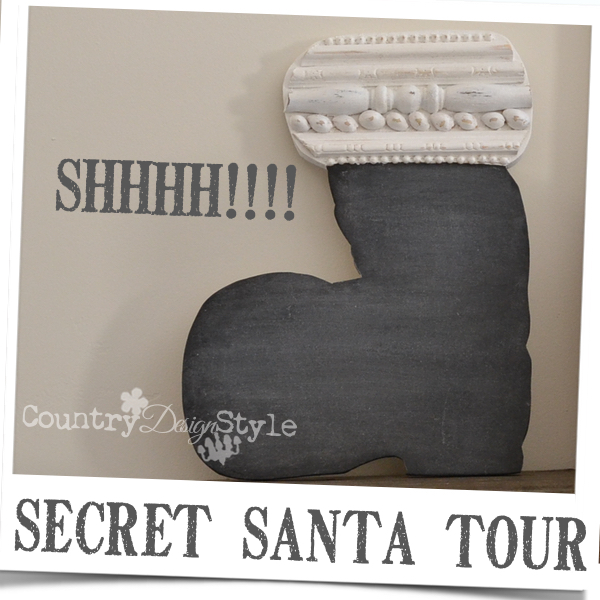
So I came up with a chalkboard. We all love chalkboards! Not just a regular chalkboard, but a Santa boot chalkboard!
Drawing
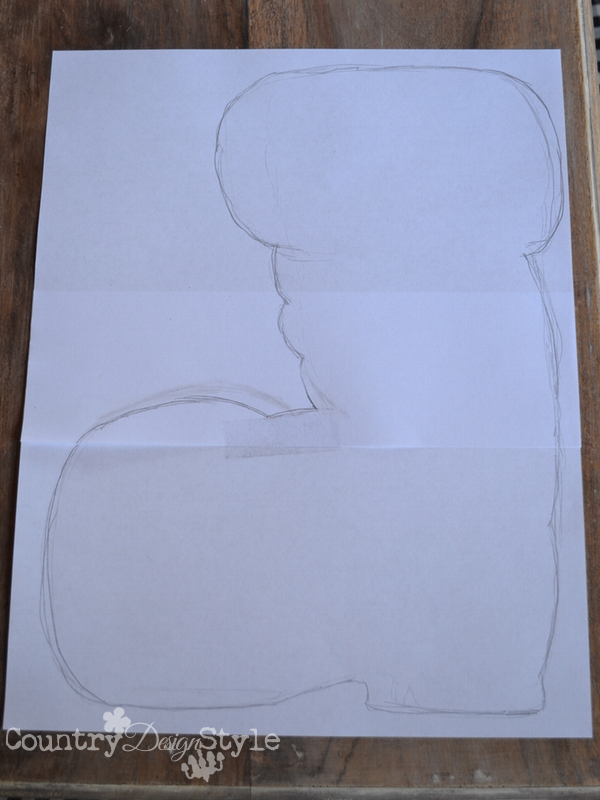
I taped two pieces of 8 1/2 by 11 copy papers together and hand drew a Santa boot. I’m not an artist, but I just kept lightly drawing until I got the shape I wanted.
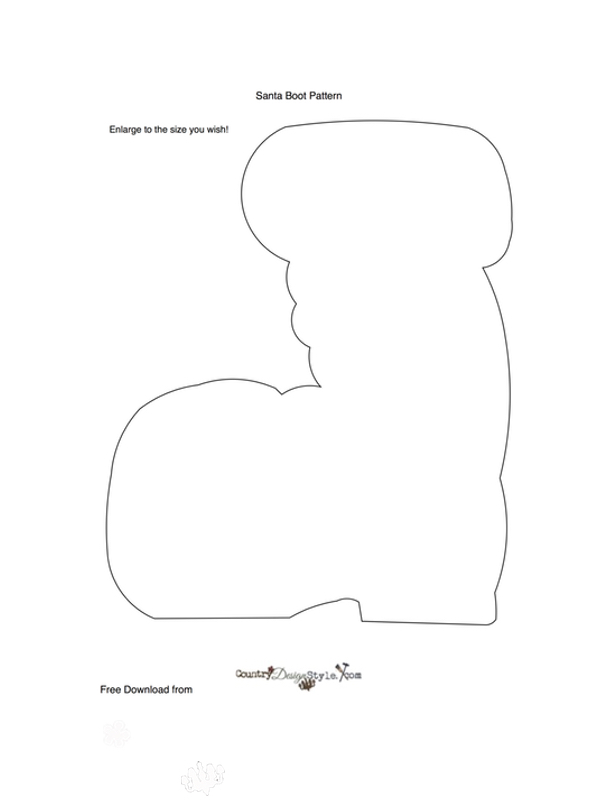 At the bottom of this post is a free printable download of a computer drawing of the Santa boot. To get the computer drawing I uploaded the photo of my pencil drawing, then using the drawing option on the computer I followed over my lines.
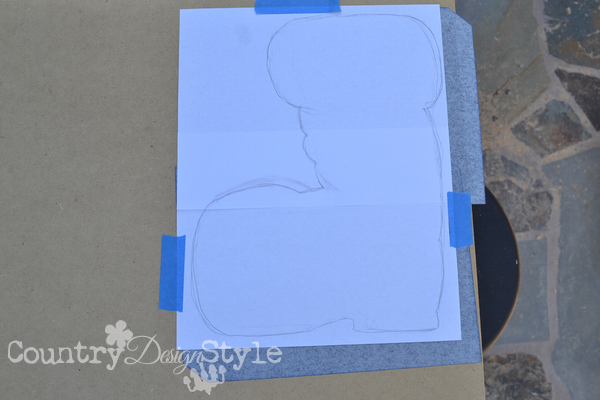
My drawing was laid on a piece of 1/2 MDF {medium density fiberboard, makes great chalkboards} and using carbon copy paper, I transferred my boot.
Carbon copy paper is the black thin paper that was used to make a copy back when we used typewriters! You can order carbon paper here.
Cutting
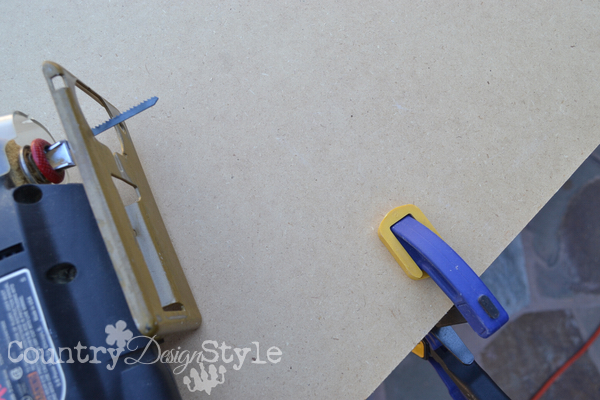
For safety, I clamped the board to my worktable making sure the boot area was hanging off the table. Yes, I have cut my table several times!! I’m learning. I placed a thin scrolling blade in the jigsaw.
When I cut following my lines. My jigsaw has a knob on top that turns the blade as you cut. I don’t use it!! I seem to do better just turning the whole jigsaw. Using that knob and I can get the blade going backward!
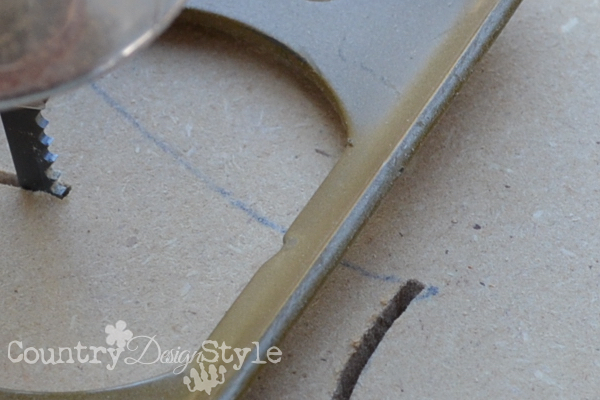
Notice above, when you cut into a “V” shape area I cut one side then remove the saw and start again on the other side.
Planning the trim
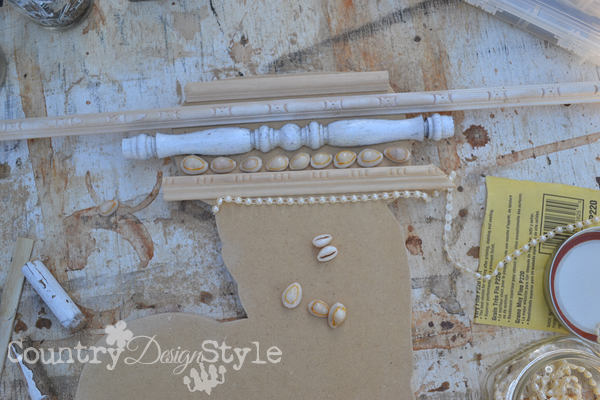
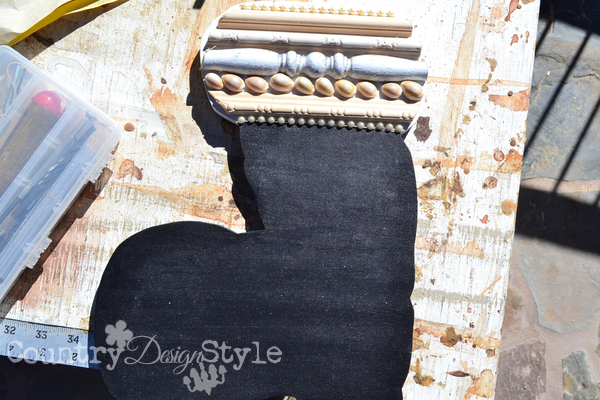
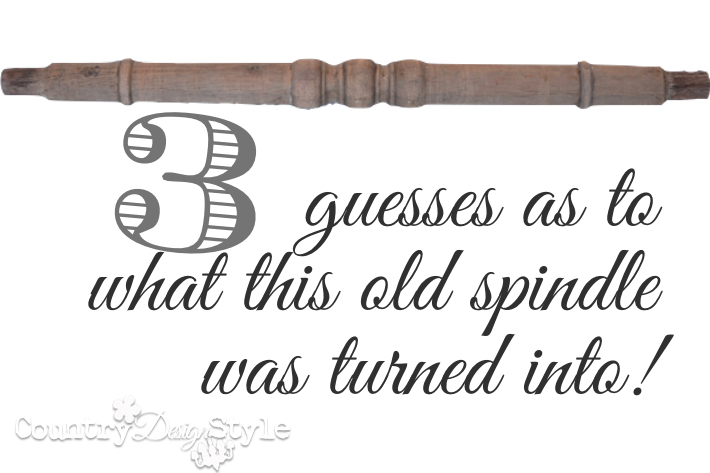
Now for the white boot cuff. Remember I wanted it breachy and rustic? So I laid out some pieces of spindles and leftover trim along with seashells and beading. When I got the arrangement I wanted I took a picture to remember.
Painting
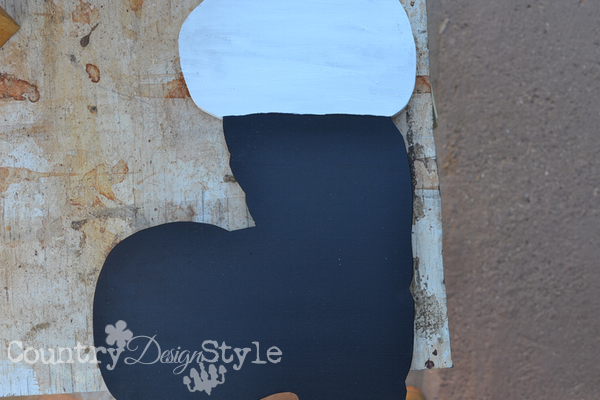
Then I painted the boot with two coats of chalkboard paint. The cuff was painted with two coats of chalk-based paint. I also painted the edges.
Next, I trimmed the wood to fit along the cuff. A quality wood glue holds all the wood, seashells and beading.
More white paint
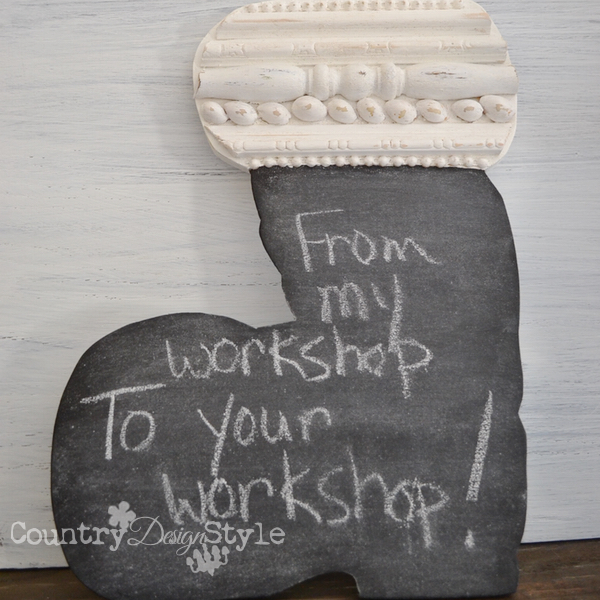
I applied a final coat of chalky white paint over the seashells, beading, and trims. I used a wet paper towel over the cuff area to light the seashells and trims. Then sealed the area with clear wax. When the wax dried a light buffing makes the cuff shine.
Remember that feeling as a child when you can wait for the recipient of your gift to open it?? That’s how I feel! From my workshop to Nancy’s workshop!
Printable boot
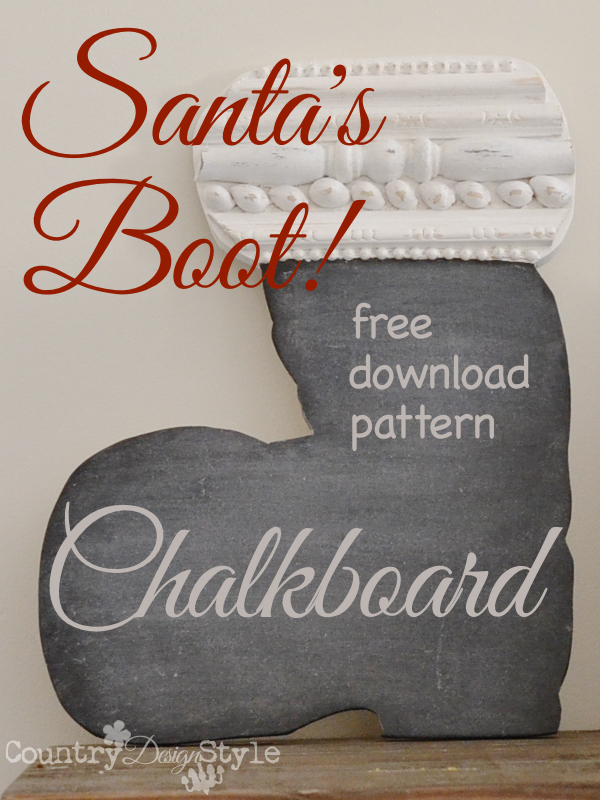
If you wish to make a Santa boot chalkboard here’s my free boot drawing printable download. You can resize to any size you wish. And make the cuff to fit your style! Glue on whatever your imagination can think dream up. Maybe thrift store jewelry, pieces of small Christmas items from the local dollar store, or paint it white using whiteboard paint.
Megan from Rhapsody in Rooms picked my name. Remember that feeling as a child when you can’t wait to open your gift? That’s how I felt when my package arrived on our front porch. I wanted to open it right away as I carefully placed it on the table. I walked past it several times. When finally I opened it later that evening…
Wow!
My Eyes light up
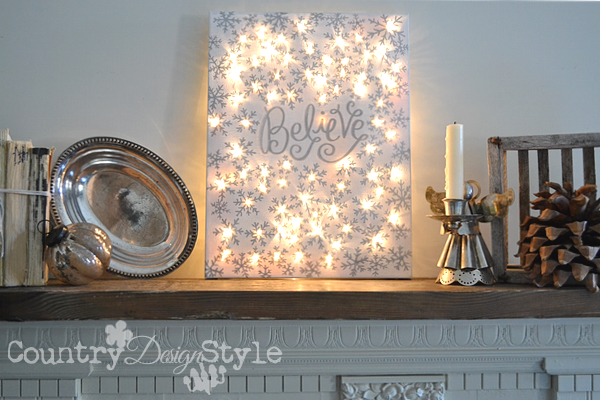
I can’t wait to read how Megan made this stunning piece. It’s perfect on our mantel. My plans for this mantel for the holidays was to add aged silver and was trying to think of something to add sparkle! My secret Santa took care of the sparkle.
Remember as a child and believing in Santa??
I believe!!
Join the newsletter

Subscribe to get our DIY HelpLetter each Thursday. Plus grab your Interior Decorating Ideas e-book.
You’re boot is adorable! Absolutely love this gift!! Sharing & pinning:)
Thank you Wendi! We make awesome elves! Jeanette
Oh my goodness! This chalkboard is awesome Jeanette. I love your added beach touches. So creative.
What a wonderful creation.
I will definitely be using the pattern.
Thank you Meegan! The tour is my favorite. Jeanette
This tour is amazing!!! Not only do I love your project, but what you received! You make me want a jigsaw. Thanks for the pattern, too! ~Christy
Christy,
A jigsaw was my first electrical hand tool. They are easy to use and work on different materials. I’m going to do a woman’s workshop series on using tools starting next year. Maybe a Santa list item??? 🙂 Jeanette
Love this! It’s such a great idea. You are so smart and clever!
Leslie, this tour has been my favorite one ever! Jeanette
This is so adorable! I LOVE the way you put the molding on the top, genius! You did an incredible job!
Dria,
Thank you so much. This tour is the bomb!!! 🙂 Jeanette
This is so stinkin cute, Jeanette! What a fun idea! XO
Christy,
Yep, Santa’s feet do stink! Heh, heh! 🙂 Jeanette
at times like this i wish i was a blogger how fun…love love the boot nancy is talented and a beautiful person just like you… love your believe sign looks perfect xx
Chris, you should be a blogger! Just grab a hammer and a paintbrush! Thanks for visiting. Jeanette
I am loving on that Santa Boot!
Thank you Terry!
Hurray!! The gift looks so beautiful on your mantel! I love it there! So glad you found a spot for it!
Also, I’m so impressed with Nancy’s gift! So creative (and daring with the jigsaw)!
Megan, we are loving the believe sign you made. We’ve turned it on every night and had a guessing game going on how you made the snowflakes so perfectly! Thank you. Jeanette
OH how fun it is to read how you made my gift!!! I am in total awe!! You are amazing. Thank you so much for the thoughtful gift Jeanette. 🙂 I love it!!
Megan’s gift to you is so nice too….I agree, looks fabulous on your mantel!!!
xo
Nancy
Nancy, I so happy you liked the boot! I was smiling all the while I was making it! We are great little elves! Hugs! Jeanette