
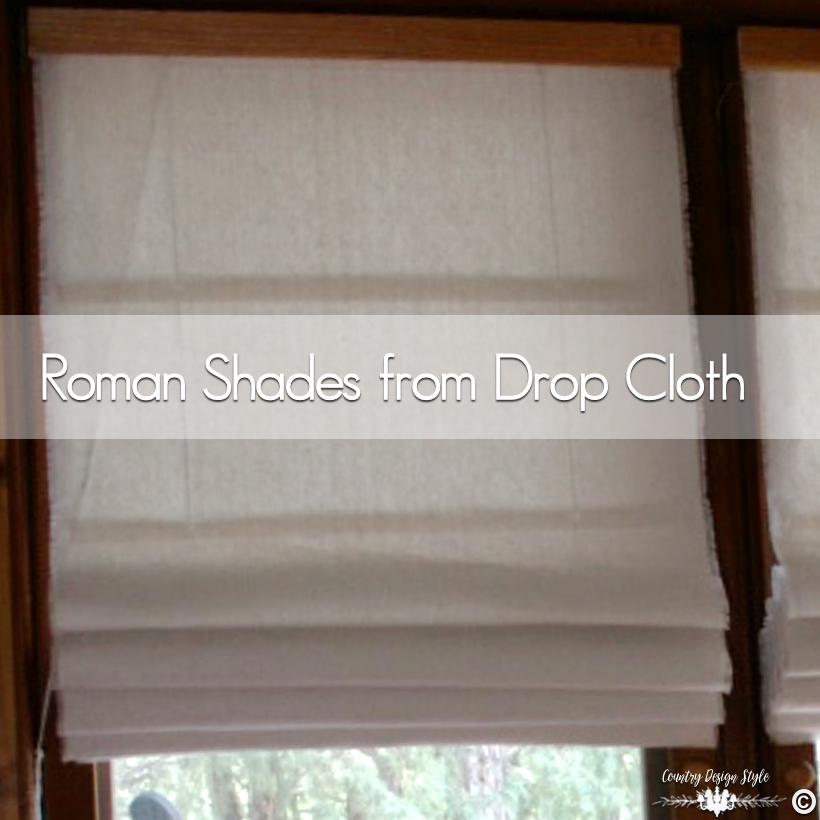
Roman Shade Tutorial
Roman Shade Tutorial and any decorating problem can have a solution. Even if the problem involves with strange windows.
Have you used a drop cloth for anything other than painting? Have you used a drop cloth for painting? They’re great for painting…but make even better DIY projects!
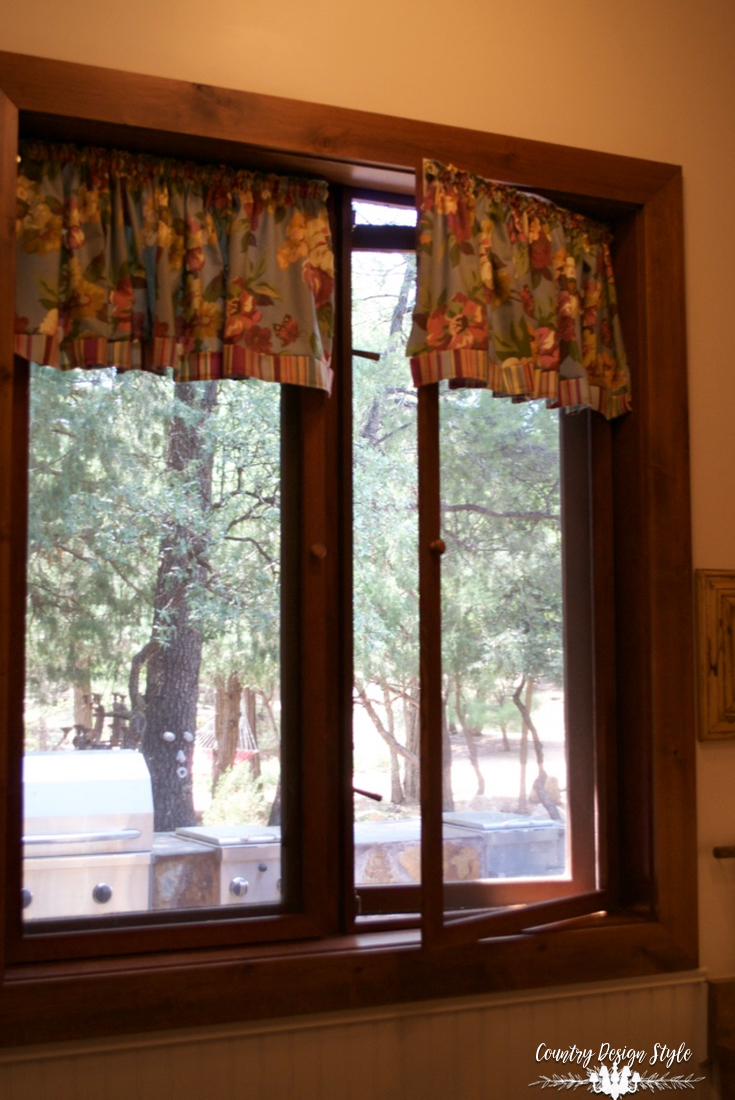
This is my decorating problem. Windows that open out with screens in wood frames that open in. This is in our laundry room. It’s a bit too country and the 80’s is calling and wants it’s valance back. 😕
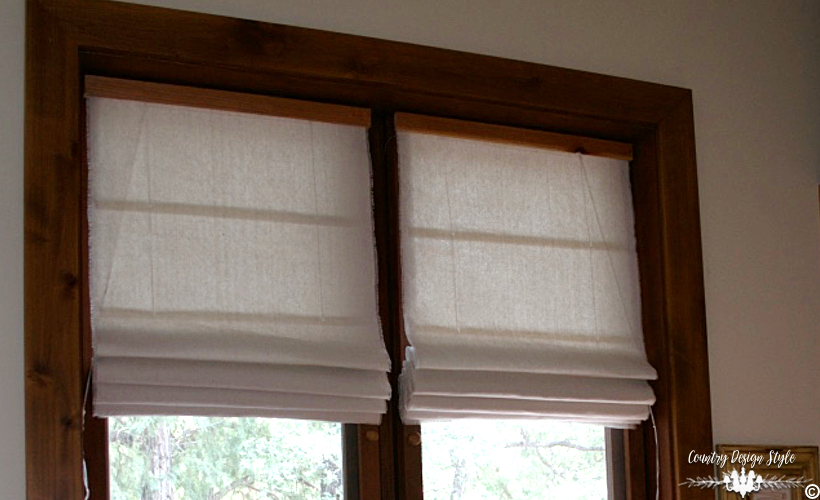
Roman Shade Tutorial
As you can see the roman shade needs to hang on the wood frame for the screens. Otherwise, I can’t open the window. It needs to be as lightweight as possible.
Today I have the opportunity to share DIY projects all using drop cloths. Make sure to click the photos of the other drop cloth projects at the bottom of this post.
I’ve never made a roman shade!!! 😕
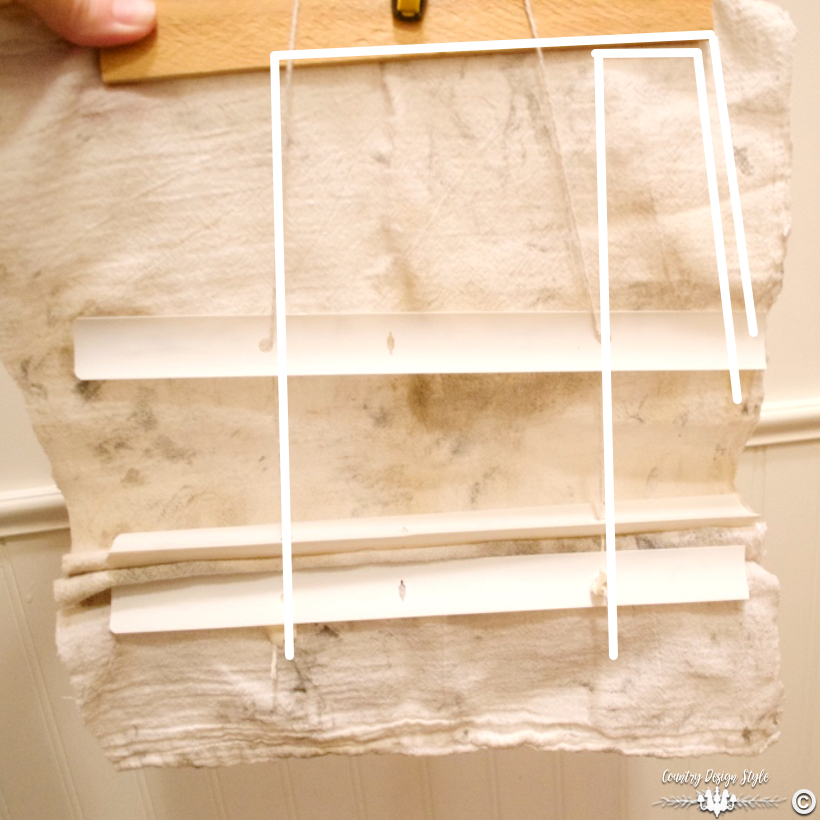
I’m a visual person. To understand how I wanted the shade to work, I made a small shade using an old paint cloth. By golly, I think I’ve got it!
How to cut rectangles from the drop cloth
I purchased my drop cloth at Home Depot.
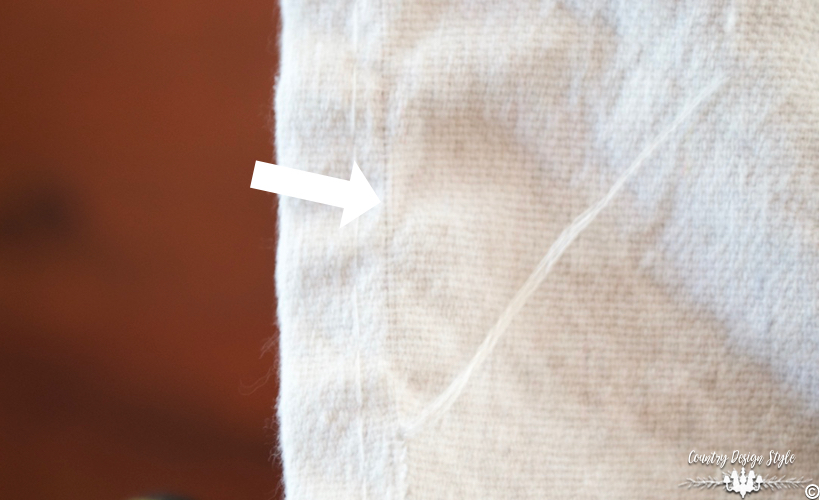
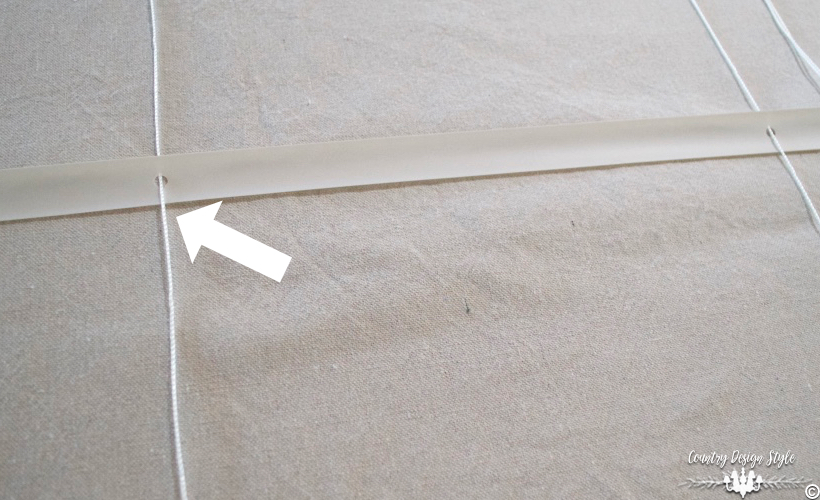
To start, I’ll share how to cut a square or rectangle from a drop cloth. Drop cloths are woven straight. They are usually not cut or hemmed straight. This is the same as pulling threads from burlap to make straight cut lines. A Drop cloth is tightly woven and the threads tend to break.
Therefore, to find the threads cut into a corner of the drop cloth. The drop cloth from Home Depot has two threads that are woven together along the length and one thread woven along the width. Above are the two threads that I pull until they break. They will break! Along the line of the pulled threads, you will see a score line. Cut along the score line. Pull more threads until they break and cut along the line. Continue until you get the size you need. Then do the same for the width.
Then pull the threads for the length of the other side of the rectangle. Then do the same for the other side of the width.
Why do I go through this?
I want this project to be “NO SEW.”

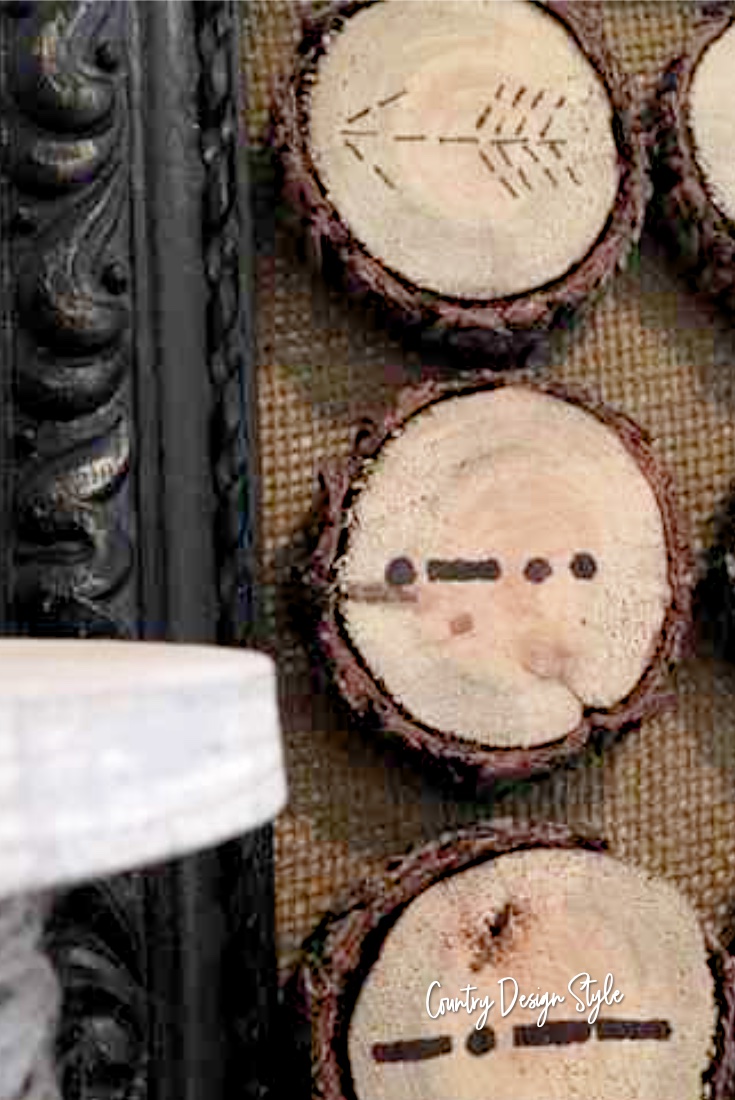
So, while my sewing machine sits in the closet. I pulled a few extra threads around the four sides for fringe. Keep those threads to make one of these!! Cool, huh!
Now that I have two rectangles, I’m ready to start making the roman shade.
Supplies and Tools
List of supplies
One 24-inch mini blind
6 by 9 drop cloth
Roll of nylon 18 gauge twine
Peel N’ Stick fabric tape
4 Buttons
4 Eyehooks
1 piece of lattice wood
List of Tools
Scissors
Glue gun and glue sticks
One hole paper punch
Wood glue
Couple of clamps
The Steps
Step 1. Measure: Measure the inside of the window frame. I measured the screen frames since our windows are unique. My measurements are 21-inches wide by 52-inches long. That’s the size I cut from the drop cloth…times 2!
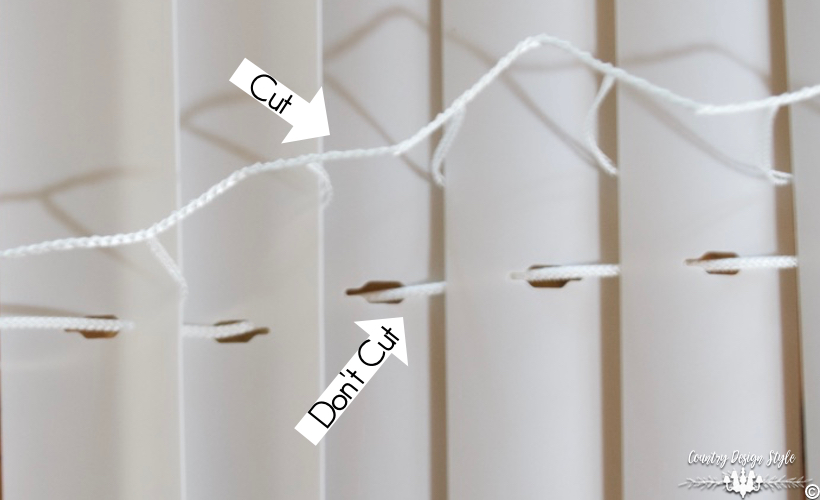
Step 2. Take apart the mini blind: Pull the window blind to full length. Cut the “ladder” thread that keeps the slats at the same distance. Don’t cut the center thread. It can be used for the roman shade. Since I’m making two shades for my window, I’m saving this center thread for another window with a single screen. Remove the slats from the blind.
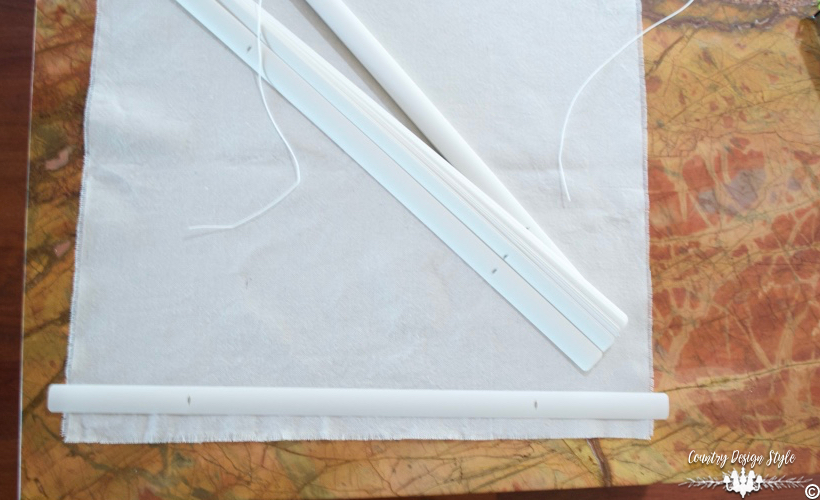
Step 3. Resize the slats: My roman shade is 21 inches. The blinds are 24 inches. Fortunately, they cut easy with scissors. If you’re using a blind with metal slats use tin snips to cut if needed. Cut from both ends so the strings will be centered.
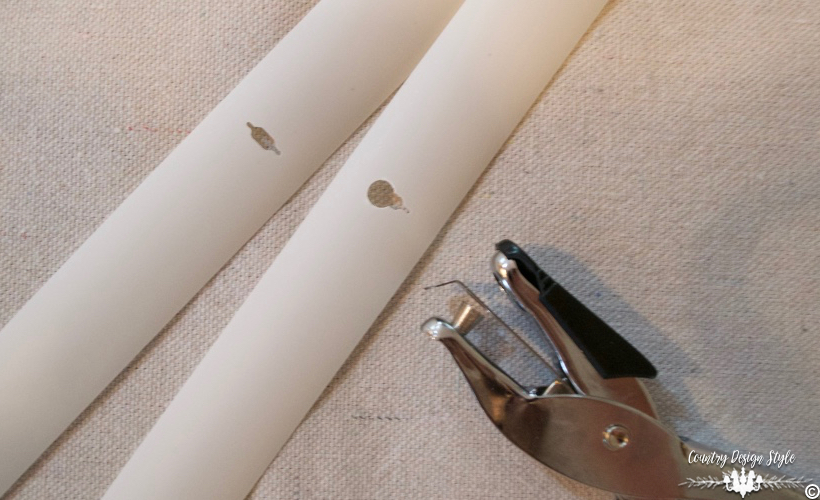
Step 4. Check if the cord pulls smooth: Blinds have holes for the center cord. In the first roman shade, I used the hole as is. The thread hangs up because the hole is smaller on the top and bottom. The second shade works better because I punched a hole in the top side using a paper punch.
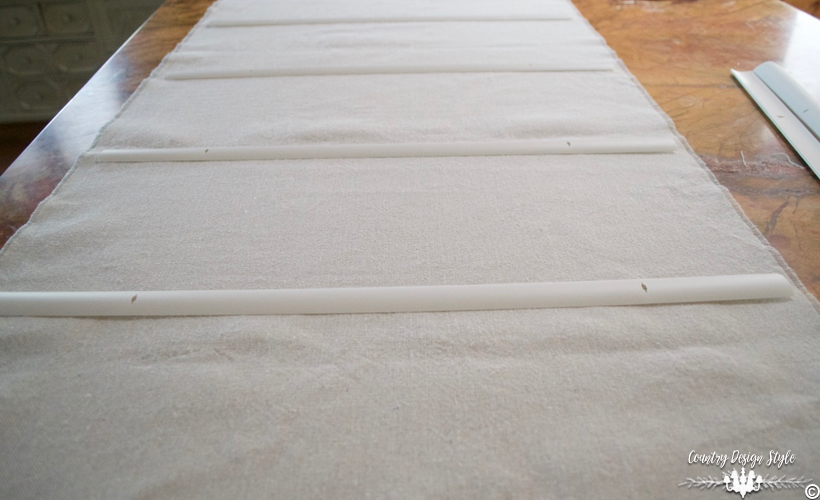
Step 5. Measure slat spacing: I started from the bottom edge and worked up the drop cloth. I measured 4-inches from the bottom laying a slat across the cloth. {next time I will make this measurement 6-inches to have more fringe showing} Mark with a pencil through the holes. From there I marked the slat hole every 8-inches on center. My 52 inches has 6 slats.
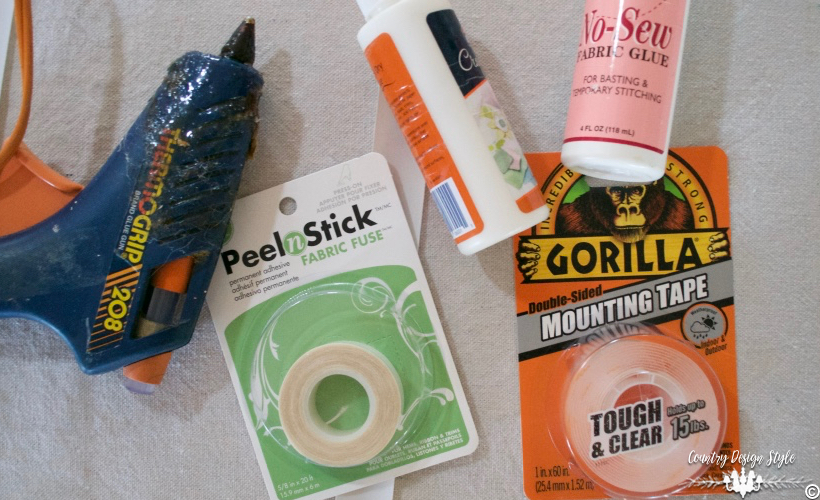
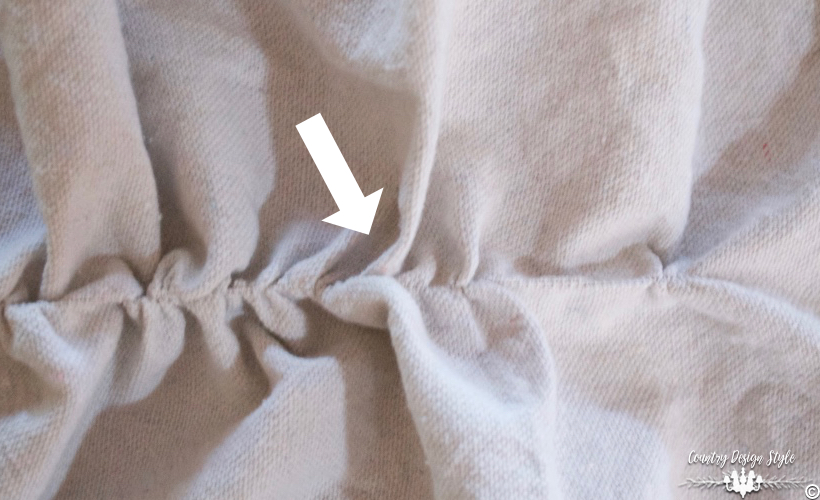
Step 6. Taping the slats: I tested several tapes and glues to mount the slats in place on the drop cloth. The peel and stick fabric worked best. I added the tape to the top curved side of the slats. Leave the area around the holes clear of tape.
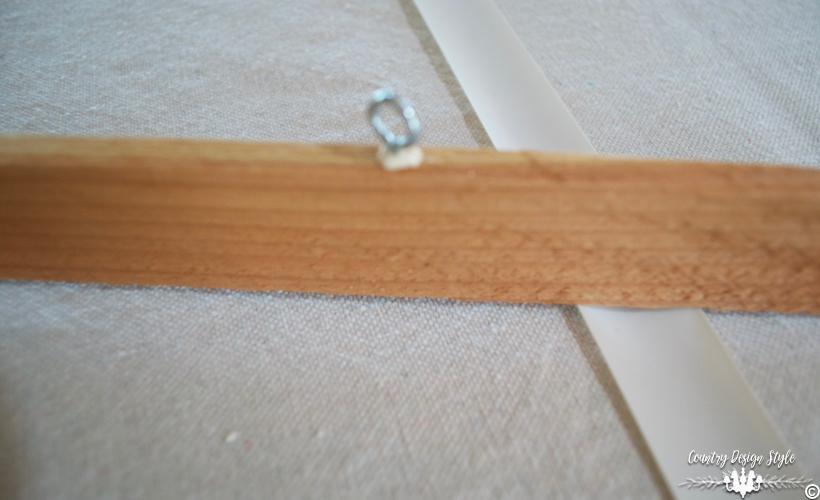
Step 7. Wood top: For the top and to hang the shade, I cut four 21-inch pieces from the lattice wood. The top is a sandwich. Two boards are the bread with the top of the drop cloth the meat and wood glue the cheese. On the back wood, I added two eye hooks with a dollop of wood glue.
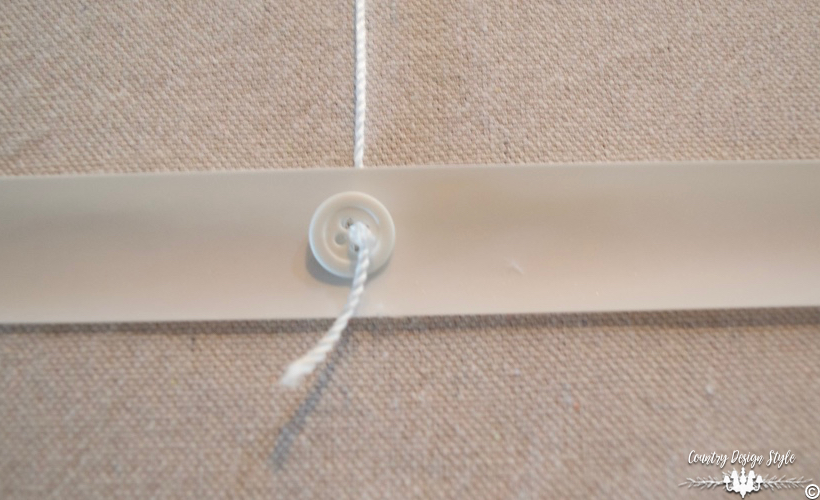
Step 8. Add the cord: I purchased 18 gauge nylon cord. To measure the amount needed simply lay the cord along the edge about halfway down the shade to the top edge. Then continue the cord across the top to the eye hook and down the shade. To keep the cord in place, thread on a button and tie a knot. Then start the cord from the bottom threading through each hole to the eye hook. Do the same to the other side.
Step 9. Additional stops if desired: If I had wanted the roman shade to pull up in rolls along the shade, I would have added buttons to act as stops a few inches from each slat. On my shades, the rolls stack on top of each other along the bottom.
Hanging the Roman Shade
I didn’t want to drill into the wood frame for the screen. Instead, I used those peel and stick strips to hang the roman shades. I rarely will move the shade up or down in the laundry room.
I rarely will move the shade up or down in the laundry room. To hold the shade at this location I tied a knot in the cord and nailed a small nail on each side of the window edge. Simple!

Hanging and I love them. I could have painted the lattice wood, but chose not to for the laundry room.
Whew!
The first shade took half a day to make. There was a lot to figure out. The second shade took 30 minutes.

I like the roman shades so much, I’m planning to make more for other rooms. Some might just be painted too! Click to see the grain sack, smocked and outdoor drop cloth curtains.
So long 80’s! Welcome, to our clean farmhouse look!
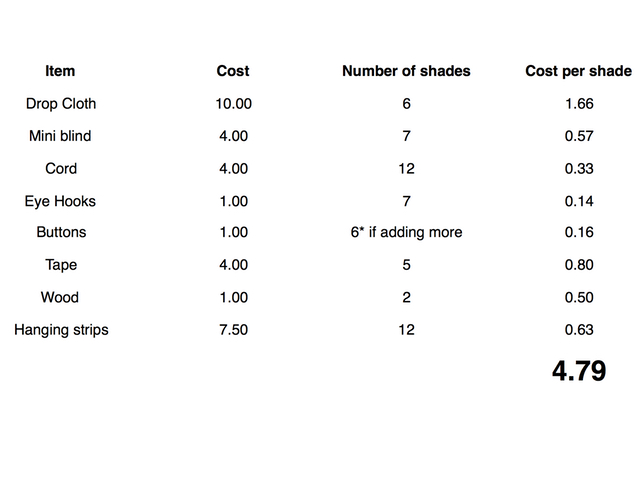
Here is the breakdown of costs.
I’ve linked up at Shabby Creek Cottage. If you need more drop cloth ideas you will find it by clicking!
Join the newsletter

Subscribe to get our DIY HelpLetter each Thursday. Plus grab your Interior Decorating Ideas e-book.


I love all your no sew projects with the drop cloths! Beautiful!
Thanks! Other than more shades, I’m also going to try a farmhouse style mattress. Just bought an 8-inch needle, yikes!
I was just thinking I would like to try this, but I never thought about using a drop cloth. Your blogs are some of my favorite. I love the detail and all the photos that go along with your DIY’s. I wish there was a video so I could understand the process more, but I know once I get started everything will fall into place for me. Thank you for sharing this. Where do I pick up the plastic mini blinds? Walmart?
Hi, Jean! Yes, I got the mini blinds at Walmart. Funny thing every mini blind was the same price. The 24 inch was the same as the 42 inch. Strange. Might have been a mistake in our Walmart. I’m will be making more blinds. Might be as much are 15!!! I will plan to make a video when I do the next shade.
Beautiful! This is a perfect solution for my bathroom windows. Thanks for sharing, Janine.
Jeanette!!! Jeanette!!! So sorry, I have a dear friend named Janine and I am forever calling you by her name.
Lol! No worries! I get many names wrong. I feel honored to be called the name of a dear friend!
What a fabulous job! I love it!!!!
Thank you so very much, Linda. Now that I figured out the best way to make them, I will be doing more. All the windows in our home are like this.