
Revolving Bookcase

Did you see the revolving bookcase in Pottery Barn’s teen section?
This one isn’t it! But the one pictured below was my inspiration to make this one.
Well, I’m no teen by any means but I love it! I thought it would make great craft room storage…so, I made one with a similar look.
Revolving Bookcase
This post contains affiliate links. I will make a commission for your purchase at no extra cost to you. This helps me maintain the website. Thank you for your support. Think of it as a friend letting you know where I found a product I use, love or want. Click here to read my full disclosure policy.
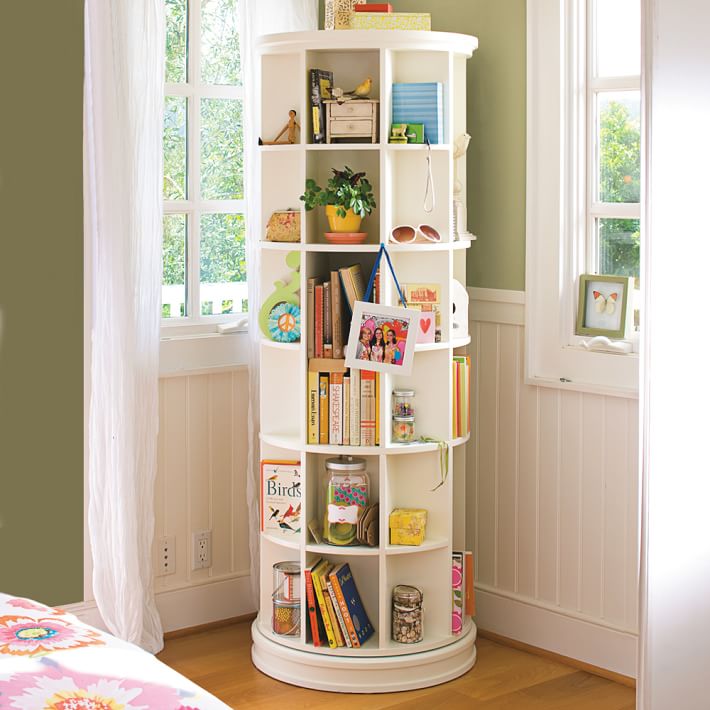
Anyhow, here’s the Pottery Barn revolving bookcase.
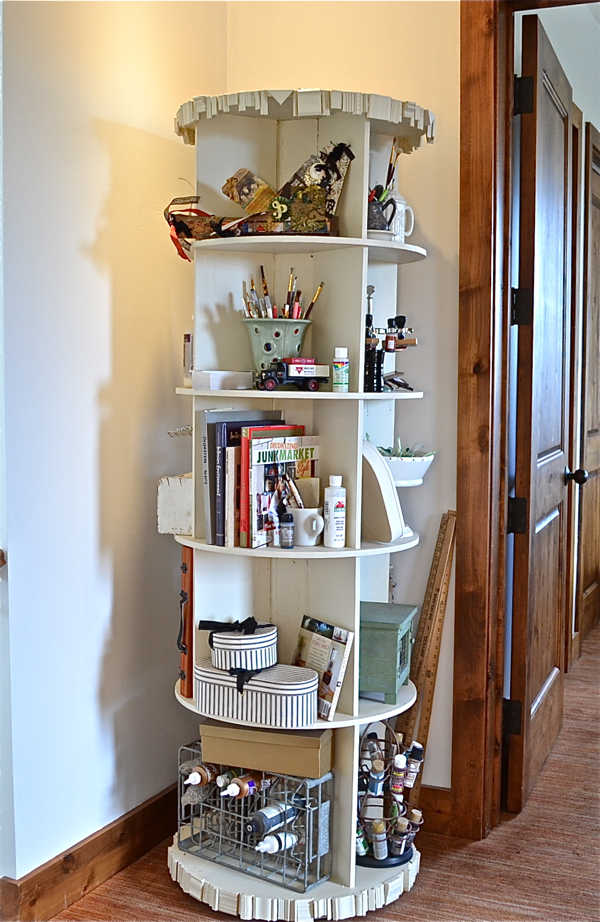
And here’s the one I made.
Mine is a bit different than Pottery Barn’s but it still has a similar look. I wanted wider shelves to hold craft supplies and I added a “unique” molding technique.
Here’s how I did it.
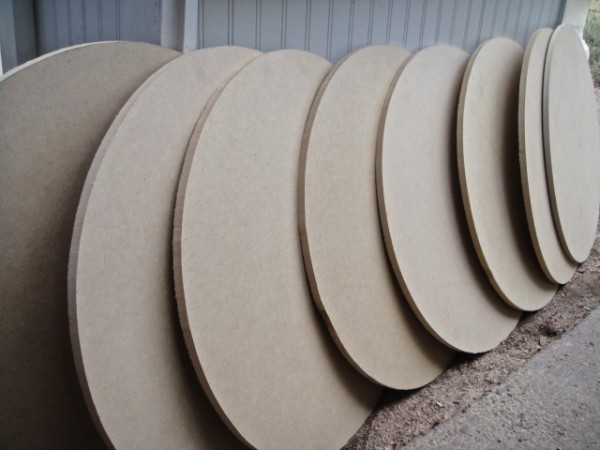
I made eight 24 inch circles out of a 4 x 8 sheet of 1/2 inch MDF. Cost $33.
The circles were drawn out using a paint stir stick with a hole in one end for a nail and a hole 12 inches out for a pencil. They were cut using a rough cut with a jigsaw first then a smooth cut using a flush cut router bit.
You can see the router bit in action. I did a tutorial for women who woodwork and how to use a router.
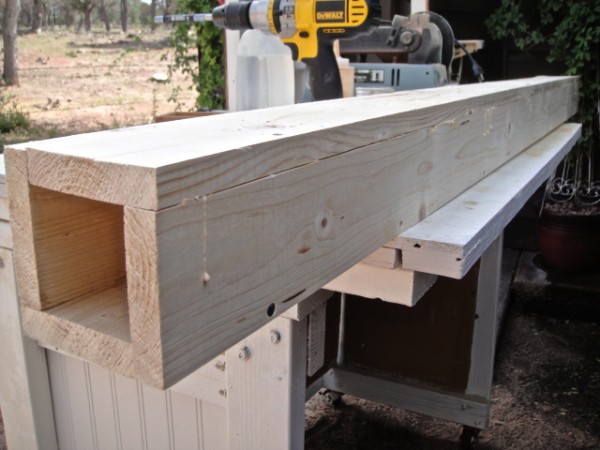
The center pole was next to make which I used 1 x 4 x 6-foot pine that cost $15. I just made a l~o~n~g square.
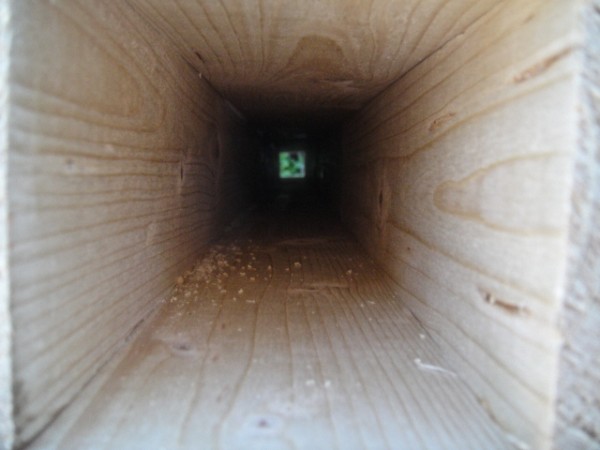
H~E~L~L~O~O~O~O~O!!!!!!

Next, I cut out center squares with the Dremel Saw.
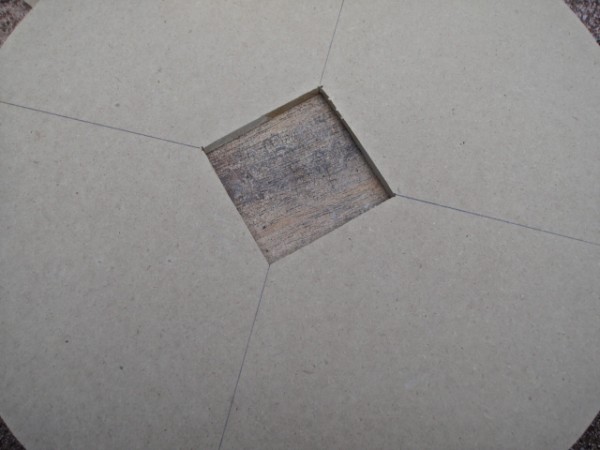
Then draw lines from the corners out.
Installing the Lazy Susan
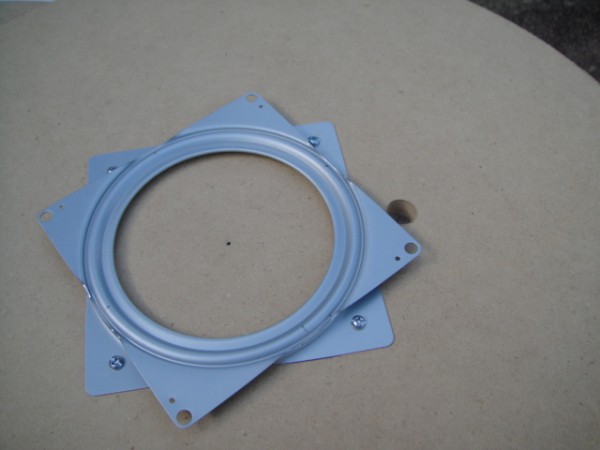
I added a lazy susan mechanism. This is not the final lazy susan I used. I had to buy a larger one online at woodworkers supply that’s 12 inches in diameter. Cost $18 with shipping.
You can see how to install a lazy susan on my installing a lazy susan video {please don’t laugh too much!} Also, when this was filmed I had another website called Homa Style. The best part though….I’ve lost weight since the filming! Woot, woot!
Trims
I used two 2′ x 4′ sheets of 1/2 inch MDF for the shelf upright dividers that cost $20. I forgot to take pictures of this part, but I used the Dremel saw to cut 8-inch strips. Then cut 3 or 4 pieces for each “layer.” I simply stacked, glued and nailed everything together starting from the bottom and worked up.
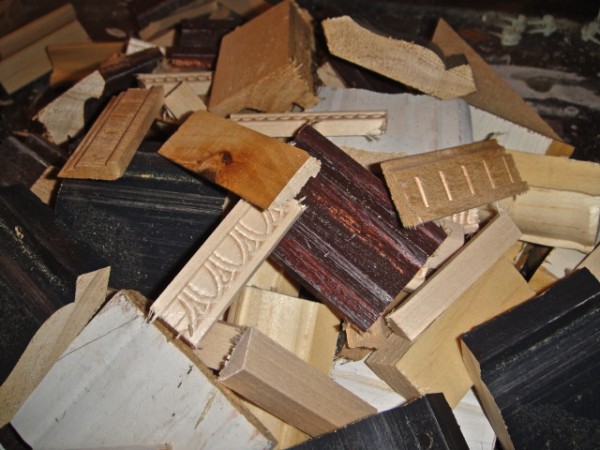
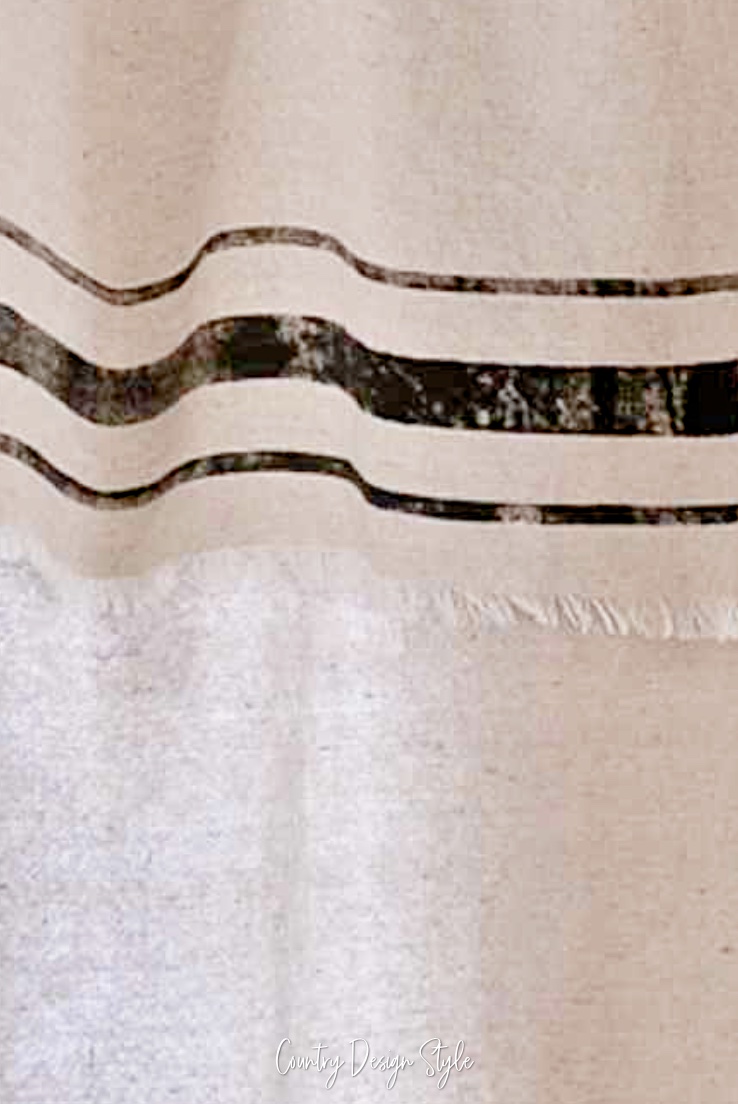
Next is the fun part…I cut up leftover trim to approximately 2 inches…
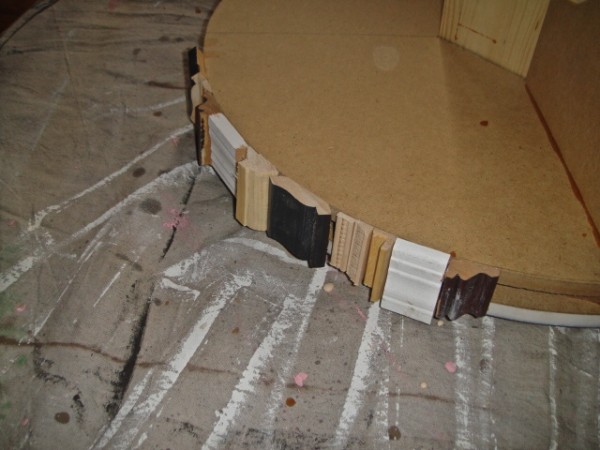
..and proceeded to glue them on around the bottom the top edges. Some pieces are upright, some are on their side and I think some are even backward! I did have to buy a couple of pieces of trim to finish at $14. I thought it would take f~o~r~e~v~e~r!!! But surprise, under 2 hours! I have done this technique on my scrap wood mantle. My f~a~v~o~r~i~t~e project to date!!
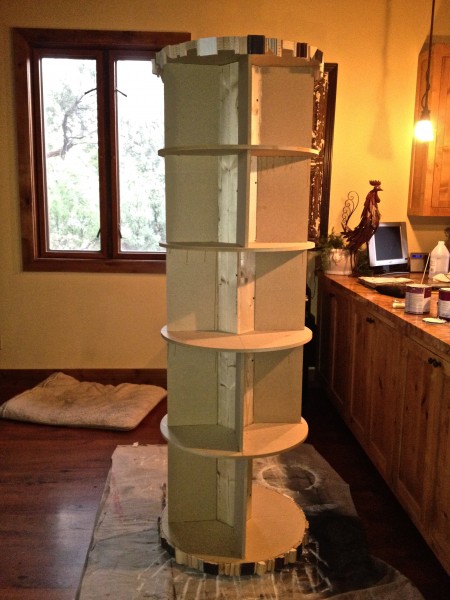
Here’s the creation…or creature…ready for paint. Notice I moved inside, too hot, sticky and sweaty!!! I purposely added only 3 dividers on two levels because I wanted longer items to fit. This time function won a bit over form!

After two coats of creamy almost white paint, it’s ready to spin!
I’m thrilled with how much this creature holds. Notice I still have open places.
Pottery Barn’s revolving bookcase costs $699. Since I had the paint and most of the trim scraps I spent $100.
I realize this is a big project but I believe if you work yourself through it anyone could do any big project.
Let me know in comments what big project you’ve tackled.
Read any teen novels lately?
Join the newsletter

Subscribe to get our DIY HelpLetter each Thursday. Plus grab your Interior Decorating Ideas e-book.

Hi there, Jeanette! I’m so thrilled that Beckie tracked you down and was able to give me the correct location for your project! It really is just perfect… space saving, terrific, unique, and not all that complex to make. And I really appreciate it from a personal level because I just started a small jewelry business at home, and I’m well and truly concerned that my craft supplies may crash and bury me alive some day soon. rofl Must organize, ASAP! Your shelving looks perfect for my needs, and its phenomenally cool that I can do one side of it rather decoratively… cute displays and the like, and put the rest of crafty goods all over the place, and then just revolve it to show only the ‘pretty’ side when I have company. I’m so devious. lol I’ll update the link in the pin to your lovely shelf asap, as I know it’ll be popular. 😉 Wishing you good luck moving your site! I can’t imagine how stressful that must be. And looking forward to all you create in the future.
Thank you for your sweet comment! Jeanette
Hi
Great bookshelf. I too saw the $600 PB one!
Have wanted to build one for my daughter (now 6yrs old).
I’d like too include a secret hidden spot for her. Would value your suggestion to a location.
Thanks
Thanks Darren, for reading. I would suggest a hidden box in the middle section. Just make a small door and nail a floor to the area. That way her treasures wouldn’t fall to the bottom.
I saw something similar to this used in the corner of a walk-in closet for shoe storage. I thought it was a great idea and wondered how to build it. Then I found your project. Thanks for the directions.
I have a 4 X 6 ft booth in a local crafts & collectibles market. Wouldn’t this be great to display my items in the booth! I wonder if I could find someone to cut the circles for me. I think I could handle the rest.
Thanks for posting your project!
Martha in Oregon
Martha, You may want to check with a local hardware store for any handy people or woodworkers that could cut circles for you. Let me know how things turn out. ~Jeanette
Oh my, LOVE this, although I’d have to get help from by hubby I’d still love to have one 😉 Now following via Blog Lovin and G+
Thank you JoAnn for the following. Gonna make sure I’m following you too!
Jeanette, what an awesome project! I love the touch of varying trim. I’m not too good with wood working, but you make it look so easy 🙂
Amy, thank you! I hope it seemed easy. It was easy to make but hard to write the steps. I’m never quite sure if the instructions are clear.
Thanks, Jeannette for fixing the link to this revolving bookcase. I love it. I am building shelves in my sewing closet right now, but i want to build this as soon as I finish the shelves. Again, Thanks so much.
Beverly, hope you share pictures:)
Wow! I’m so impressed. That turned out o pretty. I love it! laurie
Thank you so very much Laurie!
Hi there, Jeanette! I’m so thrilled that Beckie tracked you down and was able to give me the correct location for your project! It really is just perfect… space saving, terrific, unique, and not all that complex to make. And I really appreciate it from a personal level because I just started a small jewelry business at home, and I’m well and truly concerned that my craft supplies may crash and bury me alive some day soon. rofl Must organize, ASAP! Your shelving looks perfect for my needs, and its phenomenally cool that I can do one side of it rather decoratively… cute displays and the like, and put the rest of crafty goods all over the place, and then just revolve it to show only the ‘pretty’ side when I have company. I’m so devious. lol I’ll update the link in the pin to your lovely shelf asap, as I know it’ll be popular. 😉 Wishing you good luck moving your site! I can’t imagine how stressful that must be. And looking forward to all you create in the future.
Hugs & Hope,
Rachel of OddModicum
http://www.etsy.com/shop/OddModicum
http://pinterest.com/orachel/boards/ (your bookcase is pinned to my DIY Hearth & Home board)
Rachel, thank you so much for tracking me down. Beckie Farrant is wonderful. I have a few more post to update on Knock off Decor. Changing the website has been a huge undertaking! With a total new name and host I could not automatically move the posts. But it’s starting to develop. Thanks for pinning and updating. I went to you etsy shop and facebook it. Fun jewelry! I will follow you on Pinterest too!