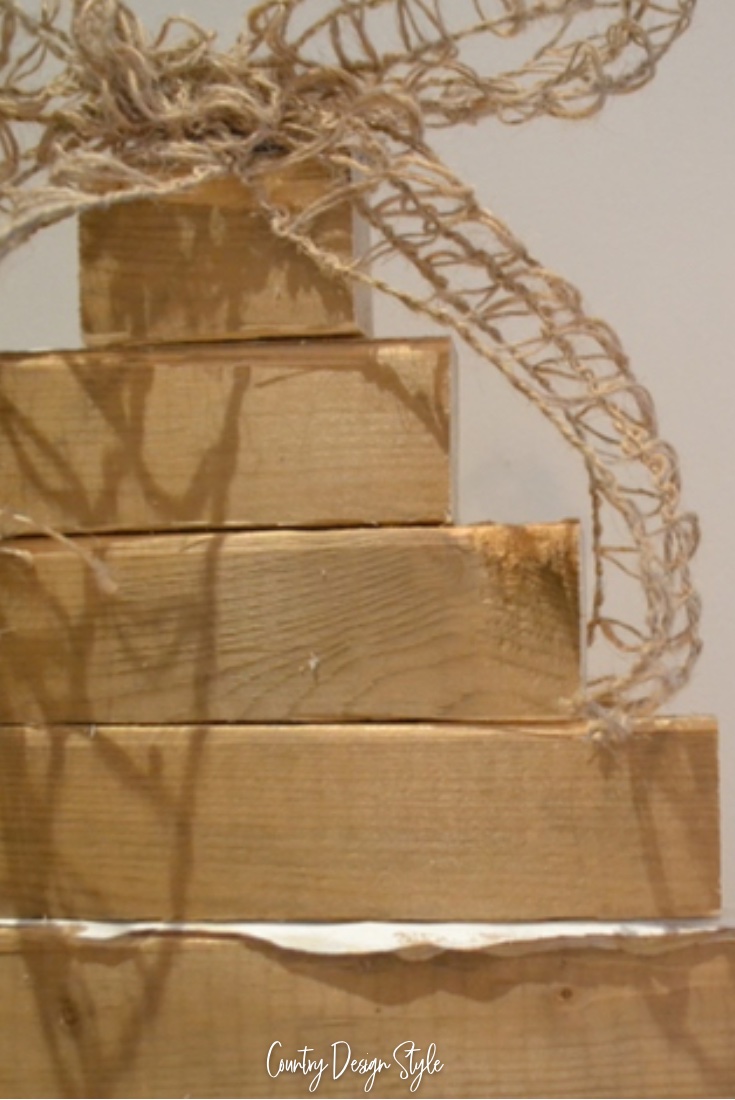
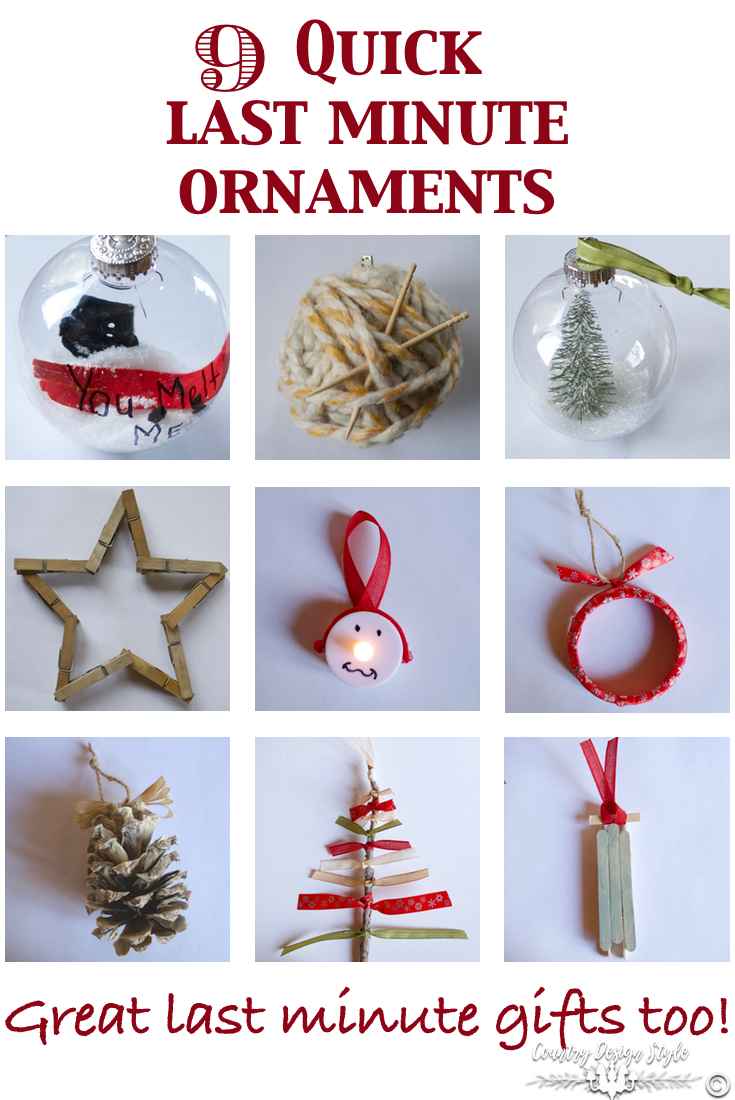
9 Last minute ornaments
On December 10 I held a workshop for subscribers to make Christmas ornaments.
We had a blast and today I want to share the ornaments with you in case you missed the workshop.
Plus if you still need to decorate the tree, need last minute extras to tie on a package or handmade gifts for neighbors…this will help!
I have plans for at least 12 workshops for 2017.
9 Last Minute Ornaments
This post contains affiliate links. I make a commission for your purchase at no extra cost to you. Think of it as a friend letting you know where I found a product I use, love or want. Click here to read my full disclosure policy.
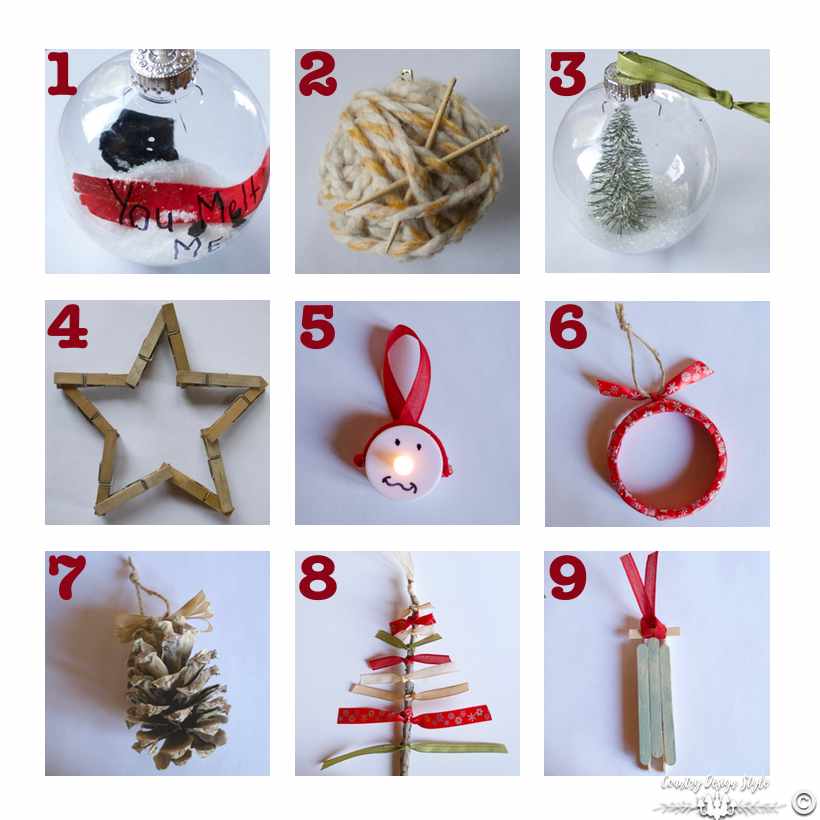
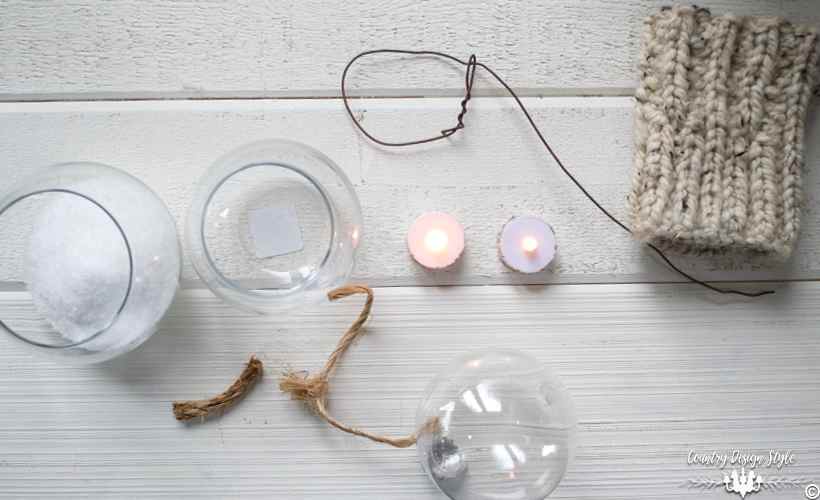
One – Melted Snowman
Supplies
3-inch clear plastic ornament
1/3 cup white bath salts
3-inch by 3-inch piece of black felt
3/4-inch by 3-inch piece of red felt
Small funnel or rolled piece of paper into funnel shape
Black permanent marker
Scissors
Craft Glue
Steps
Top Hat – Cut round circle about the of a quarter and another the size of a nickel from the black felt.
Cut a strip about 3/4 inch by 2 1/2 inches from the black felt. Add glue around the edge of the small circle. Wrap the rectangle piece around the edge and seal the ends together. Add glue to the bottom edge a place in the center of the larger circle, leaving a brim. Note if any glue seeps out, sprinkle bath salts for snow on the hat.
Scarf – Cut 5 or 6 3/4 inch cuts into the short end of the red felt rectangle for fringe.
Eyes and Buttons – Cut small circles or pieces from the black felt. I cut five pieces.
Carrot – I didn’t do this but a viewer suggested it and it would be adorable!! 🙂 Cut a small piece of orange felt or use an orange marker to make a carrot nose from white felt.
Add elements – Remove the top of the ornament. Small wires hold the top in place. Use the funnel to add bath salts to the ornament. Don’t add too much, the eyes and buttons might get buried in the snow! Add the top hat and scarf, then add the smaller pieces. Squeeze the wires together and replace the top.
Add saying – Using the marker add a favorite saying like, “You Melt Me!”
Two – Yarn Ball
Supplies
Old round ornament
Approximately 3 yards of yarn
2 toothpicks
Steps
Start wrapping the yarn around the ornament into a yarn ball. When covered tuck in the end into the ball.
Add toothpicks like knitting needles.
Three – Snow Globe
Supplies
3-inch clear plastic ornament
Small 2-inch bottle brush tree
1/4 cup glitter
Small funnel
Craft glue
Steps
Remove the ornament top. Check if tree bottom fits through the top. If it does add glue to the bottom and push tree through the top and set on the bottom of the ornament. If it doesn’t {mine didn’t} rock the bottom back the forth until the bottom pops off. Then add glue to the bottom branches. Push the tree through the top and set on the bottom of the ornament. Let dry upright. Note, you will have glue around the top edge. That’s fine the top will hide any glue. When the glue dries add glitter using the funnel. Add the top. Shake the glitter to cling on the sides like snow.
Four – Clothespin Star
Supplies
10 spring-type clothespins
Craft Glue
Steps
“V” The clothespins have a “clip” end and a “handle” end. Make a “V'” by attaching the clip end of one clothespin to the handle of the other. Note, only clip to one handle. Make a total of 5 “V’s.”
“W” Next make two “W’s” by adding the clip to a handle a “V.”
Now combine all the pieces to make a star shape by attaching clips to handles. The clips may need to be pushed open some. You may need to flip over some to match up correctly. When in place add a small amount of glue to hold in place.
Five – TeaLight Snowman
Supplies
1 Battery Tealight
Red Felt
Black marker
Piece of ribbon
Craft Glue
Steps
Glue a loop of ribbon on the back of the tealight. Make sure you can turn on and off the tealight and add a battery if needed.
Using the marker add two eyes and a mouth. Cut a piece of red felt about 1/4 inch by 2 inches. Glue over the top head of the snowman. Cut to small circles of felt and glue on the ends for ear muffs.
Six – Mason ring wreath
Supplies
Mason jar ring
Approximately 24-inches of ribbon
Craft Glue
Steps
Add a dollop of glue on the end of the ribbon and glue to the inside of the ring. When dry start wrapping covering the ring. When covered add a dollop of glue and let dry. Tie on a ribbon or for a rustic look…twine! 🙂
Seven – Farmhouse pine cone
Supplies
1 pine cone
Burlap ribbon or regular ribbon
Twine
Craft Glue
Steps
Make a simple tie with the ribbon. Run the burlap through the tie and glue on top of the pine cone. If you have 5 hands you can tie everything on top of the pine cone…Lol!
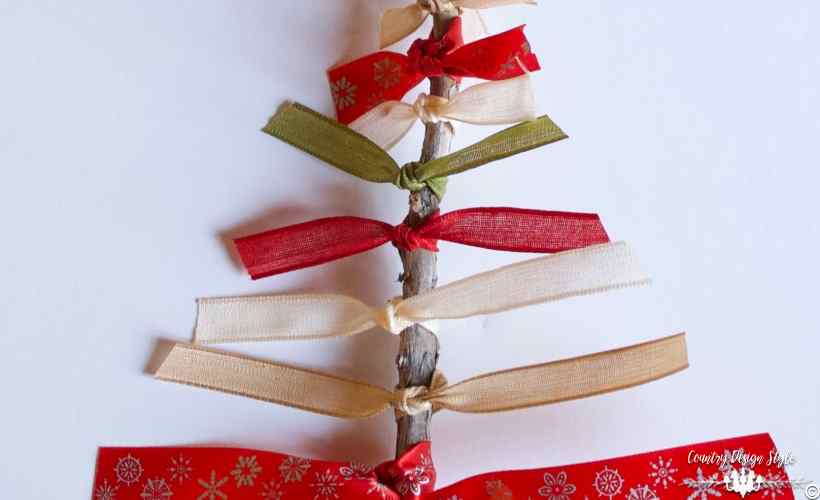
Eight – Ribbon Tree
I had trouble explaining this knot during the live workshop so I added a link below to help.
Supplies
8 to 10-inch stick
Small pieces of different ribbons.
Steps
Start at the small end of the stick. Cut about 4 inches of ribbon and make a square knot. The square knot makes the ribbon stand out from the stick. Continue adding different ribbons each about 1 to 2-inches longer than the last piece. Space the ribbons about 3/4-inch. To finish the tree trim and ribbons for a tree shape.
Nine – Sled
Supplies
Handful of craft sticks
Craft Glue
Craft Paint
Loop of ribbon
Steps
Lay three crafts sticks on your worktable with middle about 1/2-inch higher. Break two pieces of craft stick about 1-inch long. You can use wire cutters or tin snips, but I simply broke off pieces the size I wanted. Glue the two pieces across the three along the top and bottom. When dry, glue additional craft stick along the “bottom” edge to resemble the sled blades. I added two more stick along the inside to stick out the back of the sled. Then glue a small piece approximately 1 1/2-inches across the blade in front. Add a loop of ribbon to hang.
I would like to thank everyone who attended the workshop. It was fun! The schedule for the next 3 months of workshops will be out after the new year. I welcome any ideas for workshops too! Do you have a project you would like to make or a technique you would like to learn?? Let me know in comments below.
Join the newsletter

Subscribe to get our DIY HelpLetter each Thursday. Plus grab your Interior Decorating Ideas e-book.