
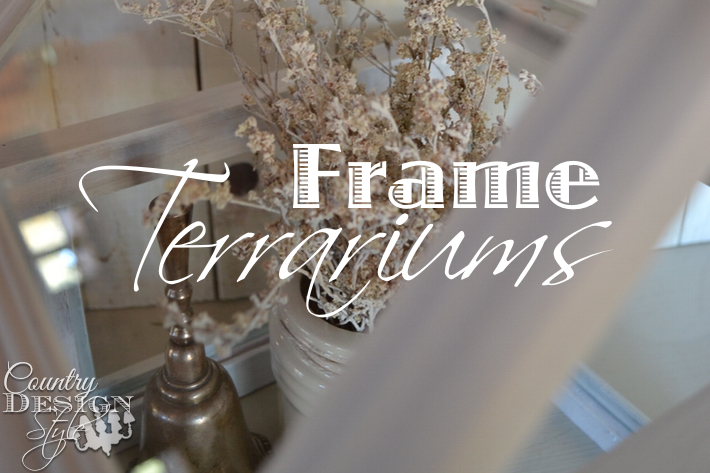
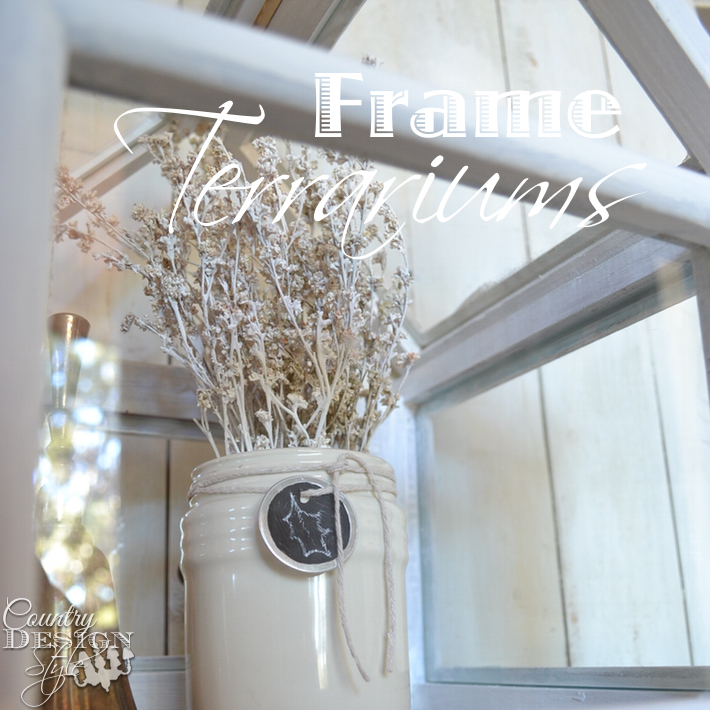
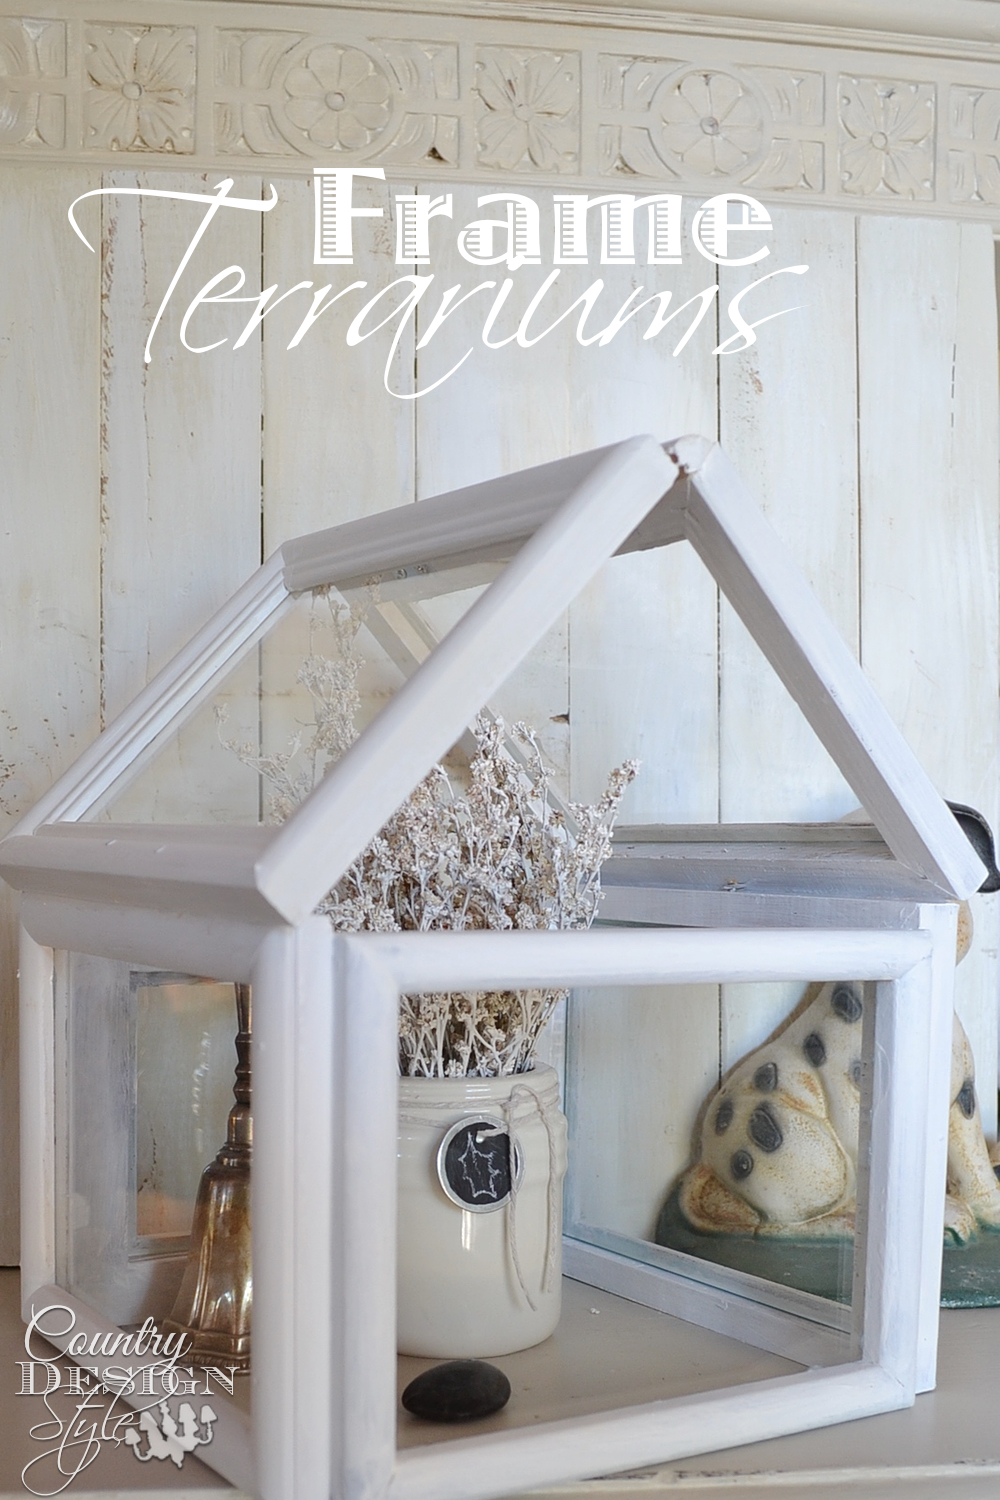
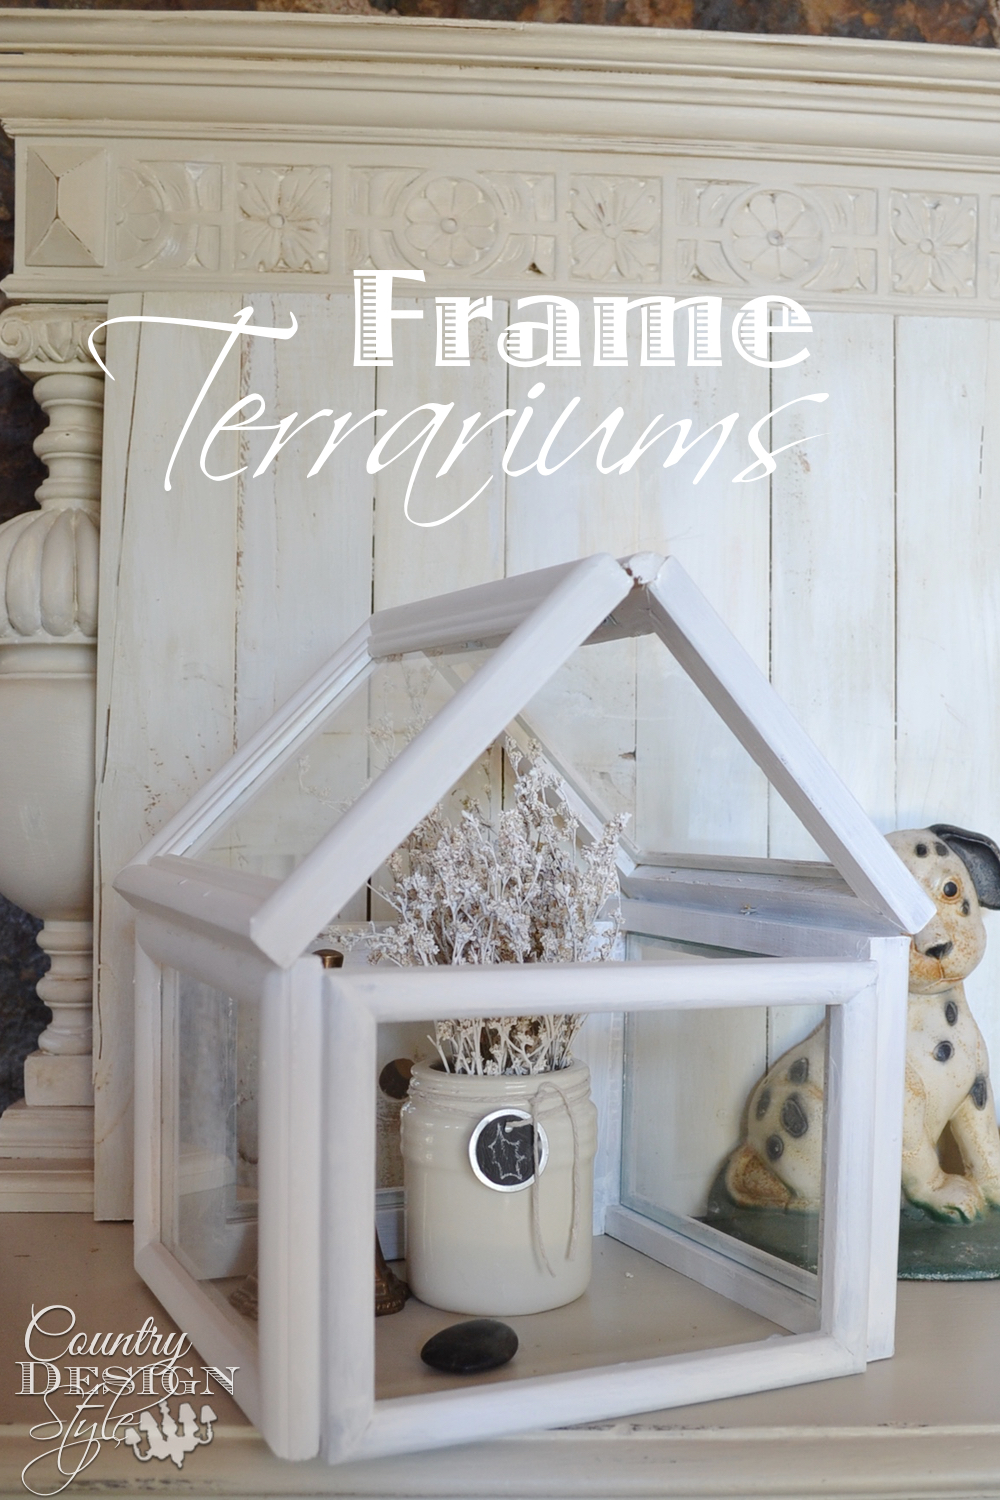
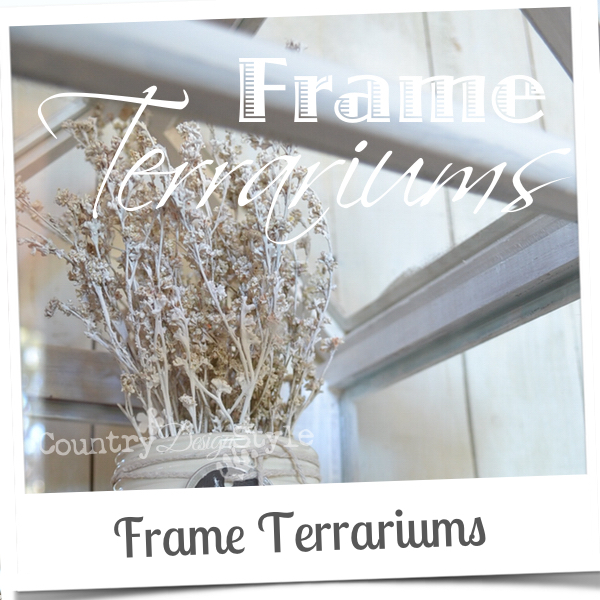
Frame Terrariums
There is something stunning about glass houses. Remember the glass lake house in the movie, “The Lake House?”
I couldn’t live in one. I get messy DIY’ng!
Making a small one for a table…
I can do!
Using it for a terrarium…
I would need Mike’s green thumb.
Frame Terrariums
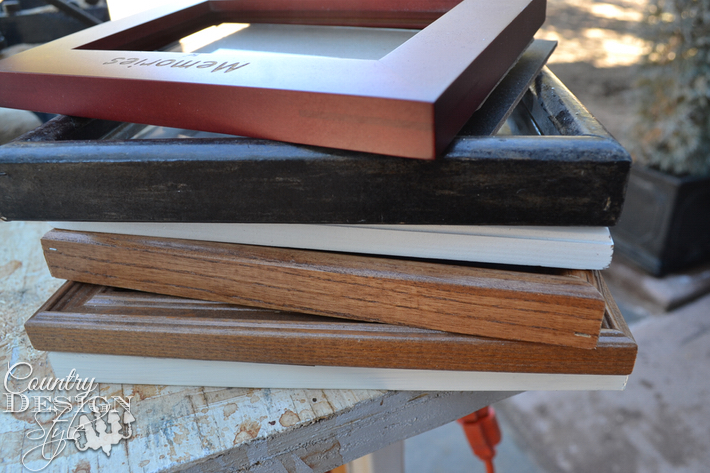
Here’s the list of supplies and tools:
- Six 5 by 7 frames {I purchased mine at our thrift store for under $5}
- Tube of clear silicone
- Wood glue
- Drill with small drill bit {1/16″}to pre~drill holes for nails}
- Small nails {I used some 1 1/4 inch and some 1-inch nails}
- Hammer
- Pliers
- Paint and paint brush
- Two small hinges or “L” brackets
- Glass cleaner
The Steps
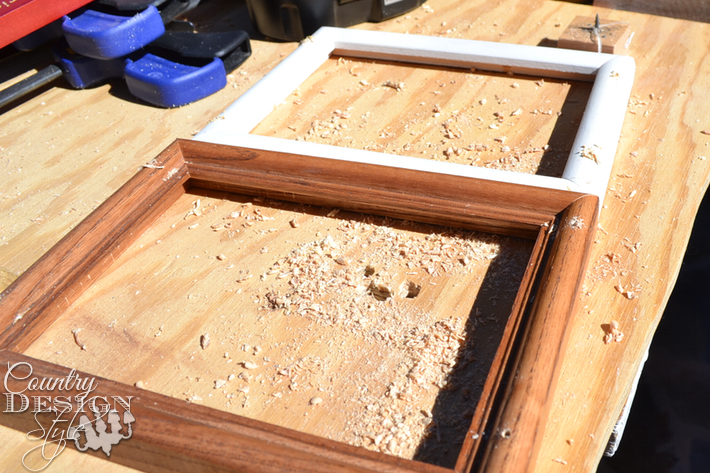
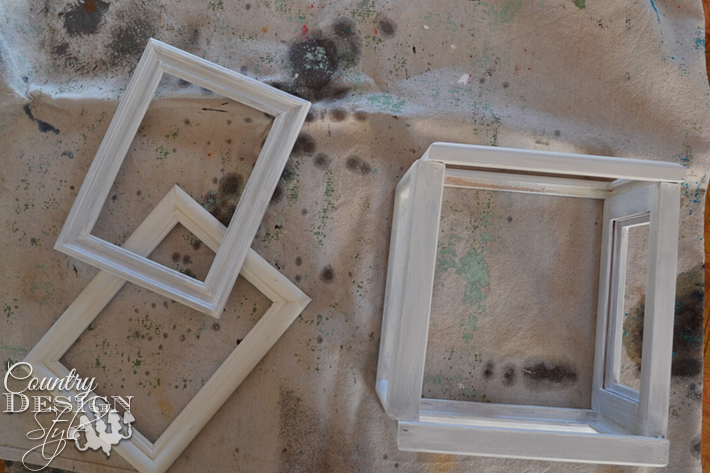
Step 1: Remove glass and set aside. Remove all staples and hangers from the frames.
Step 2: Even though the frames are all 5 by 7 the outside sizes may differ slightly. Match frames by size as much as possible. I set the two largest frames aside for the roof.
Also, decide if you want a tall frame terrarium or shorter and wider. Mine is shorter.
Step 3: Pre~drill holes along the sides of two frames. Make sure to not drill through the area the glass fits. Since I wanted a shorter terrarium, so I drilled along the 5-inch side of the frame.
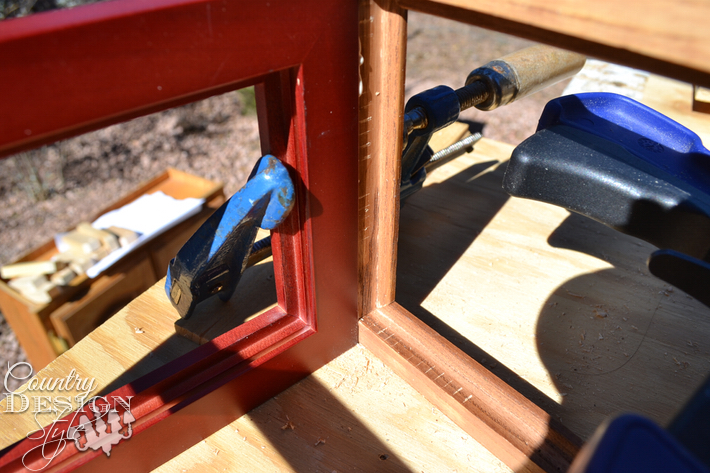
Step 4: Add wood glue and clamps to make a square. IMPORTANT, adjust the frames so the groove where the glass sits will be accessible. The first one I ever make, I had to cut the glass along one edge to wedge it in place.
Not fun!
Tap in nails. Let dry.
Step 5: Paint the frames inside and out. I can’t wait until chalky type paints come in spray cans!!!!
Spraying would be easier.
Remember to paint the two frames set aside for the roof. Let dry.
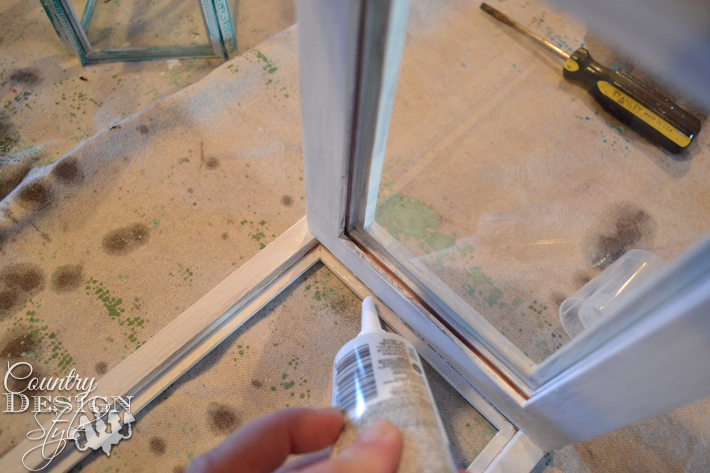
Step 6: Clean the glass. Apply a small bead of clear silicone along the edge where the glass sits. Replace glass. Let each side dry as you continue adding the glass.
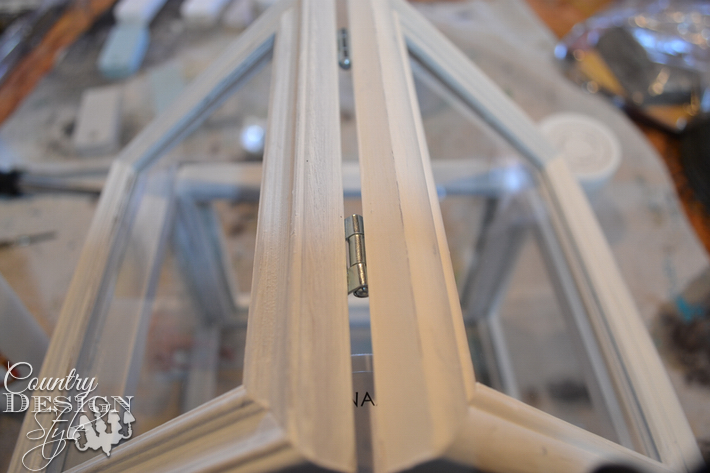
Step 7: Add a small hinge or “L” bracket between the 7-inch sides. I like using the hinge even though the roof will be nailed in place. If you wanted the terrarium to open, triangle pieces need to be cut to hold the frames. Note: I’m designing another larger frame terrarium with more details and spindles. I’ll show the triangle step then.
Step 8: Add the glass to the roof frames using the clear silicone. Let dry.
Step 9: Pre~drill a small hole to nail the roof onto your glass house. Tap in a nail to hold. Tip. Check along the edge for the direction to pre~drill to make sure to avoid glass.
So far, I’ve never had luck when my drill goes through the glass! 🙁
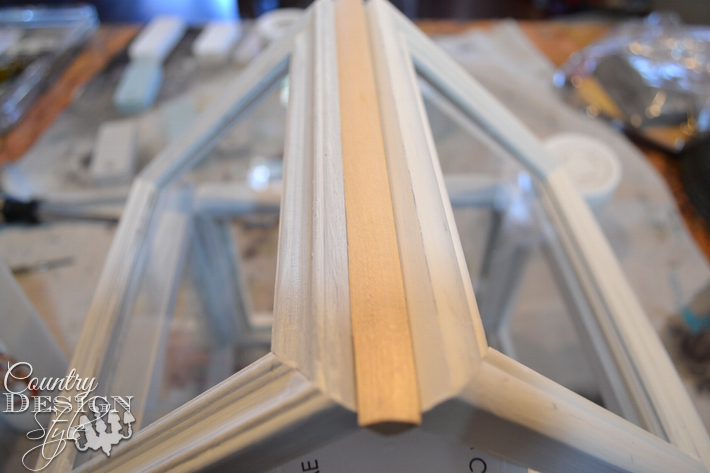
Step 10: Notice in the previous photo you can see the hinges. I could simply paint over them and be fine, but I added a small piece of quarter round trim. I just used wood glue to hold it in place. Then painted it…
forgetting to paint it on the inside! I didn’t notice the wood trim from the inside until I added this photo to the post.
Oh well, I’ll get it painted later.

You notice the title of this post is Frame Terrariums. Plural. This little one I made for my previous website, Homa Style. I used those metal hinged frames. Clear Silicone is the glue.
When I was young we had family photos in metal hinged frames on top of the TV. I would get them down and make little houses with them. Stacking them one way then another.
I’m still playing with frames!
This project took just over an hour hands on time {not including drying time} and $7 including a new tube of clear silicone. Think you would make one?
Click here for if you need more thrift store frame projects!!!
Click here to see more photos of the Lake House from the movie on Hooked on Houses.
Warning the website is addicting! 🙂
Linked up at Something to talk about
Join the newsletter

Subscribe to get our DIY HelpLetter each Thursday. Plus grab your Interior Decorating Ideas e-book.

Jeanette, this frame terrarium is so darling. I can’t believe you made it from frames. Thank you again so much for sharing and linking up to our Something to Talk About Link Party and I hope you join us again tomorrow morning. hugs, Lisa at Concord Cottage
Thank you Lisa! I’ll stop by and link up again. Jeanette
Love this idea!!! Even a small one would be so cute like a cloche topper for a cheese plate or a candle. Hobby Lobby and Michaels sell spray can chalk paint but it’s pricey. I love your ideas.
hey, there is a chalky paint in a spray can…
love the idea.
Oh my gosh! I must Google it! We live in a small town and I’ve just not seen chalky paint in spray. Do you know who is selling it? Have you tried it? I think you just changed my life!!! Thanks, ~Jeanette
So cute and you made it look so easy.
Stacey, they are easy. Plus each one turns out different! Thanks for stopping by! Jeanette
Oh my goodness how clever clever this idea is — I really was surprise – nicely done — I enjoy your ideas..
Hugs
Thank you Kristeen! These are so fun to make and very easy! Glad you like my sometimes unusual ideas!!! Thanks for visiting. Jeanette
So clever! I have tons of glassless frames. Would even work that way, too! Thanks
Kathi, it would work great with glassless frames. Plus less dusting!!! 🙂 Jeanette
Adorable- and guess what? A week late! I to 2 boxes of frames to the thrift store last Friday to donate! URRRGGGGG. I couldn’t think of a thing to do with all of them! You can’t keep everything- or can you?! As always Jeanette, you inspire me!
Oh Laura, run back and rebuy them! I did that a couple of months ago with candle holders. I donated them and a couple of days later I thought of a great idea and went back and rebought them. Mike is wondering how I keep everything!! :/ Jeanette