
DIY Wood Signs
I think that I counted 18 pictures in this tutorial post!
It looks complicated, but I promise if you follow the steps and pictures anyone can make these DIY wood signs. I used a piece of broken pallet wood. Each sign was made in under 20 minutes of hands-on time.
I shared one a few weeks ago made on live on video. This one has step-by-step instructions.
DIY Wood Signs
Disclosure: This post contains affiliate links, which means that if you click on one of the product links, I’ll receive a small portion of any sales at no additional cost to you. I only share products I like, used and have ordered, OR products I want.
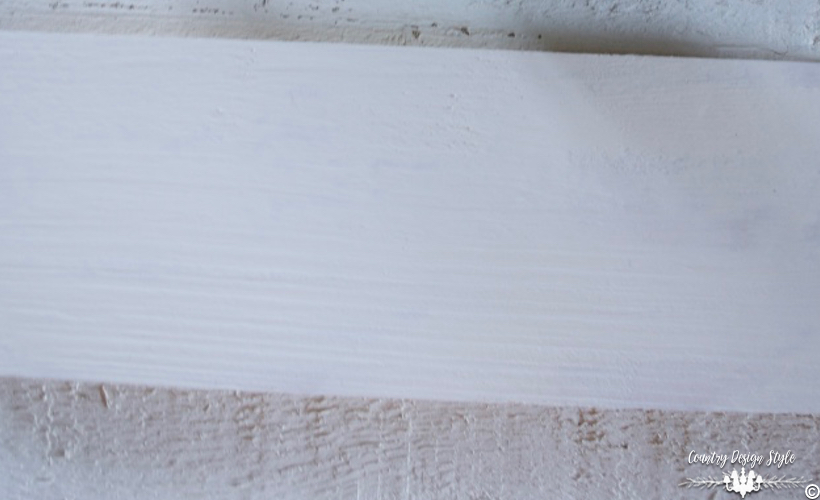
This starts with a piece of pallet wood. The board was broken, but I managed to retrieve 10-inches of straight wood 3 1/2 inches wide. I painted it creamy white.
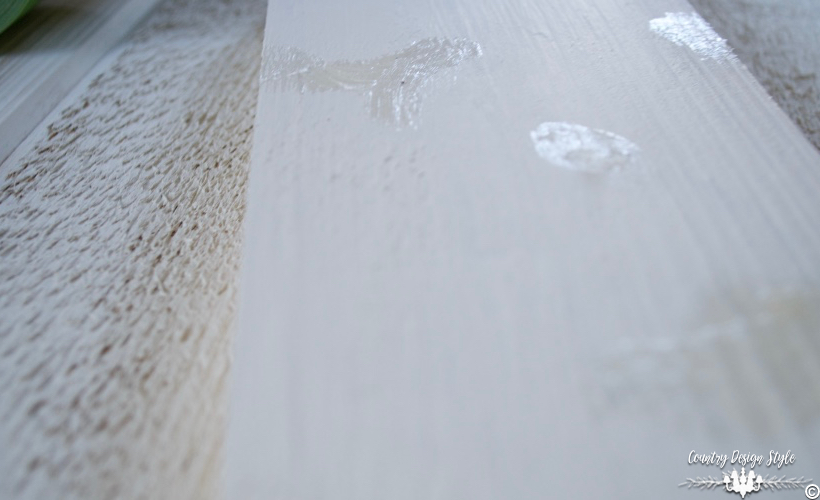
Then I smeared small dollops of petroleum jelly on the dried paint.
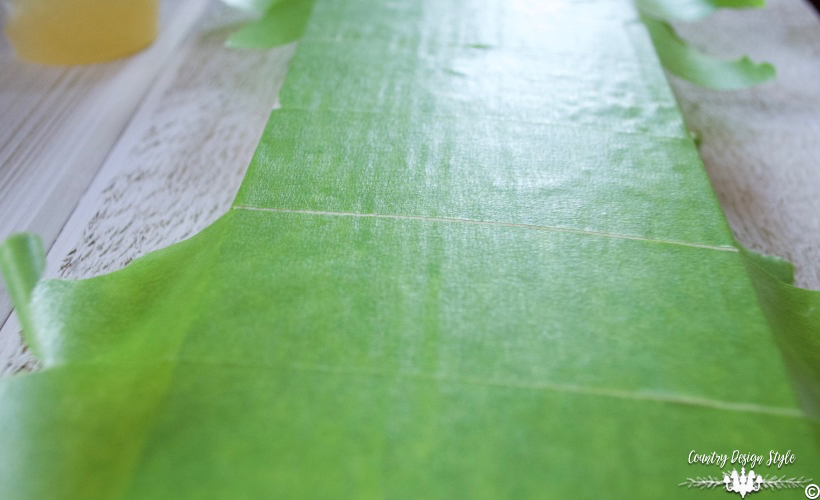
Then covered the top with 2″ painters tape. Start straight on one end and move across the board. Each piece of tape lays next to the other.

Then remove every other piece of tape. This is an easy way to make stripes without measuring.
Gray Stripes
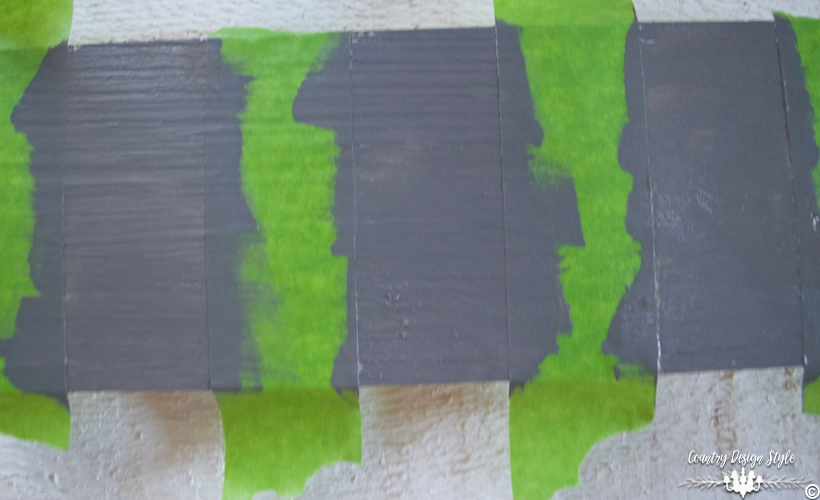
Now I painted the stripes.
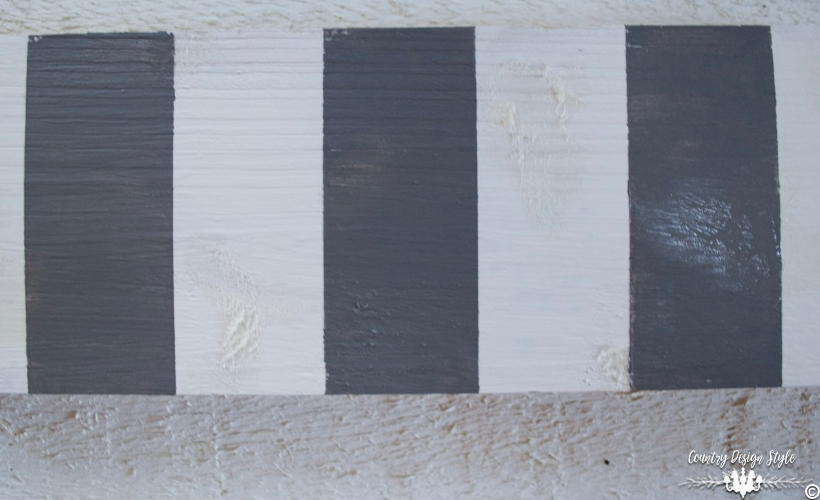
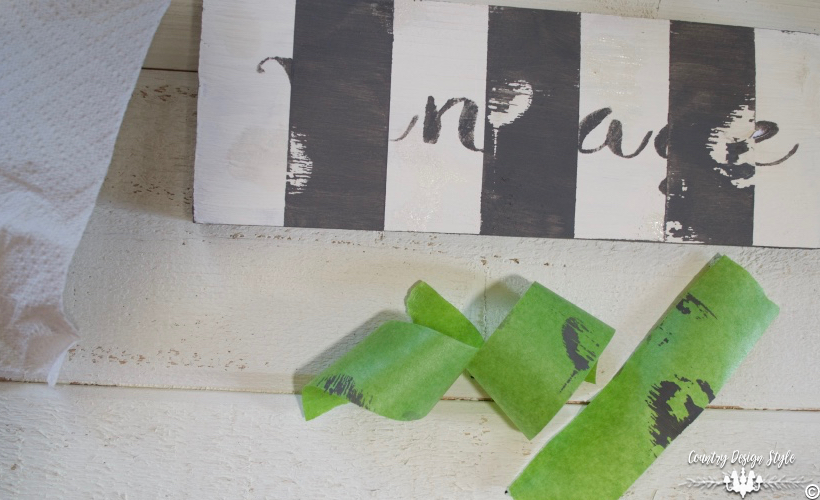
Before the paint dries, I remove the tape.
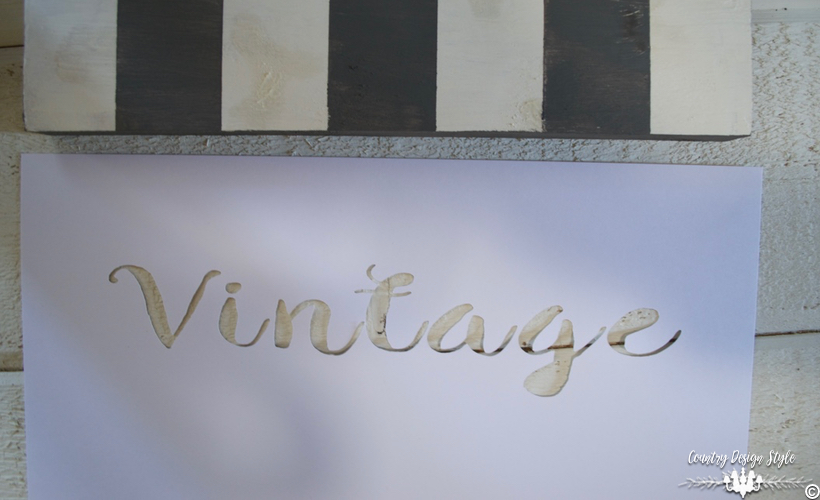
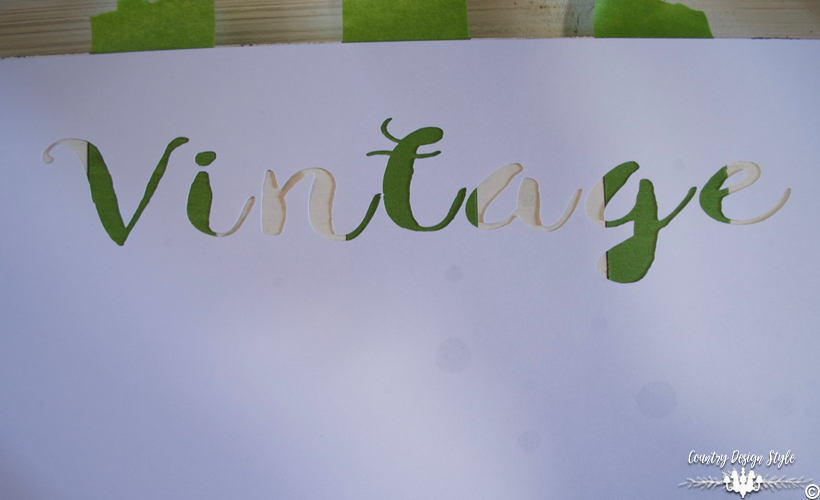
While the gray paint dries, I made a stencil using a piece of card stock and the silhouette cameo. I love that machine!!! It works just like your printer except instead of using ink, it uses a small blade. Note: card stock is not great for stencils! I use it when I’m making a “one time use” stencil. Otherwise, I use this 12 by 12 stencil sheets or this for larger stencils. The silhouette contains all the fonts and any new fonts you might have downloaded. If you don’t have a silhouette, I’ve added stencils you can order through Amazon at the bottom of the post.
Gray Lettering
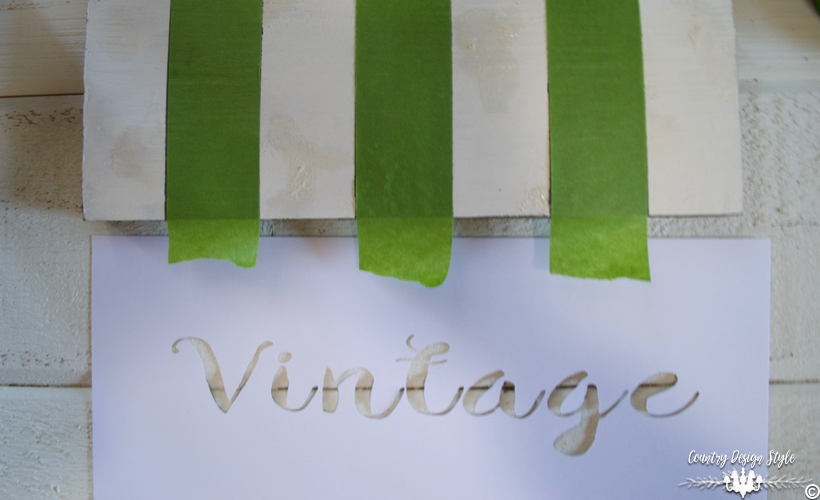
Now that the gray paint is dry, covered it up with more painters tape.
I used this spray adhesive because it’s temporary IF you wait a few minutes before applying to the surface. It’s permanent when applied just after spraying.
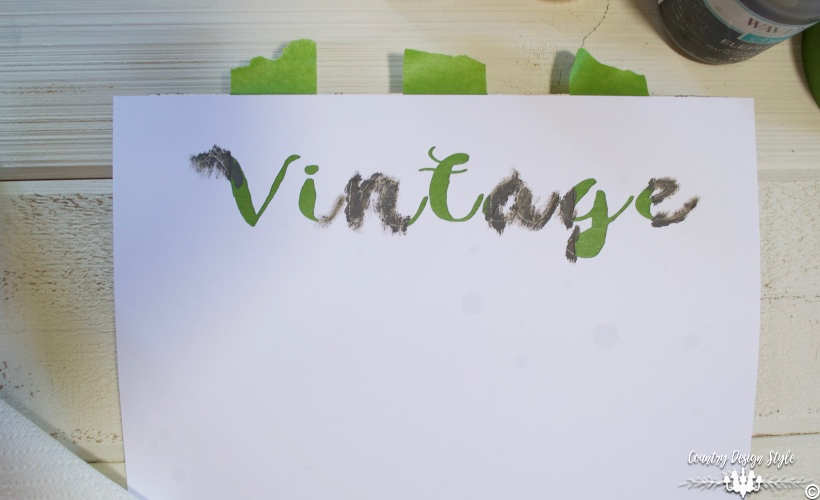
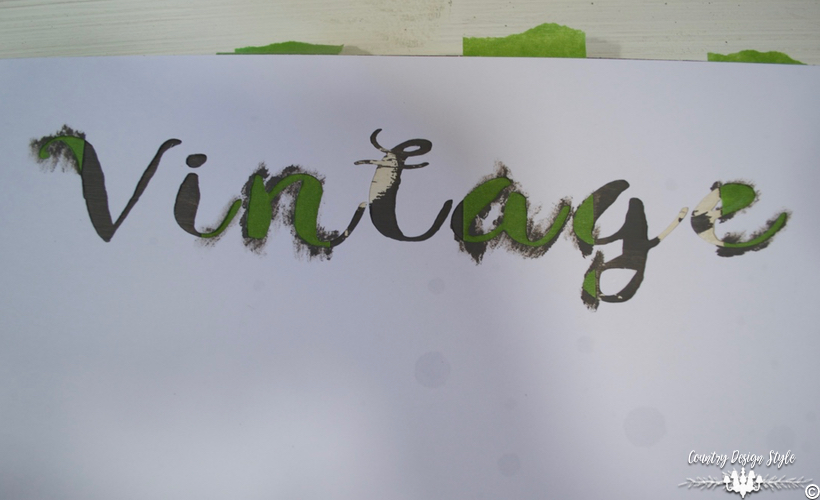
Now, paint the white areas showing through the stencil with the gray paint. I like these stencil brushes.
Then remove the stencil and the painter tape. This is not an oops! Where the petroleum jelly was the paint didn’t stick to the board, but does stick to the tape. So, just keep going and ignore those “destressing” areas.
Cream Lettering
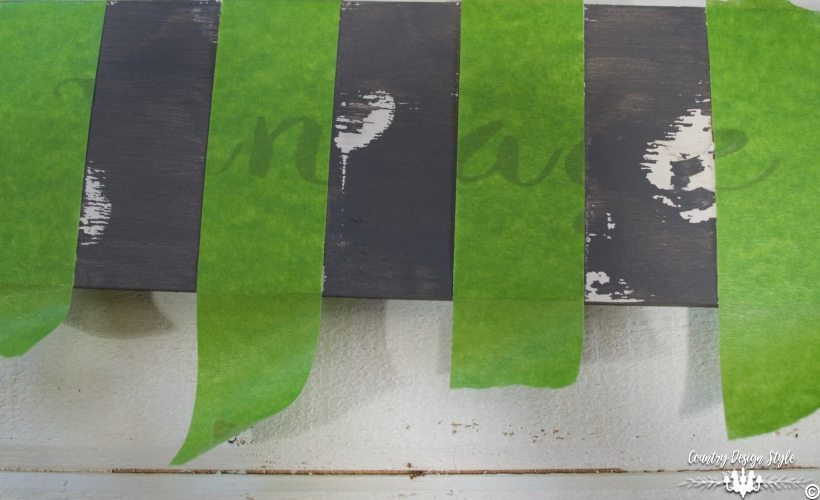
Are you tired of painter tape yet?? Good, because we need to add more covering the cream stripes. You can see the gray partial letters through the tape. That’s handy because…
it helps when reapplying the stencil again. We shouldn’t need any more spray adhesive. Just position right where the stencil was before.
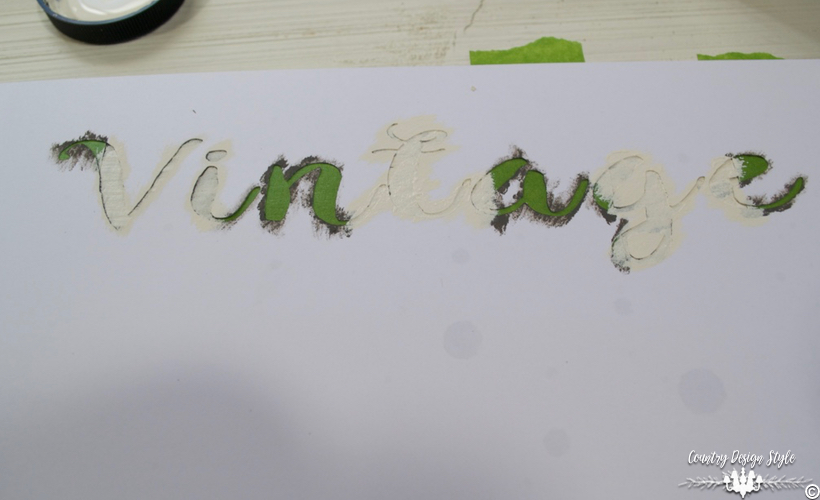
Now, just paint the cream paint in the areas that show gray.
And…

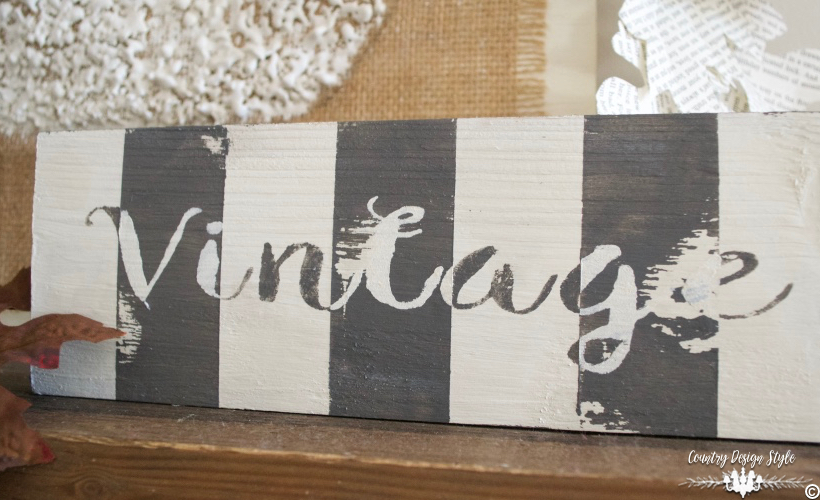
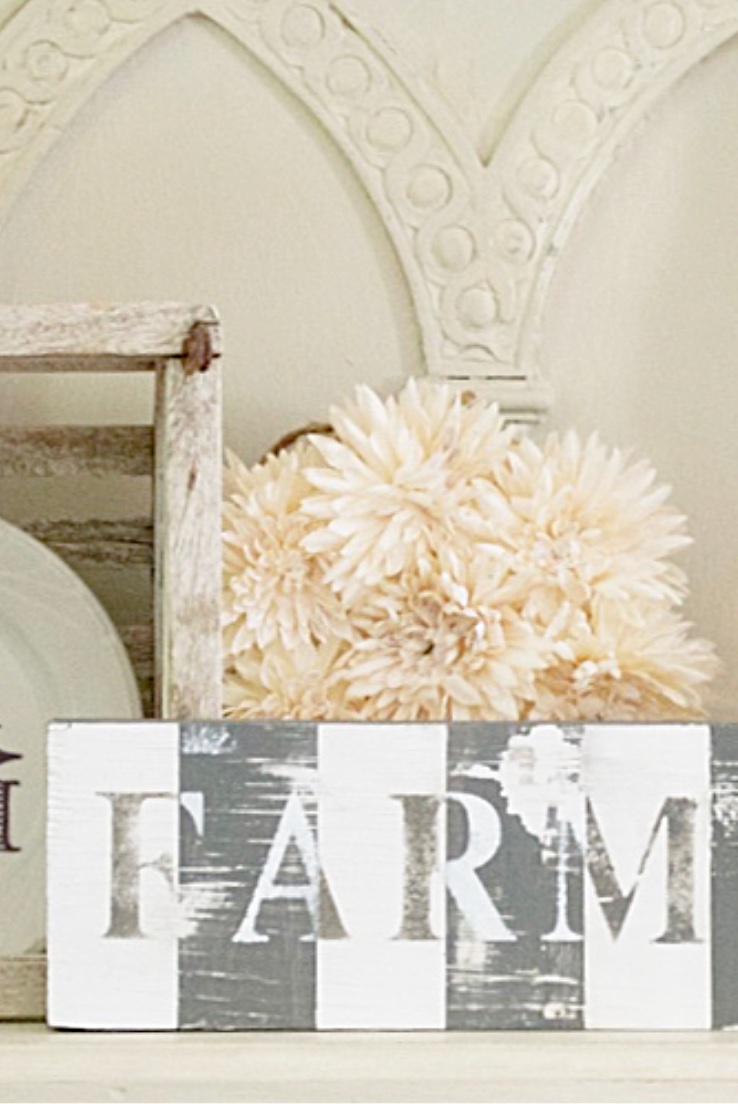
Voile! DIY wood signs with stripes and striped lettering.

Here’s a link to the first DIY wood sign I made and a video showing the steps.
Because some people do better reading and others watching. 🙂

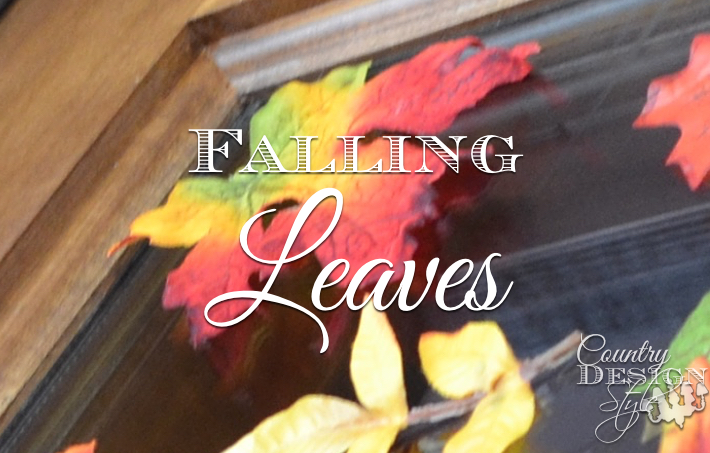
In the final photo, you can see two other projects. Rusty Leaves and Melted crayon pumpkin.
Join the newsletter

Subscribe to get our DIY HelpLetter each Thursday. Plus grab your Interior Decorating Ideas e-book.


You do a very nice job of explaining the steps, bit by bit, from the painting of the stripes to reapplying the stencil. Your additional projects look interesting as well.
Hi Jeanette… I would never of thought of the petroleum jelly to make that rustic effect. I’ll show my wife later today and I’m sure I’ll be sent to the hardward store to pick up all the supplies to make several of these projects for fall. 😉 A great project and love the look. Thanks for sharing and will be checking out the rest of your site over the next few hours. 🙂
Hello Ed, Thank you for reading and checking our my posts. I enjoy sharing and helping others with their DIY projects, even if I have to through the web! I’ll pop over to your website too! I LOVE woodworking.
Stinkin Cute Sign. Very Good step by step instructions. Luv Ya Dawn
Hi, Dawn! Thank for stopping by! Hugs! 🙂
I love this…..I recently had another birthday…and this sign tells it all…lol! I love this sign. Beautiful job!
Happy Birthday, Linda! I’m feeling a bit vintage too! 😀
This is a great step by step. Thanks! I NEVER post anything remotely negative. However, I must tell you that the ads at the bottom of the page are infuriating to me. It is distracting to say the least. I know not everyone feels this way and you have to earn a living, but at least fix it so the damn things can be “closed”! When they stay on the page it is so, so annoying to me that I don’t even want to read the post. I love you and your blog but those ads have to go. At least give us an option! Thanks for listening.
Thank you, Linda, for your sweet complaint! I have to agree. I didn’t realize some ads don’t have a close button. I stopped trying to close them because with my old hands, I missed a couple of times and ad companies ping you if you click your own ads. I joined a new ad company 38 days ago. The new ad company asked me to test a “Partner Program” with them for 30 days. So, for the next 30 days, you and I will see many different types, sizes, and placements of ads. I freaked 38 days ago when I saw the ads on my photos that I work so hard at taking, editing and trying to convey the project. Then braced for the complaints. I got one last week about ALL the ads {she seemed negative about many things} so I disregarded that one. Your comment is not negative, but helpful. When talking to the ad company on Tuesday I conveyed three things. One, the type of ads, placement, and how they work have to work for my readers, {formost} me and the ad company. Otherwise, no one wins. Two, if the ads on photos work for readers I can make simple adjustments to my photo skills and make sure the bottom of photos are not crucial to the project. Three, I will listen to positive constructive suggestions from readers. Like the bottom ads need to have a close button! So, bare with me during the next 30 days of ad testing. Thank you, Linda, for your help and friendship. <3
Cool technique! I keep thinking I need to buy a silhouette machine. I just have to figure out where I’ll put it! 🙂
Thank you, Cecilia. I have to admit, my silhouette sat in the middle of our dining room for the first few weeks. I volunteered to signs for our Humane Society’s thrift store. Those signs that say, Ladies Shoes, Kitchenware, Restroom, etc. I made over 50 signs using wood and stencils cut with the silhouette. It was a great motivator to buy the silhouette and thankfully was easy to learn. Now it’s in a cabinet upstairs and my laptop is downstairs. 😕